


About
Who says tea drinkers are boring?
A great way to keep your teas fresh and tasty, while showing off your personal taste!
-
 Scarlet Draven favorited Funki Fied Tea Tin!
02 Jan 18:18
Scarlet Draven favorited Funki Fied Tea Tin!
02 Jan 18:18
-
 Step 1
Measure the height of the tin from the bottom of the lid. You want to make sure the lid will still fit after you are finished decorating, after all!
Indicate the lid position using a fine-point permanent marker (unless your tin has an existing guide).
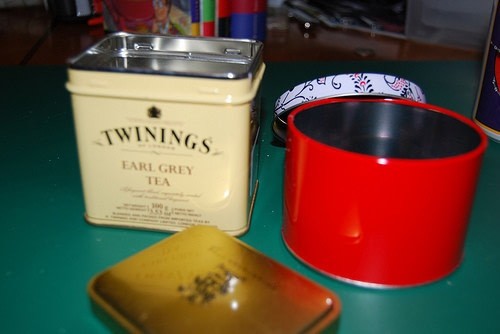
I found some great tins on clearance at a local craft store, which is what gave me the idea. You can also re-use Twinings tins or other airtight canisters.
-
 Step 2
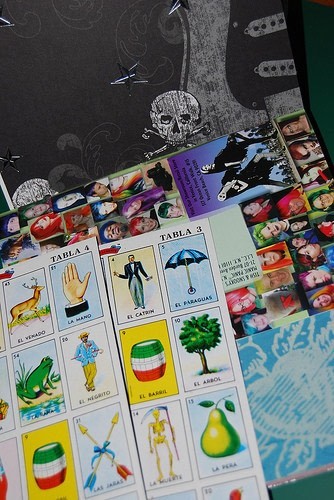
Gather your decorative papers. You can use scrapbooking papers, Loteria tablas (as I did), junk mail, catalogs or just about anything flexible enough to glue to a tin!
Trim your papers to fit within the measurements you took.
-
 Step 3
Spread glue** evenly over the surface to be covered. DO NOT spread glue over the lid-line. If you are using an industrial glue, you will need to work quickly and in a ventilated space (you twisted little glue-sniffer).
**Choose a glue to match your materials. For metal tins, use an industrial glue like E6000 or Liquid Nails. If you have a foil-lined paper canister (like a cocoa container), you can use a tacky white glue or my new personal fave, YES! paste.
-
 Step 4
Apply your pretty papers and let your glue dry.
-
 Step 5
Don't forget to decorate your lid!
-
 Step 6
TIP: I chose to sand off the existing finish and paint the sides of my lid in a color that I matched to one of my papers. You could also use spray paint, tiny scraps of paper or a thin paper that would easily wrap from the top to the sides.
-
 Step 7
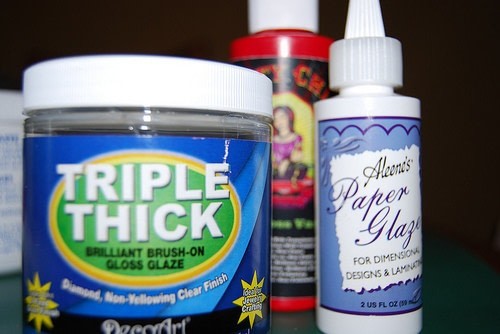
VARNISH it baby! You want to protect your work, don't ya?
There are a plethora of varnishes from which to choose, so pick your favorite whether it be gloss, satin or matte.
Wipe off any varnish that creeps up over the lid-line. Ensure that the varnish is not just dry, but allow plenty of time for it to cure before using.
-
 Step 8
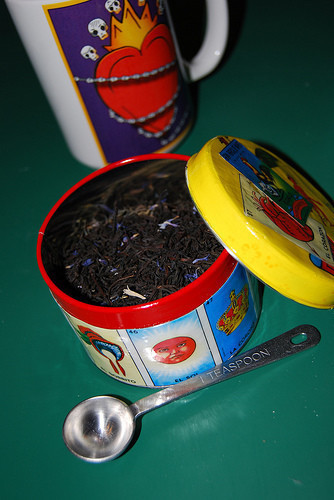
Now go rock your Earl Grey, baby!


Comments


