


About
fruit loops, necklace
I was thinking, what would be a cute idea for a necklace? Fruit Loops! lol
Okay, so this is fairly simple.
-
 Rainbow Wyvern favorited Fruit Loops Necklace
26 Mar 20:34
Rainbow Wyvern favorited Fruit Loops Necklace
26 Mar 20:34
-
 Scarebear entered her project Fruit Loops Necklace to Crunchy Granola Charm Contest
14 Mar 23:13
Scarebear entered her project Fruit Loops Necklace to Crunchy Granola Charm Contest
14 Mar 23:13
You Will Need
-
 Step 1
Get all your supplies ready! The paints I bought were purple, pink, yellow, orange and green. Also find a nail, it'll come in handy! Start working the clay so it's soft.
-
 Step 2
When the clay is soft, roll it in to a ball.
-
 Step 3
Flatten up the ball to a
and shape it into a wheel shape.
-
 Step 4
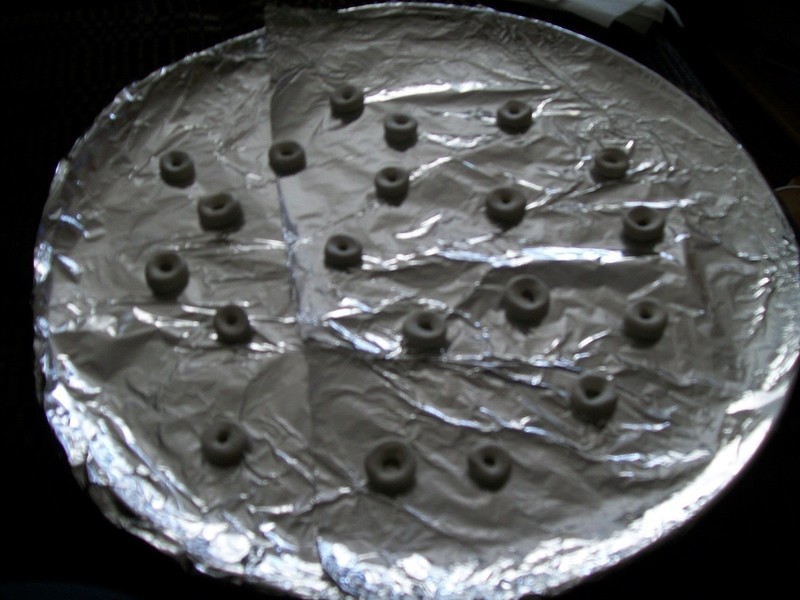
Get a nail and poke the middle of the wheel of clay. Work it around until it's in the shape of a inter-tube. Smooth it's flat so there's not many bumps.
-
 Step 5
You'll want to preheat the oven to 275, because you want to bake it for 15-20 minutes; or be safe and make sure that's what the clay you bought says.
-
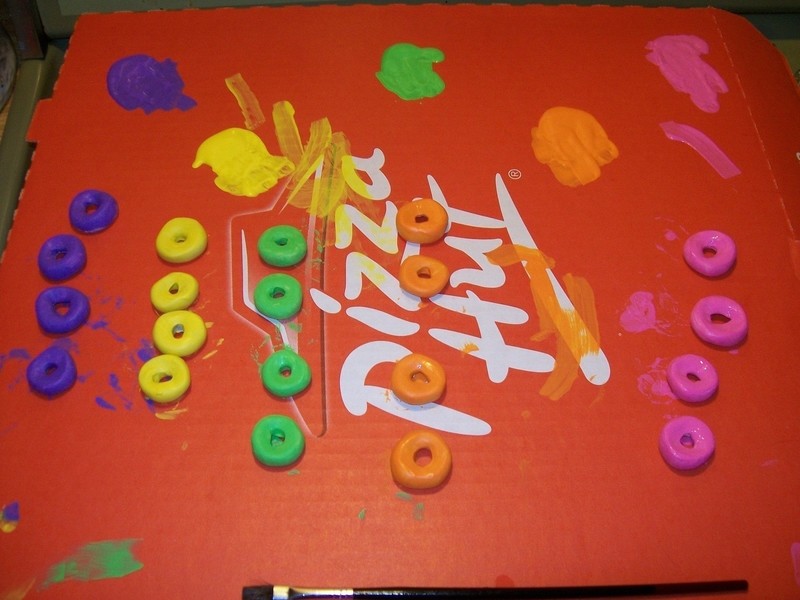
 Step 6
Now I use any old cardboard to paint on. I made 3 necklaces so I painted 4 loops in each color.
-
 Step 7
Now you want to spray a gloss over them. This is a one side at a time task again.
-
 Step 8
You want to paint one side of the loops, let it dry, and then paint the other side. It took me 2 coats for them. I'd suggest laying them on plastic wrap or something like it because they can stick to cardboard and get pieces stuck on them.
-
 Step 9
Now you can use any string you like, I prefer hemp. It's time to tie the loops onto the string. Once that's done, just knot the ends together and you have yummy neckwear! ...please don't eat it though!


Comments


