


About
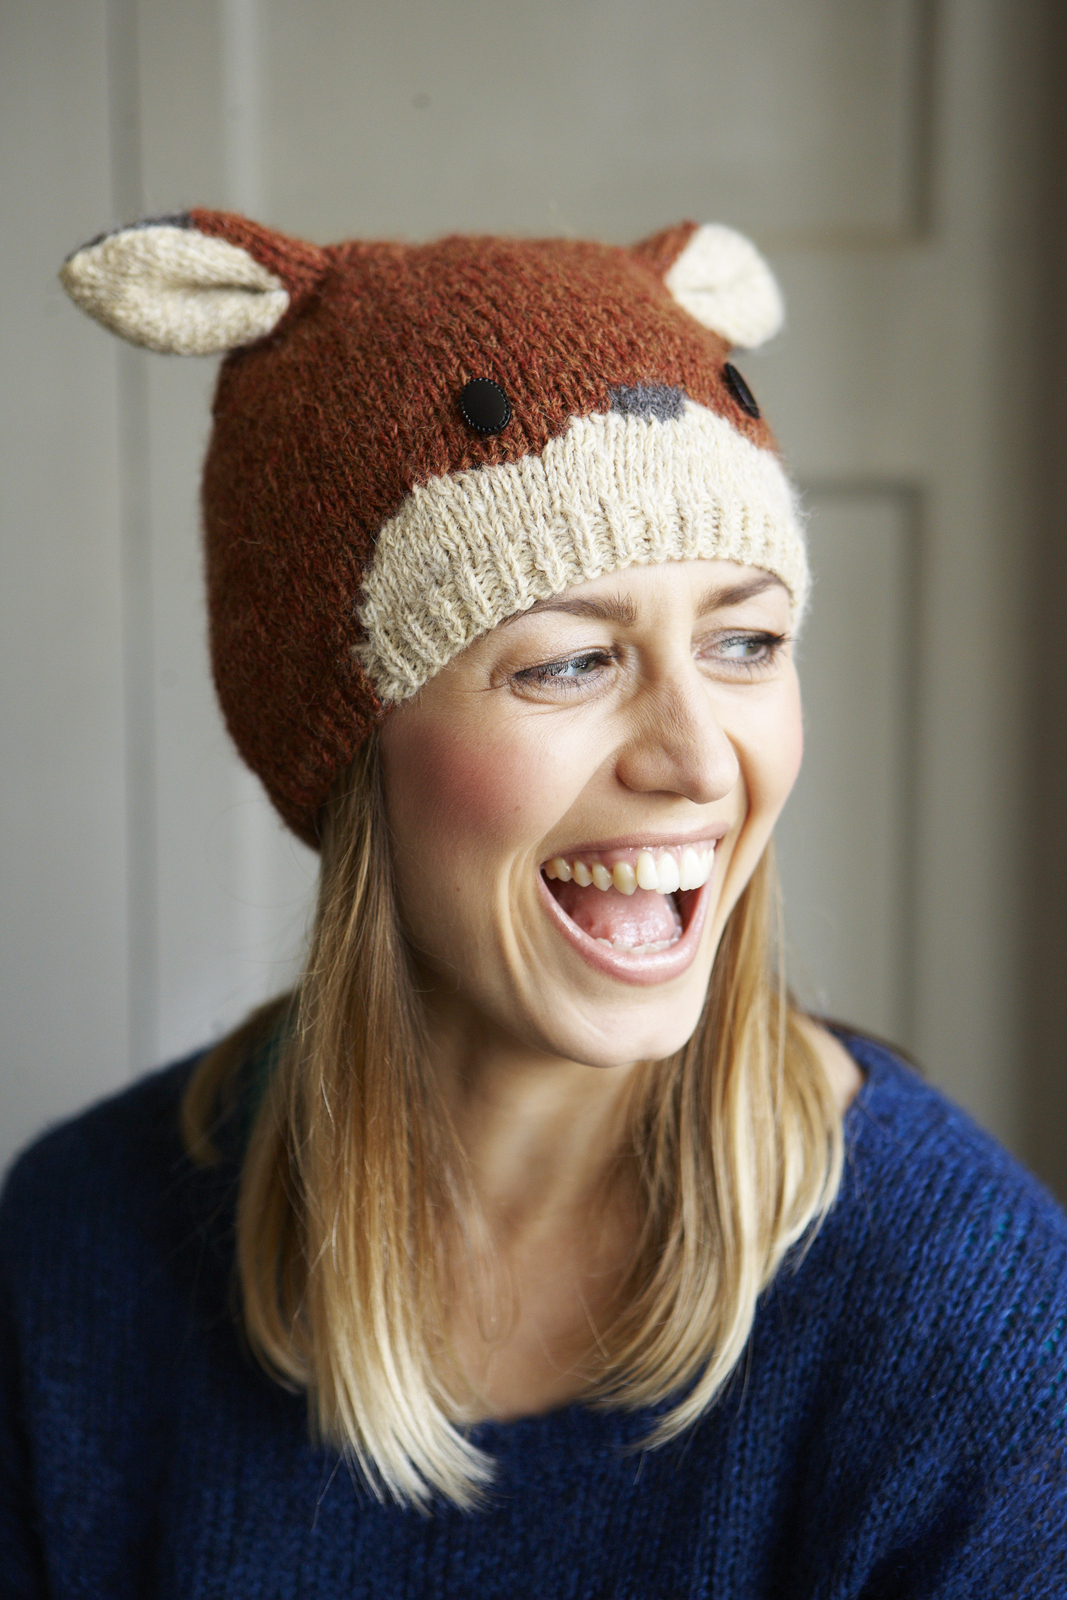
Animal Hats
You don’t have to be quick as a fox at knitting to run up this beanie speedily. As it’s quick and easy to make, it’s a great project for beginners who are new to the intarsia technique.
Size: Adult (one size)
Tension:
20 sts and 26 rows to 10cm/4in
square over stocking stitch using
5.5mm (US 9) needles.
Tags
© 2024 Rachel Henderson / Kyle Books · Reproduced with permission. · Animal Hats by Rachel Henderson. Published by Kyle Books, priced £14.99. Photography: Will Heap
-
 ZombieUnicorn favorited Fox Beanie Hat
14 Jan 22:45
ZombieUnicorn favorited Fox Beanie Hat
14 Jan 22:45
-
 Nina R. favorited Fox Beanie Hat
11 Dec 18:03
Nina R. favorited Fox Beanie Hat
11 Dec 18:03
-
 Pandagirlpolly favorited Fox Beanie Hat
24 Feb 05:40
Pandagirlpolly favorited Fox Beanie Hat
24 Feb 05:40
-
 Екатерина Х. favorited Fox Beanie Hat
02 Feb 16:16
Екатерина Х. favorited Fox Beanie Hat
02 Feb 16:16
-
 Tierra T. favorited Fox Beanie Hat
08 Nov 05:01
Tierra T. favorited Fox Beanie Hat
08 Nov 05:01
-
 Irénke C. favorited Fox Beanie Hat
06 Sep 13:59
Irénke C. favorited Fox Beanie Hat
06 Sep 13:59
-
 rainbowjo86 favorited Fox Beanie Hat
05 Sep 08:19
rainbowjo86 favorited Fox Beanie Hat
05 Sep 08:19
-
 Tabitha F. favorited Fox Beanie Hat
24 Aug 22:44
Tabitha F. favorited Fox Beanie Hat
24 Aug 22:44
-
 Dorothee D. favorited Fox Beanie Hat
28 Apr 17:09
Dorothee D. favorited Fox Beanie Hat
28 Apr 17:09
-
 Sabrina Dee Berry favorited Fox Beanie Hat
11 Apr 07:37
Sabrina Dee Berry favorited Fox Beanie Hat
11 Apr 07:37
-
Step 1
Pattern:
Using 4.5mm (US 7) needles and yarn A, cast on 30 sts. Join yarn B
and cast on 38 sts, then change back to yarn A and cast on 30 sts
(98 sts). The central 38 yarn-B sts, and 1 yarn-A st on either side of
those, are to be worked following the chart, shown on page 53.
Using the intarsia technique (see page 23), follow the chart using
yarns A and B, and working as follows:
Row 1: *k1, p1, rep from * to end.
Row 2: *k1, p1, rep from * to end.
These 2 rows set the 1 x 1 rib.
Continuing to follow the chart, work 4 more rows in 1 x 1 rib,
ending with RS facing for next row.
Change to 5.5mm (US 9) needles.
Starting with a k row (Row 7 on the chart), work in st st using
yarns A, B and C until all 16 rows of the chart have been
completed. (Note that odd-numbered rows should be knitted
and even numbered rows should be purled.)
Break off yarns B and C and, using yarn A, continue in st st until
work measures 15cm/6in, ending with RS facing for next row. -
Step 2
Begin shaping:
Row 1: k7, k2tog, *k6, k2tog, rep from * to last st, k1 (86 sts).
Rows 2–4: Work in st st, starting with a p row.
Row 5: k6, k2tog, *k5, k2tog, rep from * to last st, k1 (74 sts).
Rows 6–8: Work in st st, starting with a p row.
Row 9: k5, k2tog, *k4, k2tog, rep from * to last st, k1 (62 sts).
Row 10 and every alt row: p to end.
Row 11: k4, k2tog, *k3, k2tog, rep from * to last
st, k1 (50 sts).
Row 13: k3, k2tog, *k2, k2tog, rep from * to last
st, k1 (38 sts).
Row 15: k2, k2tog, *k1, k2tog, rep from * to last
st, k1 (26 sts).
Row 17: k1, k2tog to last st, k1 (14 sts).
Break off yarn, thread it through the remaining st
and fasten off securely. -
Step 3
Ears:
Outer ears (make 2):
Using 5.5mm (US 9) needles and yarn A, cast on
15 sts.
Starting with a k row (RS), work 12 rows in st st.
Change to yarn C.
Row 13: k1, s1, k1, psso, k9, k2tog, k1 (13 sts).
Row 14 and every alt row: p to end.
Row 15: k1, s1, k1, psso, k7, k2tog, k1 (11 sts).
Row 17: k1, s1, k1, psso, k5, k2tog, k1 (9 sts).
Row 19: k1, s1, k1, psso, k3, k2tog, k1 (7 sts).
Row 21: k1, s1, k1, psso, k1, k2tog, k1 (5 sts).
Row 23: k1, s1, k2tog, psso, k1 (3 sts).
Row 24: p3tog.
Break off yarn, thread it through the remaining
st and fasten off securely.
Inner ears (make 2):
Using 5.5mm (US 9) needles and yarn B, cast on 13 sts.
Starting with a k row (RS), work 12 rows in st st.
Row 13: k1, s1, k1, psso, k7, k2tog, k1 (11 sts).
Row 14 and every alt row: p to end.
Row 15: k1, s1, k1, psso, k5, k2tog, k1 (9 sts).
Row 17: k1, s1, k1, psso, k3, k2tog, k1 (7 sts).
Row 19: k1, s1, k1, psso, k1, k2tog, k1 (5 sts).
Row 21: k1, s1, k2tog, psso, k1 (3 sts).
Row 22: p3tog.
Break off yarn, thread it through the remaining
st and fasten off securely. -
Step 4
Making up:
Weave in all ends.
Sew the side edges of the hat using mattress
stitch (see page 22). The seam marks the centreback
of the hat.
Sew 1 inner-ear piece to 1 outer-ear piece
(ensuring the RS of each piece faces outwards)
using mattress stitch (see page 22). Repeat with
the remaining ear pieces.
Position the ears to the hat using the pictures to
guide you, then attatch them to the hat.
Position the buttons using the pictures to guide
you, then sew on the buttons to form the eyes.
Comments


