


About
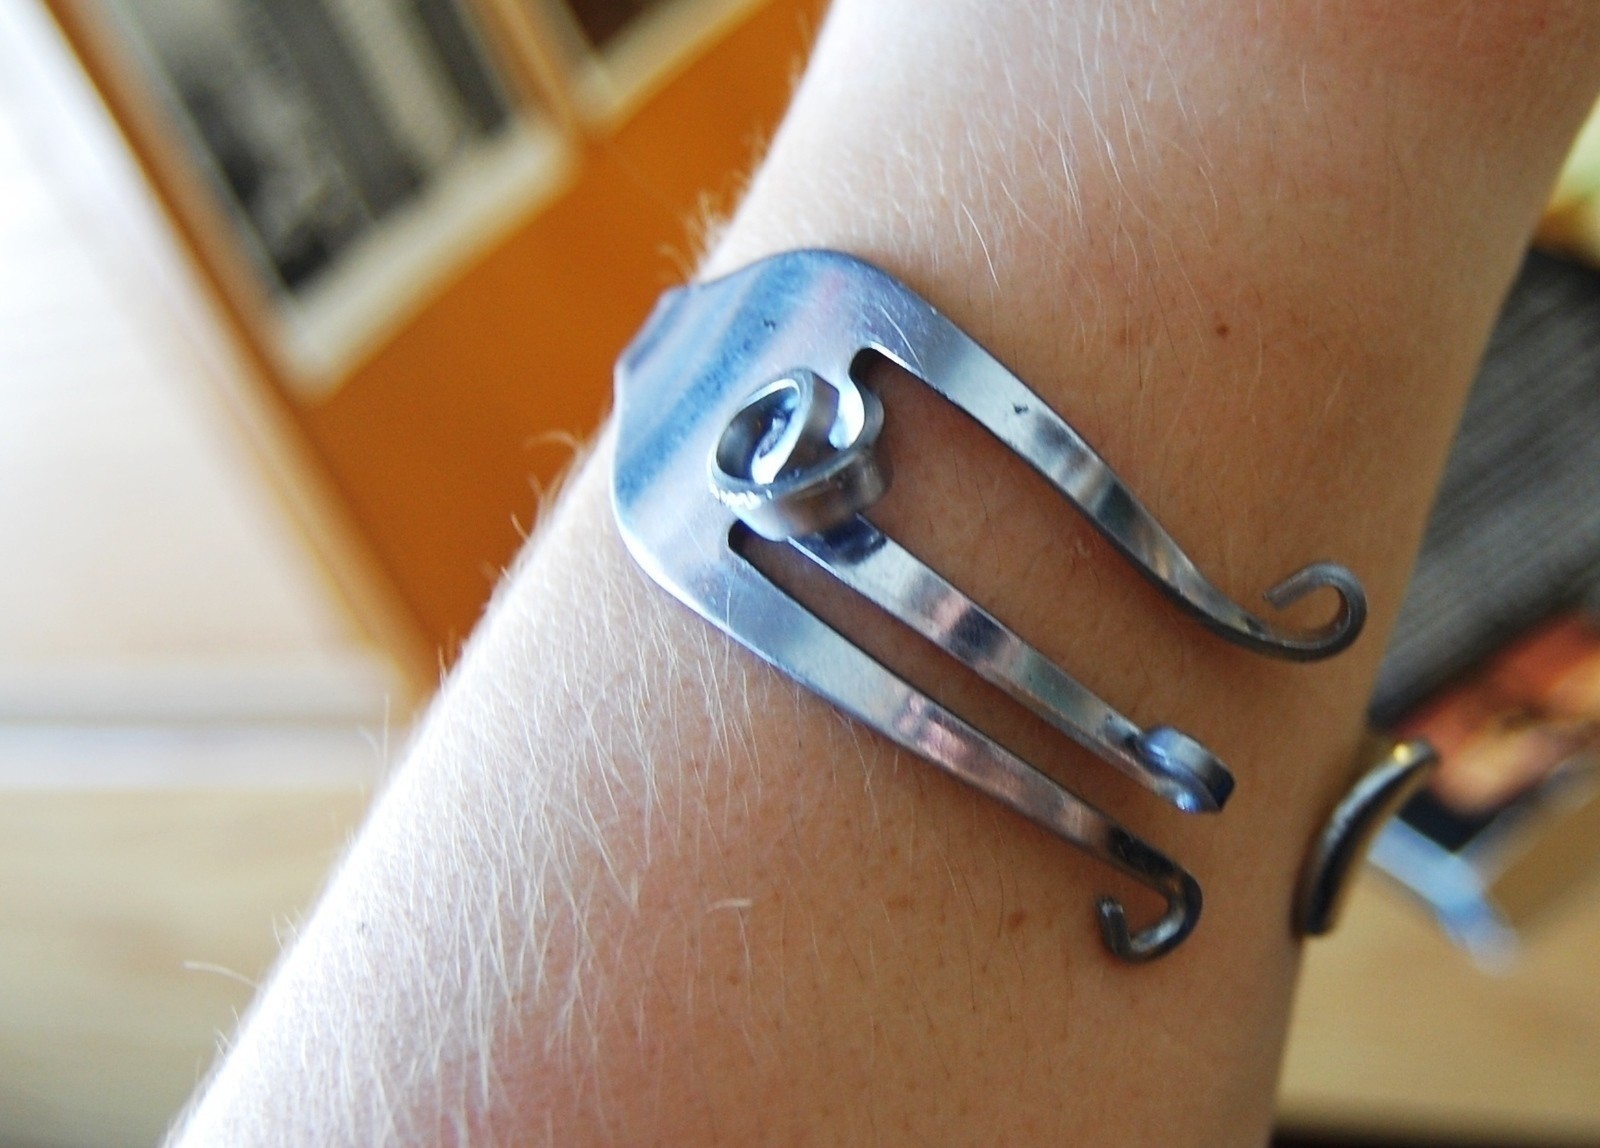
Fork + pliers = bracelet!
Check out my blog for more <a href="http://starsforstreetlights.blogspot.com/"> DIY! </a>
My friend had one of these and I had to try and make it.
-
 Key West Witch favorited Fork Bracelet
12 May 15:40
Key West Witch favorited Fork Bracelet
12 May 15:40
-
 Carla B. favorited Fork Bracelet
24 Jun 02:03
Carla B. favorited Fork Bracelet
24 Jun 02:03
-
Key West Witch added Fork Bracelet to Utensil/Silverware Jewelry, Crafts, Knobs ...
19 Mar 08:31
-
 Agnes Starlén favorited Fork Bracelet
06 Mar 17:46
Agnes Starlén favorited Fork Bracelet
06 Mar 17:46
-
 Cathy M. favorited Fork Bracelet
22 Jan 17:14
Cathy M. favorited Fork Bracelet
22 Jan 17:14
-
 meg B. favorited Fork Bracelet
21 Jul 21:18
meg B. favorited Fork Bracelet
21 Jul 21:18
-
 Lisa M. favorited Fork Bracelet
02 Apr 16:35
Lisa M. favorited Fork Bracelet
02 Apr 16:35
-
Roxy R. favorited Fork Bracelet
15 Jul 00:11
-
 Emma H. favorited Fork Bracelet
29 Mar 12:28
Emma H. favorited Fork Bracelet
29 Mar 12:28
-
 Faith B. added Fork Bracelet to 2015 gifts to make
03 Mar 17:37
Faith B. added Fork Bracelet to 2015 gifts to make
03 Mar 17:37
You Will Need
-
 Step 1
Step 1: Make sure you have sturdy pliers to hold the fork into place when you are using another pair of needlenose pliers to bend the prongs.
TIP: Use a cheaper fork, they tend to be easier to bend.
-
 Step 2
Step 2: Use the needlenose pliers to bend the prongs to your desired shape/design. I have heard that if you heat up the fork with a blowtorch the prongs are more malleable, but I think that technique is a bit extreme unless you are making an extremely complicated design.
-
 Step 3
Now you have a bracelet!
:)


Versions
+
Add your version


See all 7 »
Posted by
Ginger Snapped
Posted by
I May Be Rude But I'm The Truth
Posted by
whatintheworld?

Holly
<a href=http://www.astleyclarke.com>Astley Clarke</a>
Annie, scrabble cheat http://freescrabblehelper.com/
Thanks for the tutorial. Hope the New Year is treating you well.
Contact me here if you have a concern.
Jane
http://diylessons.org/