Forbidden Glamour Necklace
Extract from Bead & Wire Fashion Jewelry • By Jessica Rose • Published by GMC Publications


About
Bead & Wire Fashion Jewelry
Mood board & design process
I love sparkly jewelry and wanted to create a piece that not only sparkled but was literally covered in crystals.
To begin with I started looking at how crystals were used in furniture, around the house, and in clothes and jewelry. I then thought about a fresh color palette of combining pinks with brown and a touch of clear or white—something classy that would shine against a black dress.
These different elements came together to create the mood board that I then used to go bead and crystal shopping and designed the piece from there.
Forbidden glamour
Silver chain-and-wire necklace with sparkling crystals
Diamonds may be a girl’s best friend but crystals come a close second.
Using simple but effective techniques, you will first create the necklace "skeleton"
from silver chain before building up layers of crystals using silver headpins
and basic wire-wrapping techniques.
-
 Key West Witch added Forbidden Glamour Necklace to Jewelry
30 Jun 01:46
Key West Witch added Forbidden Glamour Necklace to Jewelry
30 Jun 01:46
-
 Luna D. favorited Forbidden Glamour Necklace
25 Apr 05:26
Luna D. favorited Forbidden Glamour Necklace
25 Apr 05:26
-
 Angie B. favorited Forbidden Glamour Necklace
19 Oct 09:30
Angie B. favorited Forbidden Glamour Necklace
19 Oct 09:30
-
 Carla B. favorited Forbidden Glamour Necklace
26 Mar 04:49
Carla B. favorited Forbidden Glamour Necklace
26 Mar 04:49
-
 Leah P. favorited Forbidden Glamour Necklace
06 Jun 09:38
Leah P. favorited Forbidden Glamour Necklace
06 Jun 09:38
-
JANE M. favorited Forbidden Glamour Necklace
09 Mar 15:59
-
 mmotse03 favorited Forbidden Glamour Necklace
25 Feb 00:43
mmotse03 favorited Forbidden Glamour Necklace
25 Feb 00:43
-
C T. added Forbidden Glamour Necklace to Accessories! x
26 Jan 11:30
-
C T. favorited Forbidden Glamour Necklace
26 Jan 11:30
-
 GMC Group published her project Forbidden Glamour Necklace
09 Oct 22:58
GMC Group published her project Forbidden Glamour Necklace
09 Oct 22:58
You Will Need
-
 Step 1
Cut three lengths of chain using the side cutters: short chain: 6¾in (170mm); medium chain: 10in (250mm); long chain: 11¾in (300mm). These will make up the front of your piece.
-
 Step 2
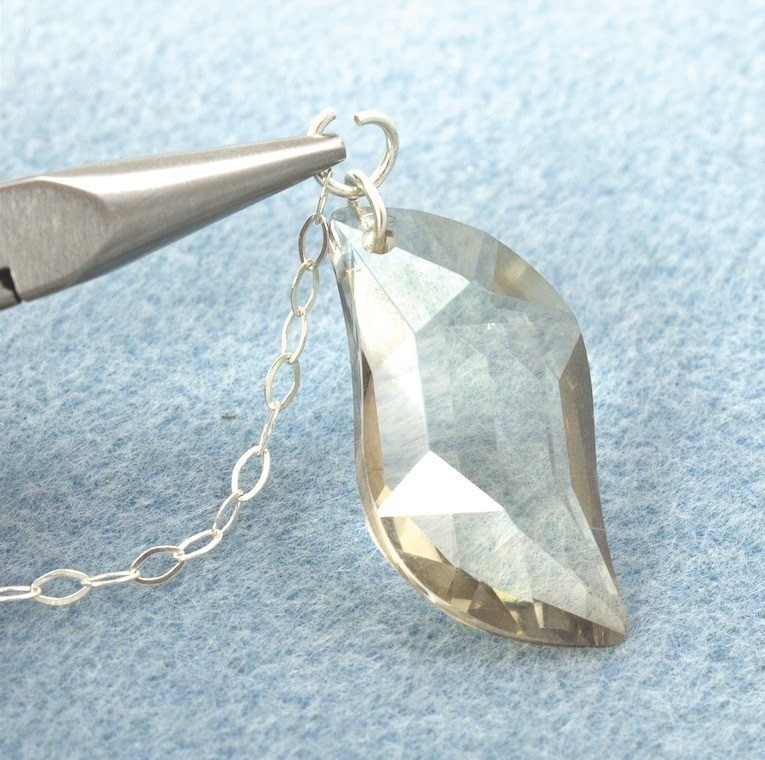
Using two large silver jumprings, attach the large Swarovski pendant to one end of the longest length of chain. First attach one jumpring to the pendant then use a second jumpring to attach that to the chain (for how to close a jumpring, see page 37). This will be the focal end of this long-length necklace.
-
 Step 3
Attach one of the pink crystal rondelle beads to the end of each of the other two lengths of chain cut in step 1. First thread the bead on to a silver ball-ended headpin and use your round-nose pliers to wrap the loop around the chain. You will be using this wire-wrapping technique throughout.
-
 Step 4
Now add the first layer of crystals. Take the longest chain (with the large pendant on the end) and begin attaching the light pink rondelles to it using the wire-wrapping technique on ball-ended headpins described above. Each bead should be nine chain links apart on the opposite side of the chain.
Tip
Master the techniques—there are a few specific techniques used in this piece and whether it works relies on getting those right, so before you start, practice with some oddments of chain and beads. Once you are confident, move on to the real deal. -
 Step 5
Once you have completed the longest chain, do the same with the other two. Again, make sure to attach each pink bead nine links above the previous one.
-
 Step 6
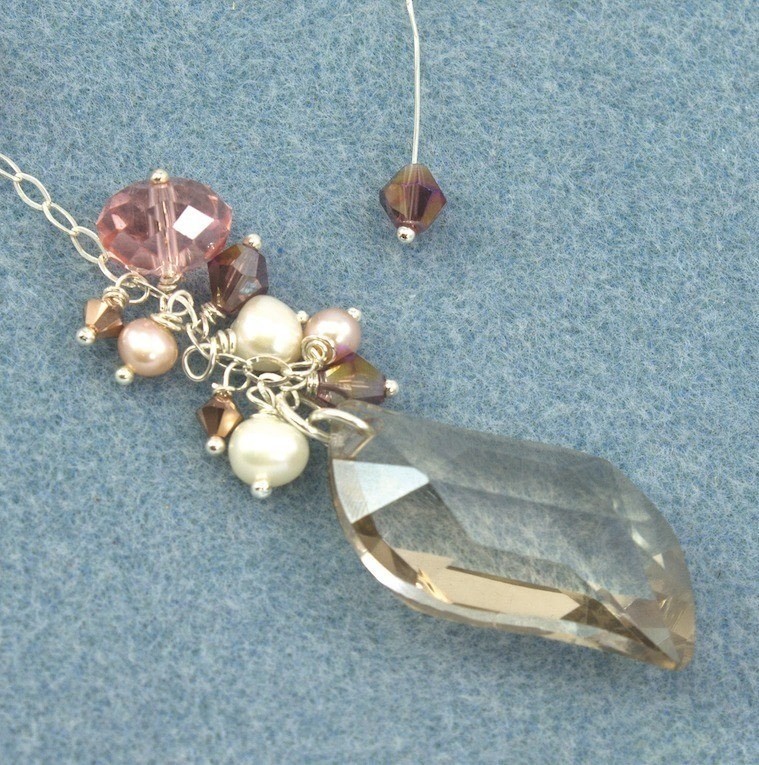
Now you are ready to add the second layer of crystals and pearls. Take out eight silver headpins and a pair of each of the four other beads used in this piece, as pictured.
-
 Step 7
Using the same wire-wrapping technique as before, attach each of the crystals and pearls, one by one, to the chain, in between the pink rondelles: white pearl, purple crystal, pink pearl, gold crystal (then repeat). This will give you eight beads, each one attached to a single chain link between the pink rondelles already attached.
-
 Step 8
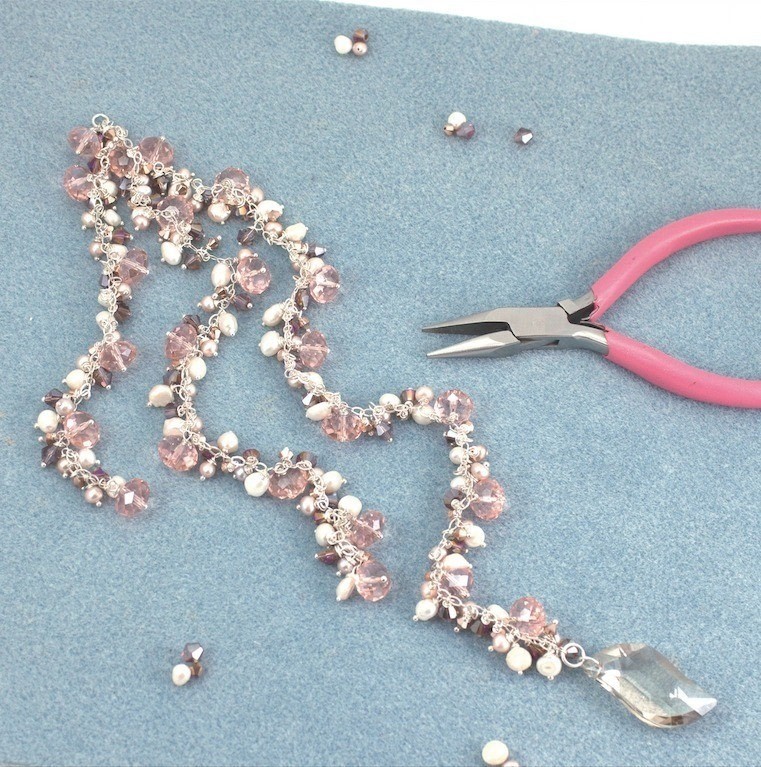
After completing your first set, work your way up the chain adding the same set of eight pieces in between each pink rondelle.
-
 Step 9
To complete the bottom half of the piece, cover all three chains in this way and attach them together at the top with a single medium jumpring.
-
 Step 10
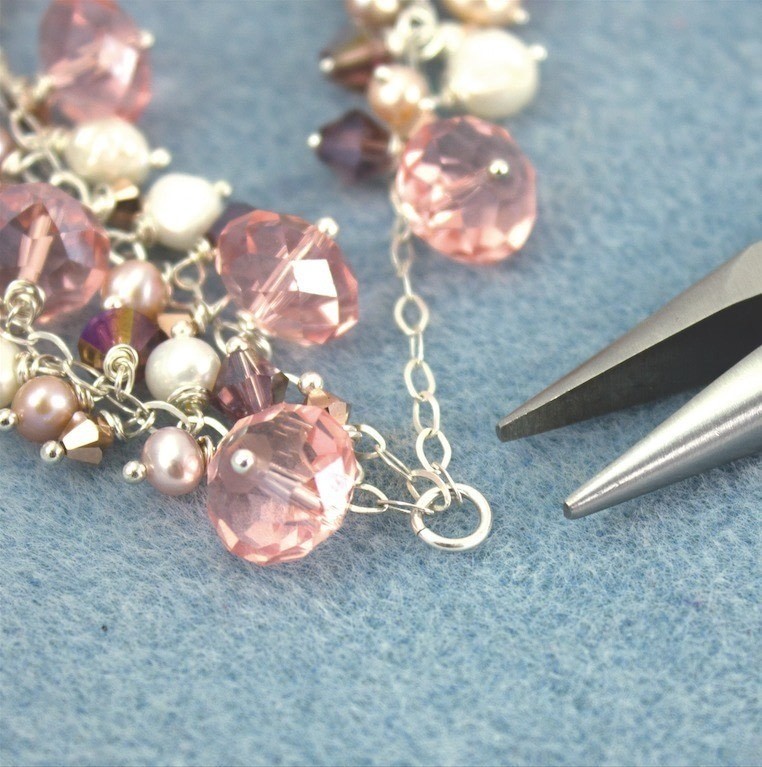
See image for a close-up of the three chains joined at the top with a jumpring as described in step 9.
-
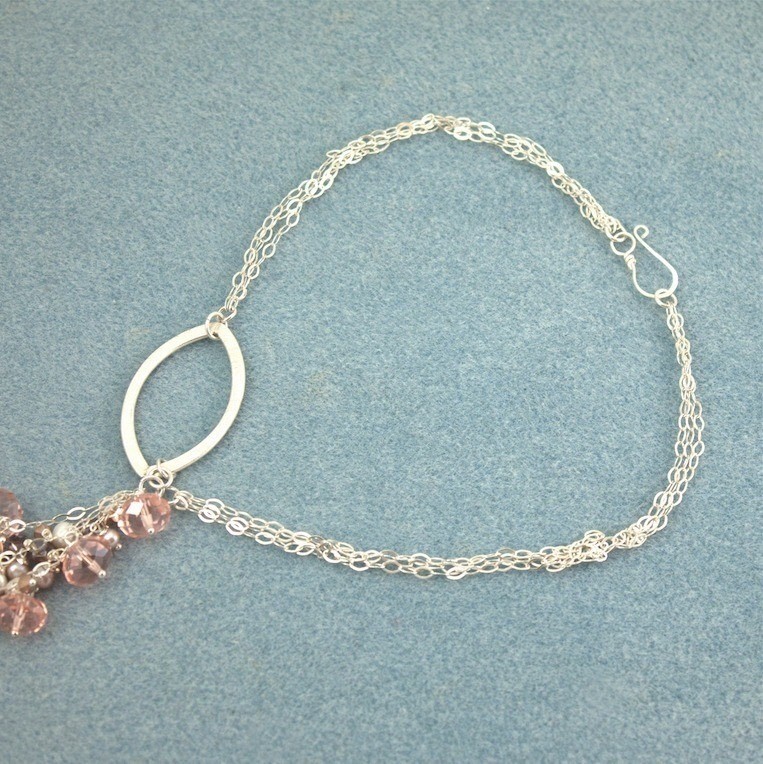
 Step 11
Put your piece aside and cut three new lengths of chain to a length of 81⁄4in (210mm) each. Take the silver leaf-shaped component and, using one large and a medium silver jumpring, attach it to the three new lengths of chain. As always, make sure your jumprings are tightly closed.
-
 Step 12
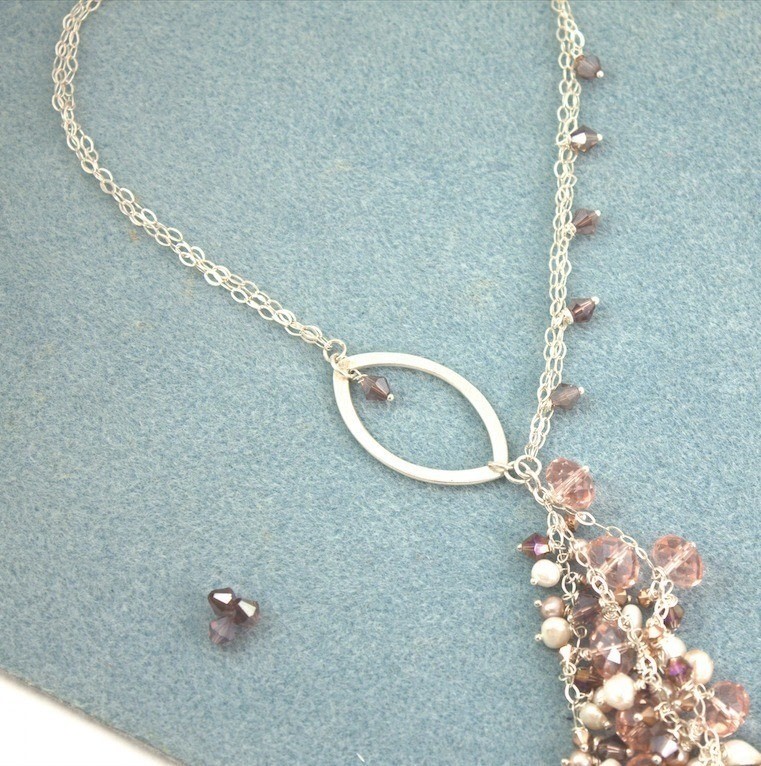
On the other side of the leaf-shaped component, use another large and a medium silver jumpring to attach the rest of your piece. You should end up with three crystal-covered chains, followed by the leaf-shaped component, then the other three lengths of chain.
Tip
This piece, while not that difficult technically, is not for the faint-hearted. It takes a day or so to make, as attaching all of the marvelous pearls and crystals is a lengthy process. It is best to make this piece over a number of evenings or days doing bits and coming back to it. Be patient, it’s worth it! -
 Step 13
To attach a clasp to the end of the chain, join the three pieces together using a medium jumpring and attach a clasp at the same time. I used a handmade silver hook clasp, made using 18-gauge silver wire (see techniques on page 33). You can also use a bought clasp or finding.
-
 Step 14
Now to add the final chain to your piece. Cut three lengths of 6³/in (155mm) chain and attach them to the first jumpring at the end of your crystal covered chain section. This will be on the opposite side of the piece from where the leaf-shaped component sits.
-
 Step 15
Add a large jumpring to the end of these three new pieces of chain to attach them together and hook in your clasp to see the complete chain-based top end of the necklace.
-
 Step 16
As a finishing touch, attach a row of the purple crystals to the length of chain on the opposite side of the leaf-shaped component and a single one to the jumpring at the top of the component. Just for some added sparkle.
Tip
The lengths of chain given in the steps are a great guide but everyone has a different shaped neck and prefers different lengths for their necklaces. Hold up the piece against yourself (or the person you are making it for) in a mirror and check you are happy with where the chain is sitting before committing.