


About
Make a beautiful Nordic book mark
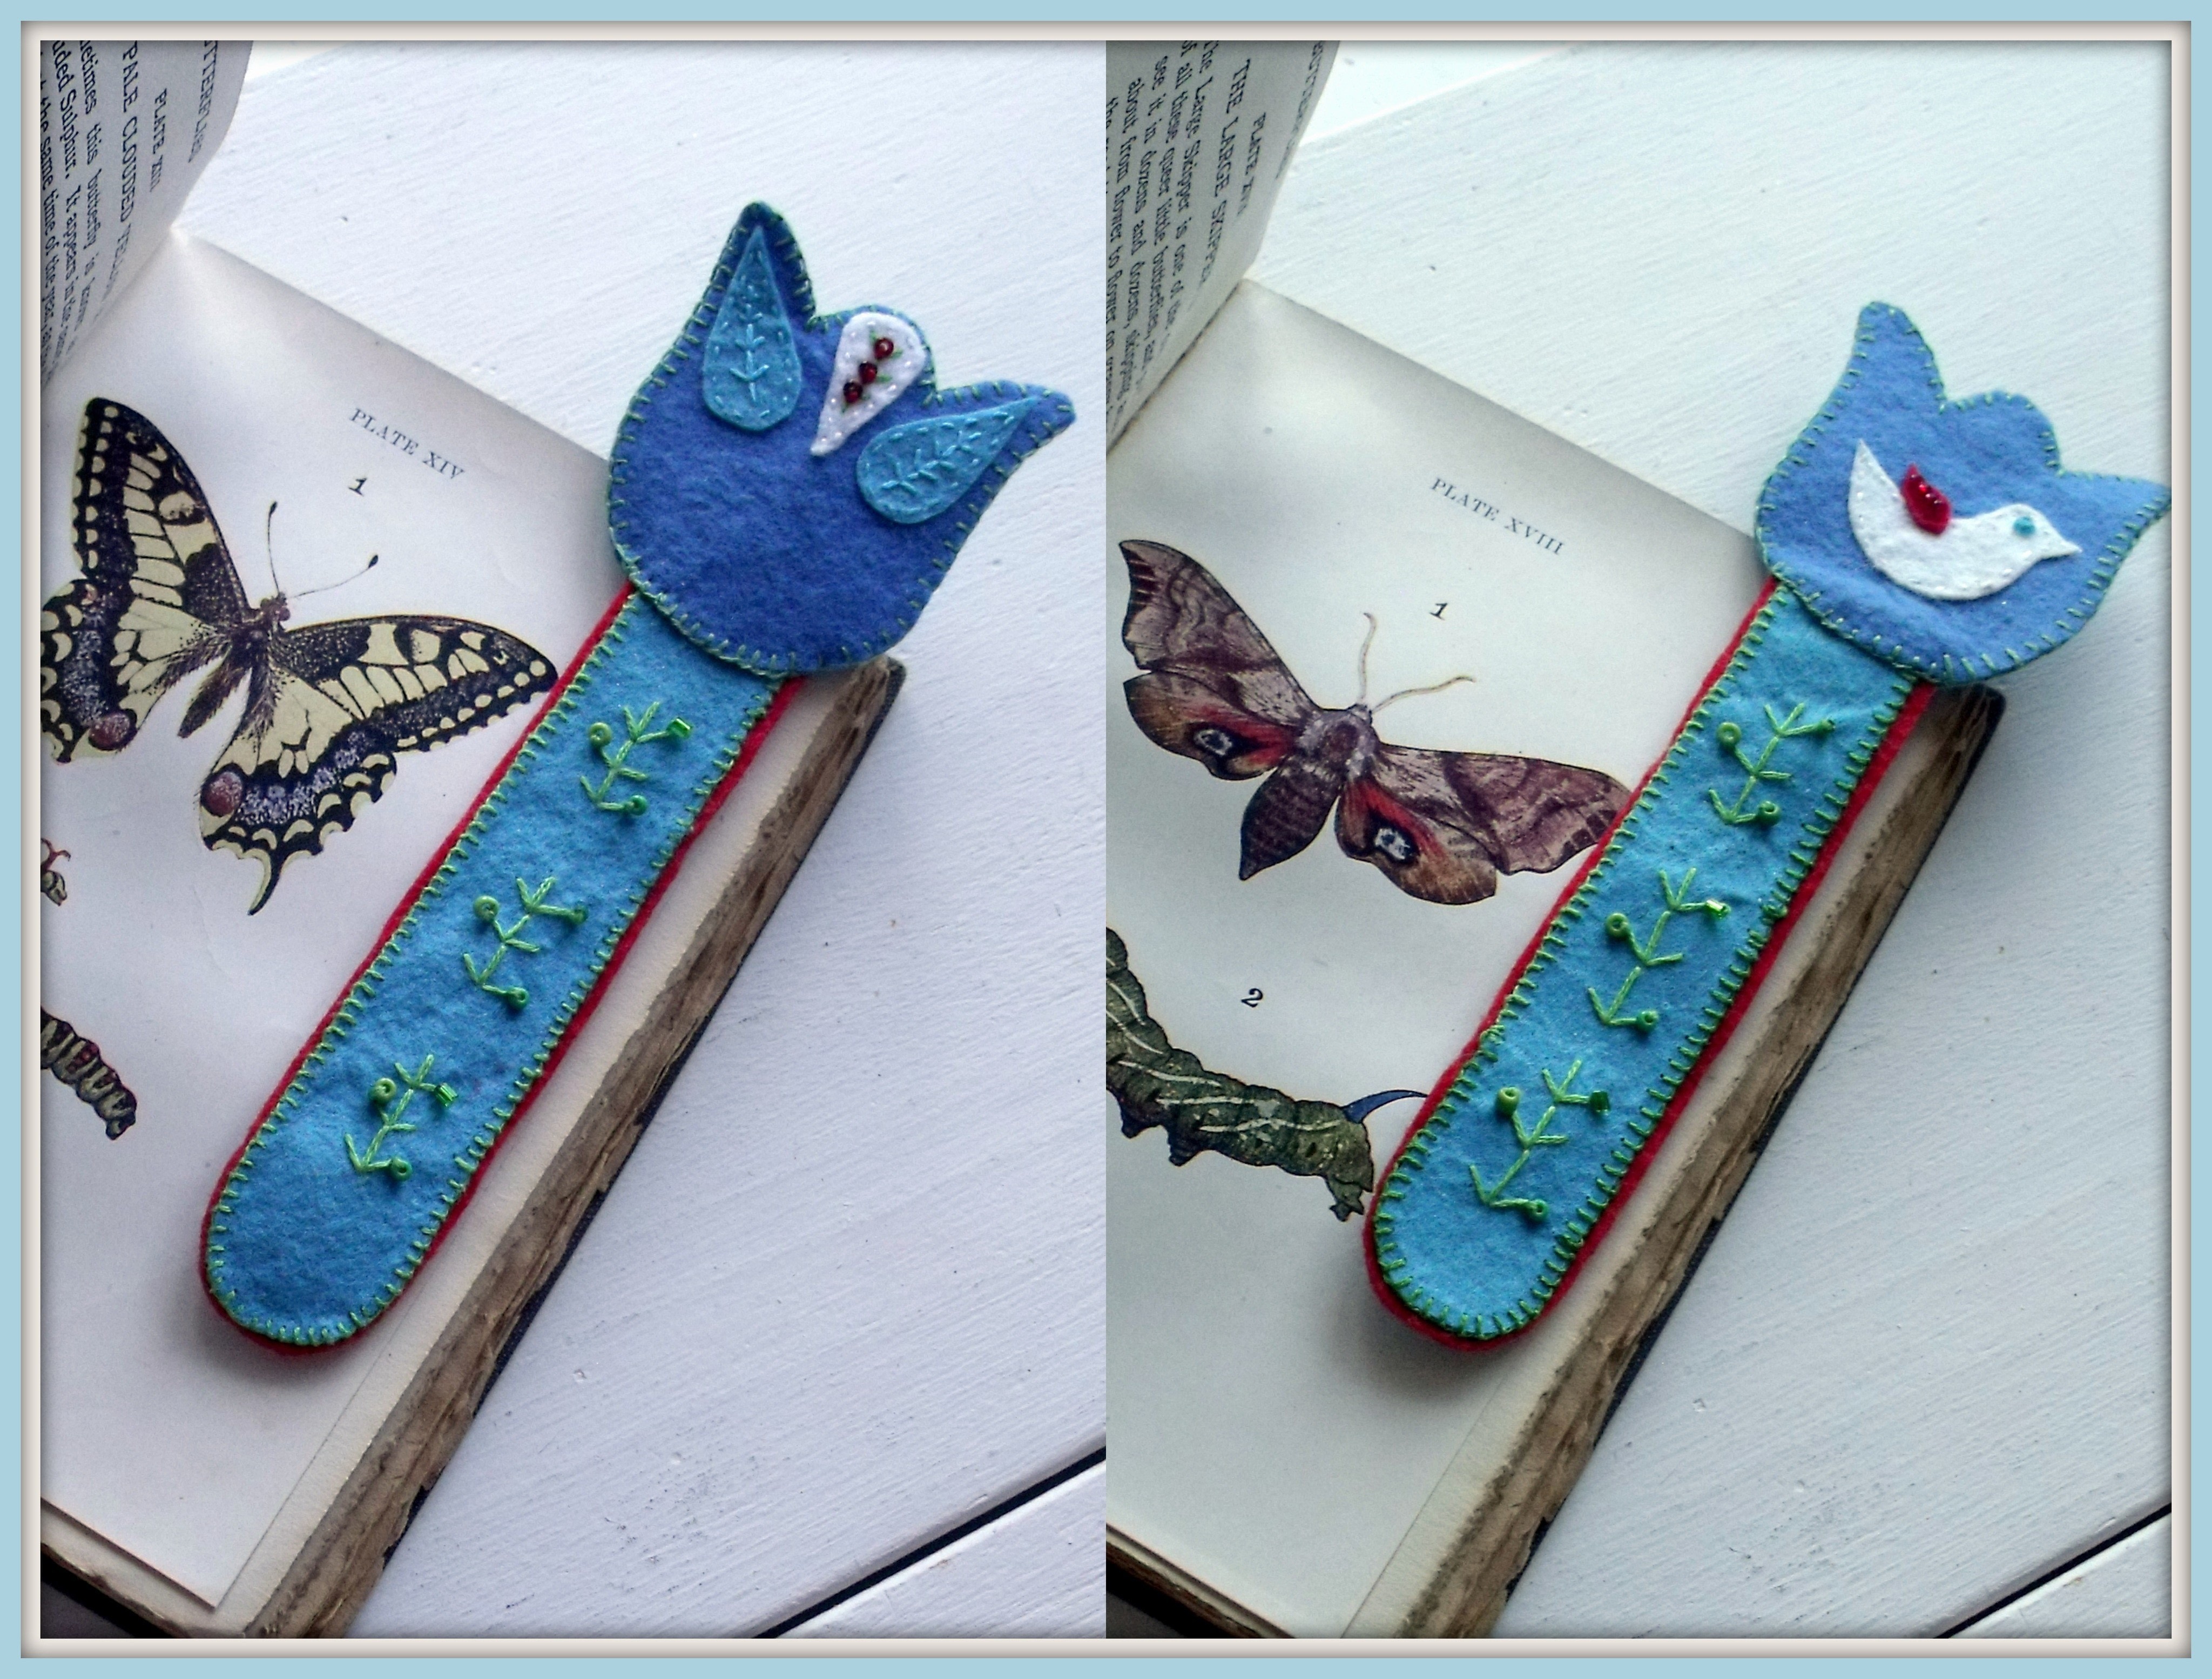
There is nothing more lovely that receiving a handmade gift-and this little book mark is quickly made, so versatile and will be appreciated for a very long time by the receiver! You can even let the children create a simpler version with a little fabric glue and flat backed sequins!
Tags
Downloads
- 110446_2F2015-08-15-141455-Template.jpg 196 KB [ Download ]
-
 kiki w. added Folklore Book Mark to Craft 2 sell
29 Jan 00:28
kiki w. added Folklore Book Mark to Craft 2 sell
29 Jan 00:28
-
 Kinhime Dragon favorited Folklore Book Mark
28 Jul 21:04
Kinhime Dragon favorited Folklore Book Mark
28 Jul 21:04
-
Rebecca M. favorited Folklore Book Mark
11 Jun 18:16
-
 Emma H. favorited Folklore Book Mark
09 Jun 18:47
Emma H. favorited Folklore Book Mark
09 Jun 18:47
-
 Cake Eater Sarah favorited Folklore Book Mark
12 Oct 23:47
Cake Eater Sarah favorited Folklore Book Mark
12 Oct 23:47
-
 jane.louis.353 added Folklore Book Mark to Needlework
16 Sep 15:21
jane.louis.353 added Folklore Book Mark to Needlework
16 Sep 15:21
-
 marlene.gagne.3 favorited Folklore Book Mark
09 Sep 10:41
marlene.gagne.3 favorited Folklore Book Mark
09 Sep 10:41
-
Sal M. added Folklore Book Mark to Sewing
03 Sep 20:57
-
 Kajsa Kinsella published her project Folklore Book Mark
03 Sep 06:00
Kajsa Kinsella published her project Folklore Book Mark
03 Sep 06:00
You Will Need
-
 Step 1
Use the templates and cut out all the pieces you can see on the picture. NOTE that the red stem piece should be slightly wider and longer than the two blue ones.
-
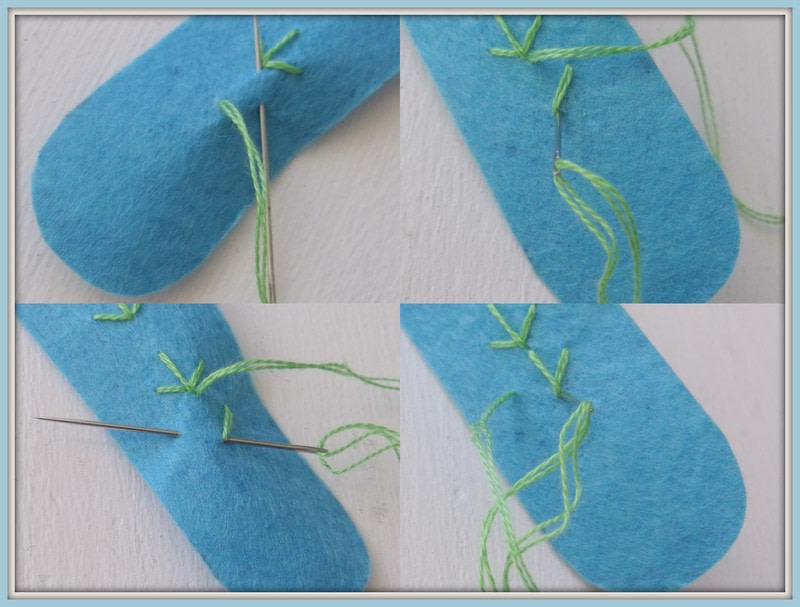
 Step 2
To decorate the light/aqua blue felt pieces, use Fern Stitch: sew three sets of three stitches along each. It`s not as difficult as it looks, but maybe practice on a scrap piece of felt first, to get the hang of it.
-
 Step 3
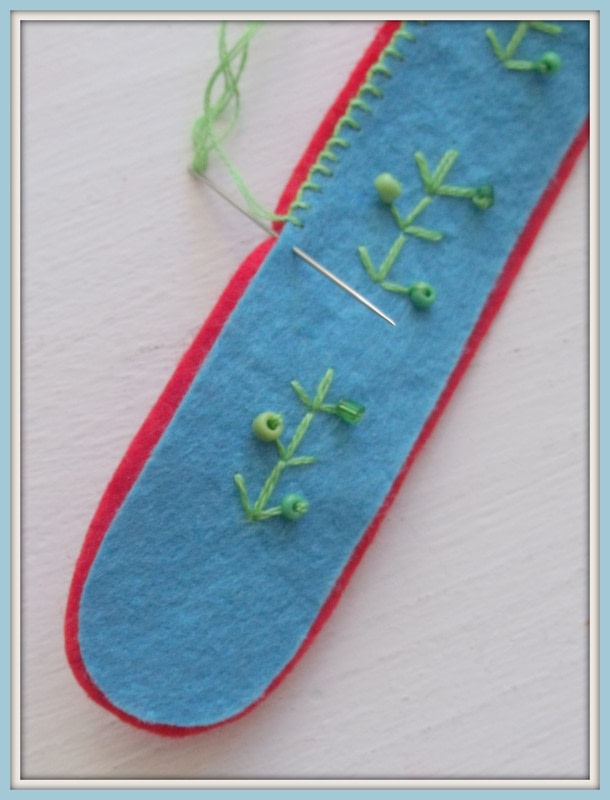
Decorate the fern stitches with three different tones of beautiful green glass beads each to make the design really pop!
-
 Step 4
Lay one decorated blue part on the red larger centre piece, load a sharp needle with light green embroidery floss and use Blanket Stitch to attach it. Only just nip a little red and then push through the blue, attaching it only to the surface. Don`t sew through to the other side as the second blue part will need to be placed there. When you are done with one side, attach the other one too. Keep the stitches very neat and even for the best result.
-
 Step 5
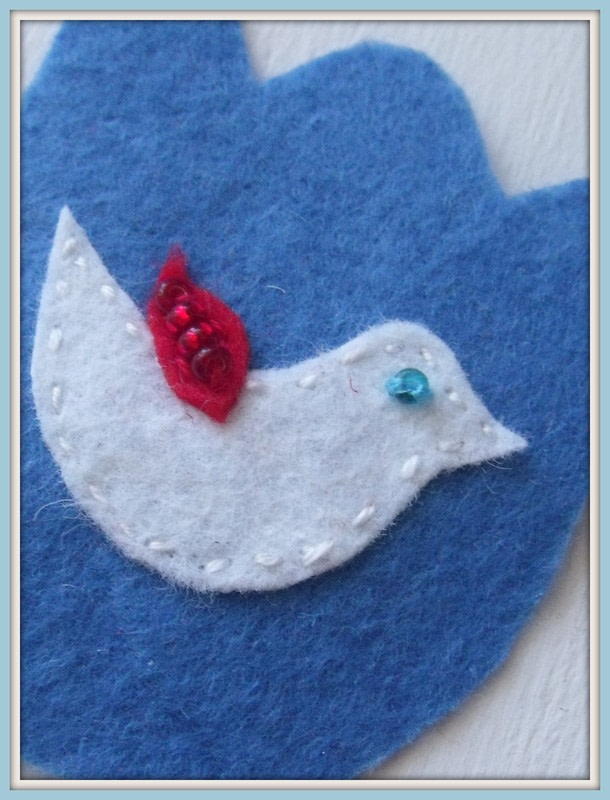
Decorate the two dark blue tulip parts-use fern stitch and straight stitch to attach the individual pieces. Add a few lovely berry-red glass beads to the flower and wing and finally a sparkly blue eye for our little birdie!
-
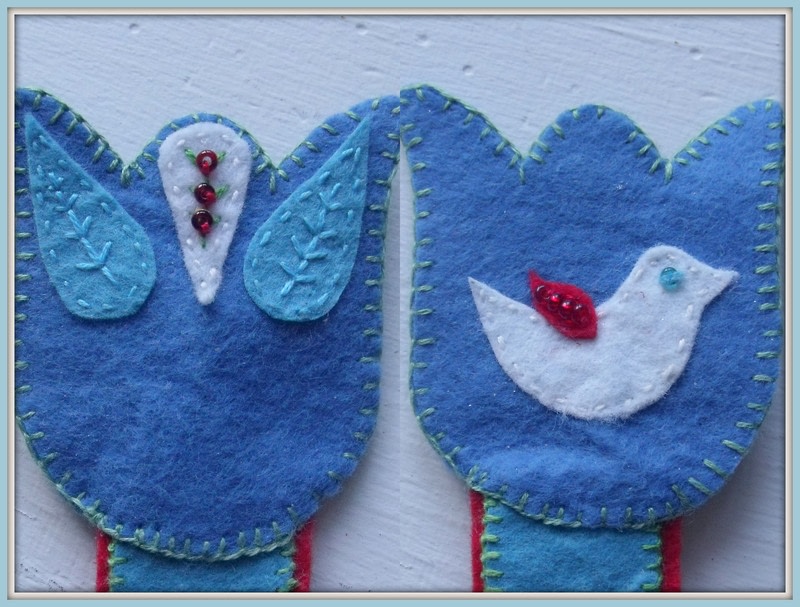
 Step 6
Place the two decorated tulip parts back to back, line them up well and wedge the assembled flower stem in between the base. To attach the flower head to the stem, stitch small blanket stitches, joining the parts together. As you come to the base of the tulip, only nip as before the lighter blue and push all the way through the darker blue. Finish sewing all the way up to where we started and secure your thread.
-
 Step 7
Turn the almost finished bookmark over; you will see that the tulip base on this side is still unattached, so let`s nip a little again. Sew it in place and we`re done!
-
 Step 8
If the book mark is very “bubbly”, you can iron it on very low heat under a damp tea towel.
-
 Step 9
Find a beautiful book and put your lovely book mark to use!