About
Easy, awesome tote made from a thrift store dress, and an old shirt!
I love this tote, not only is it super cute, but it is really soft since it is made out of clothing!
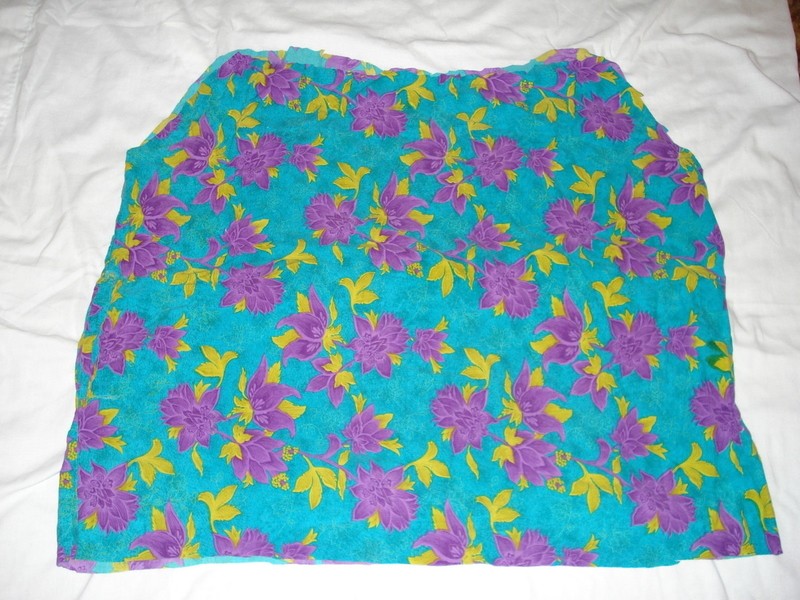
I picked up this funky dress from a thrift store because I just love the fabric. I thought it would be awesome to make a tote bag out of it since the colors are awesome and the dress was cheap. Fabric from a fabric store can be quite pricey so I definitely recommend going to a couple thrift stores and finding some awesome dresses (or skirts) like this one and turn them into cool things. Also at certain thrift stores they have days where most clothing is 99 cents, find out those days and then shop till you drop!
This tutorial can be used for any kind of fabric since I have all of the measurements. Feel free to use any fabric it doesn't have to be an old dress.
If you want to use a dress, or are picking out dresses or skirts to use as fabric, be wary of the seams on the dress. Many dresses have a seam on each side then one running down the back. If this is the case you will want to make sure that you have enough fabric from the front of the dress to make the two pieces of the outer tote. Also feel free to tweak the instructions to fit your particular dress (like making it smaller or larger to fit your needs).
For all the measurements I gave them about 1/2 inch seam allowance.
-
 Step 1
To start, lay the dress on the floor. With this dress there is only two seams down the side, there is no seam down the back.
-
 Step 2
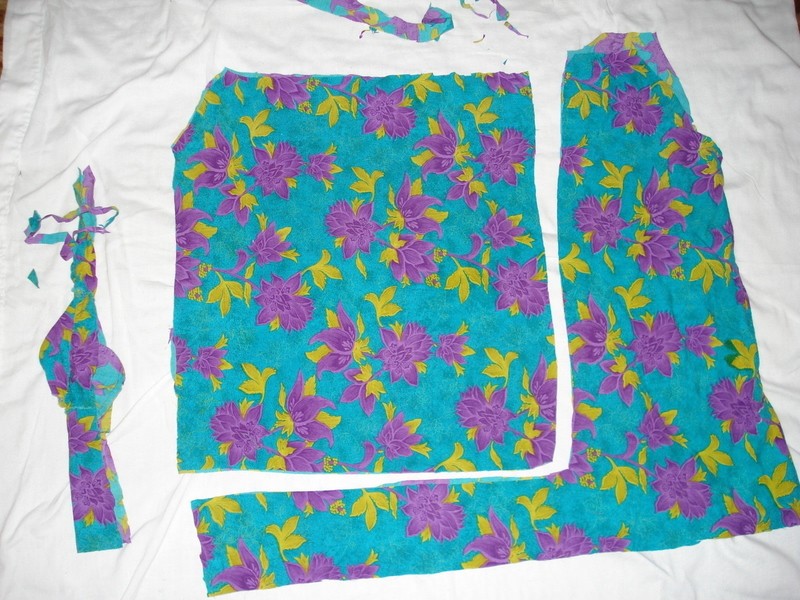
Next, cut off the top of the dress. Removing the sleeves and collar.
-
 Step 3
Then cut off the bottom of the dress (if needed).
-
 Step 4
Now you are left with a whole piece of the same fabric, which is two sided.
-
 Step 5
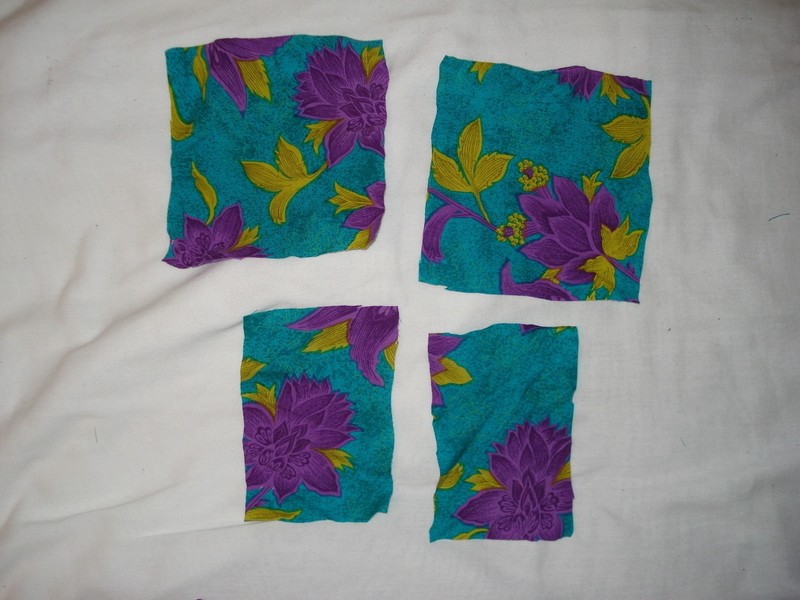
Cut the fabric 15 by 12 inches. Making two pieces of fabric. Don't forget to cut the seams off.
I am going to refer to this as my main fabric. -
 Step 6
If you have different patterns on your dress, like mine, cut it like so, seperating the different patterns from each other. If you do have a dress with some sort of boarder (mine is geometric) don't throw it away because it can be used for the straps.
-
 Step 7
I cut the seams off of the purple fabric and layed out the two pieces. Cut them 15 by 4 1/2 inches. These are going to become the top part of my tote. If you dont have this on your dress, find another similar fabric that matches your main fabric and use that.
-
 Step 8
With the two purple pieces and the green flowery fabric add interfacing to all four of them. If needed.
This helps to give the fabric more stability. -
 Step 9
I then took 1 green piece and layed it out and pinned 1 purple piece to the top of it, keeping right sides facing each other. Do this for the other green and purple piece.
-
 Step 10
Then sew your two pieces across for both. Now take the two sides and place right sides together and sew down one side. Make sure that when you sew your first side that the two sides line up perfectly. Meaning the line between the purple and green is straight between the two sides.
-
 Step 11
Then sew all the way around the edges leaving the top open. I sewed over them twice to give it more strength.
-
 Step 12
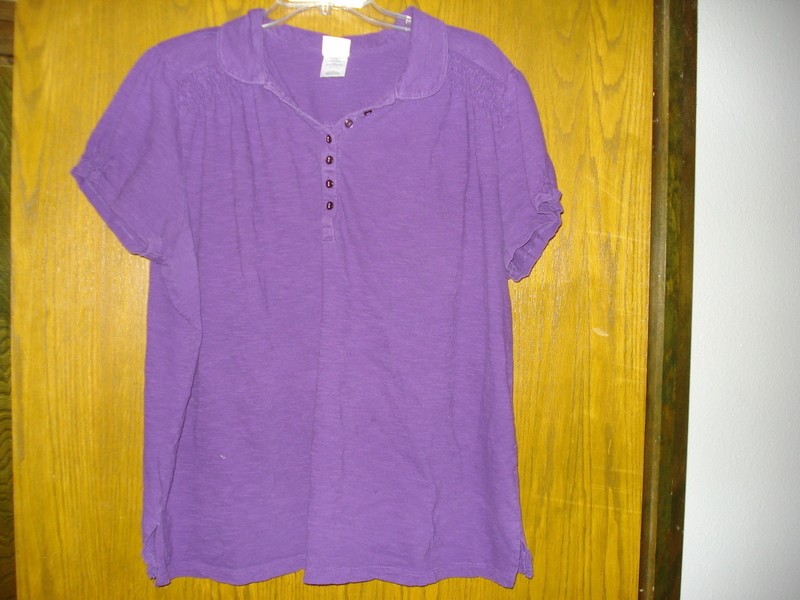
Now for the lining. I didn't have any fabric that matched the outside fabric of the bag so I got an old shirt from my Mom and used it instead of buying fabric at the store.
-
 Step 13
If you decide to use an old shirt make sure your lining will fit inside your bag before you start cutting. So, place the bag on top to make sure the lining will fit like so.
-
 Step 14
Since this fabric will fit, cut off the top portion of the shirt. Taking the sleeves, collar, and also the buttons off.
-
 Step 15
Once you have that done, cut off the ends of the shirt, where the sems are as well as the bottom seam.
-
 Step 16
Now you have two pieces ready to be use.
-
 Step 17
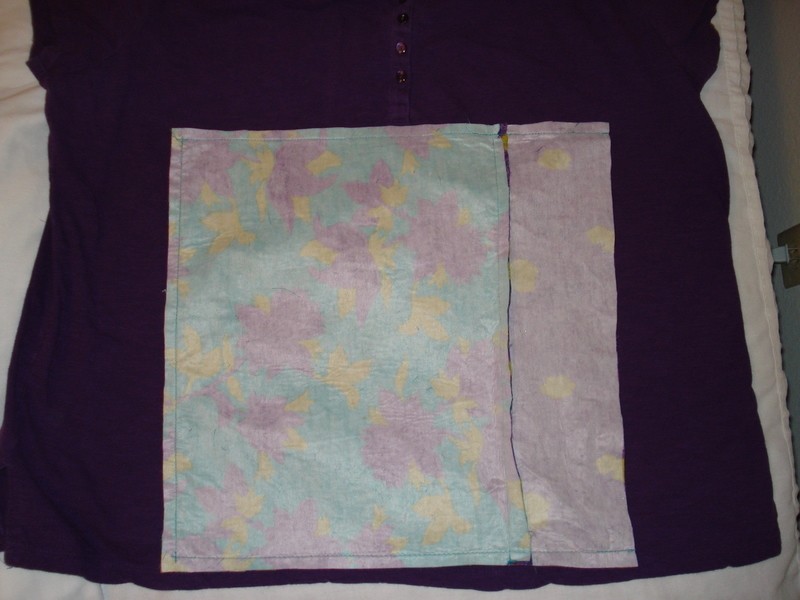
I really wanted pockets in my tote so I decided to make some. Cut two pieces 5 X 5 1/2 inches. And two more 5 X 3 1/2 inches.
-
 Step 18
I cut two of each so that the inside of the pocket would have the right side of the fabric facing facing out. It also gives the pockets more strength. Put the two wrong sides together for each pair. I folded down the top twice to make a nice edge. Ironing them down will make it a lot easier.
-
 Step 19
Then, sew the top where the edge is for both pockets.
-
 Step 20
Then take 1 of the purple fabric pieces and place the pockets on the fabric making sure that they line up correctly and that they are placed where you want them in proportion to the bag. I put the purple inside of the bag and measured the pockets from bottom. My pockets were 6 1/2 inches from the bottom.
-
 Step 21
Now fold each of the edges under except the top and sew around all three sides for both pockets. It should look like this when you are done.
-
 Step 22
Take the other purple shirt piece and sew the two pieces together, while leaving the top open, and with the right sides facing each other.
-
 Step 23
Now strap time! I used the boarder from my dress, if you don't have that cut four pieces of any fabric (or you could use your main fabric, in my case the flowery green fabric) 28 X 2 1/2 inches. With two of those four, add interfacing (if needed) to the wrong side. Then, place together two with right sides facing, one with interfacing the other without, pin, and sew on both sides leaving the two ends open. Do that for the other strap as well. Turn both straps right side out.
-
 Step 24
The way I attached the straps was to pin them where I wanted them on the flap of of where the purple and green flowery fabric overlap. My straps are 3 inches in from each side. And about 5 inches apart.
-
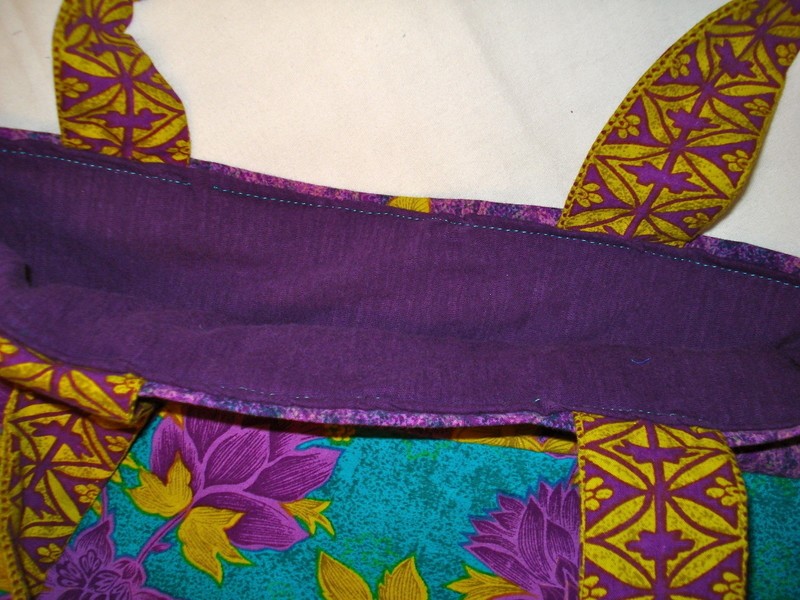
 Step 25
I hope you can see in the photo that the strap was only sewn on the inside, missing the other seam from where them green and purple fabric meet. Sew it back and forth a few times to make the strap strong. Do this for all four strap ends. Make sure to line them up correctly from one side of your tote to the other.
-
 Step 26
I didn't take many pictures of the end so I will do my best explaining. Take the purple piece with pockets and place it inside the bag. Fold the outside fabric down once pinning it making sure it is even all the way around the bag. Now fold down the purple once and pin it to the outer fabric. This makes a really nice top edge. Make sure that the straps are also pinned in place so that they will come out straight when you sew around the top. Once everything is settled now sew around the edges. Start at one side of the tote where the seam is. Going slowly sew across one side of the bag, checking to make sure you sewed it straight. Do the same for the other side. This is definitely the hardest part but just take your time in pinning and sewing and it will pay off.
-
 Step 27
You are now finished!!! As you can see there is one seam around the top of the bag.
Happy Sewing Everyone!!!
Please leave comments, questions, and post your version of this awesome tote.
I would love to see what you have done!