About
Patch by Cath Kidston
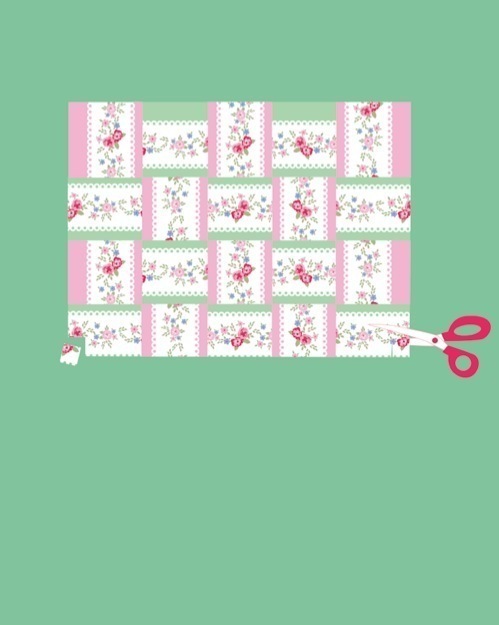
One of the fascinating things about patchwork is the way that you can piece together printed fabrics to create a completely new design. To make this useful zip-up washbag squares were cut from two different colourways of my Lace Stripe cotton duck and then arranged alternately to make a chequerboard pattern, which looks as if it has been woven from lengths of floral braid.
CUTTING OUT
from green floral print fabric
twenty 8cm squares
from pink floral print fabric
twenty 8cm squares
two 3 x 4cm zip tabs
Tags
© 2024 Cath Kidston / Quadrille · Reproduced with permission.
-
 Caron K. added Floral Washbag to Zipper Pouches
23 Dec 08:11
Caron K. added Floral Washbag to Zipper Pouches
23 Dec 08:11
-
Caron K. favorited Floral Washbag
23 Dec 08:11
-
 Amy D. favorited Floral Washbag
28 Mar 22:58
Amy D. favorited Floral Washbag
28 Mar 22:58
-
 Kim H. favorited Floral Washbag
24 Dec 19:35
Kim H. favorited Floral Washbag
24 Dec 19:35
-
Alecia B. favorited Floral Washbag
01 Aug 16:25
-
 Gemma P. favorited Floral Washbag
04 Mar 21:25
Gemma P. favorited Floral Washbag
04 Mar 21:25
-
 ~-*animelover~-* favorited Floral Washbag
28 Jan 13:45
~-*animelover~-* favorited Floral Washbag
28 Jan 13:45
-
Charlotte M. added Floral Washbag to yetanotherone
04 Nov 18:23
-
 Orla H. favorited Floral Washbag
28 Sep 22:19
Orla H. favorited Floral Washbag
28 Sep 22:19
-
 TheAnnatron added Floral Washbag to Sew!
14 Sep 19:44
TheAnnatron added Floral Washbag to Sew!
14 Sep 19:44
-
 Step 1
Lay out the squares for the (identical) front and back of the bag, in four rows of five. Alternate the colours and the direction of the stripes to create the basketweave effect. With right sides facing, sew the patches together in horizontal rows, leaving a 1cm seam allowance.
-
Step 2
Press the seam allowances to one side, alternating left and right, as you go down the rows.
-
 Step 3
Hold the top edge of the second row against the bottom edge of the first row together, with the seam matching and the allowances butting up next to each other. Insert a pin at each seam line and the corners, then machine stitch 1cm from the edge. Add the other two rows, then make up the second panel in the same way.
-
 Step 4
Press all the seam allowances open so that the patchwork will lie flat.
-
 Step 5
Rule a line 2.5cm up from the bottom edge of one panel, then trim along this line. Draw a 2.5cm square at each corner and cut them away. Do the same on the other panel.
-
Step 6
Pin the panels, wrong side down, to the waterproof lining. Machine stitch the two layers together, sewing 3mm from the edge of the panels. Cut out neatly.
-
 Step 7
With right sides facing, stitch one of the zip tabs across the tapes at the top end of the zip. Press the seam towards the tab. Lay the zip along the top edge of a bag panel to check the size and sew the other tab to the bottom end, so that the outer edge of the tab lines up with the side of the bag. (You can stitch through the teeth without damaging the machine needle, as long as you are using a nylon zip, but avoid the tiny metal stopper at the bottom.)
-
 Step 8
Tack the top edge of one side panel to the zip and tabs with right sides facing. Fit a zip foot to the machine and stitch 6mm from the edge. Sew the other panel to the opposite side, then press the seams lightly and top stitch.
-
Step 9
Open the zip and fold the bag so that the patchwork lies on the inside. Pin the side and bottom edges together, leaving the squared off corners open. Machine stitch the bottom edge with a 1cm seam, then sew the side edges, starting from the corners and sewing towards the zip. Secure both ends of the three seams with reverse stitches. Lightly press them open.
-
 Step 10
Now open out one of the open corners and refold it so that the side seams lines up with the bottom seam. Pin the two edges together and machine stitch with a 6mm seam. Do the same at the other corner, then turn right side out. Ease the corners out to make a flat base for the bag.
TOP TIPS:
this versatile design can be adapted by altering the size of the squares: ?make them smaller for a make-up bag or larger for a changing bag (a great baby shower gift!).if you are a real perfectionist, you can neaten the inside seams with an overlocking stitch or by binding them with bias binding, either by hand or machine.