Flapping Bird Envelopes
Extract from Trash Origami • By Michael G. LaFosse and Richard L. Alexander • Published by Tuttle Publishing


About
Trash Origami
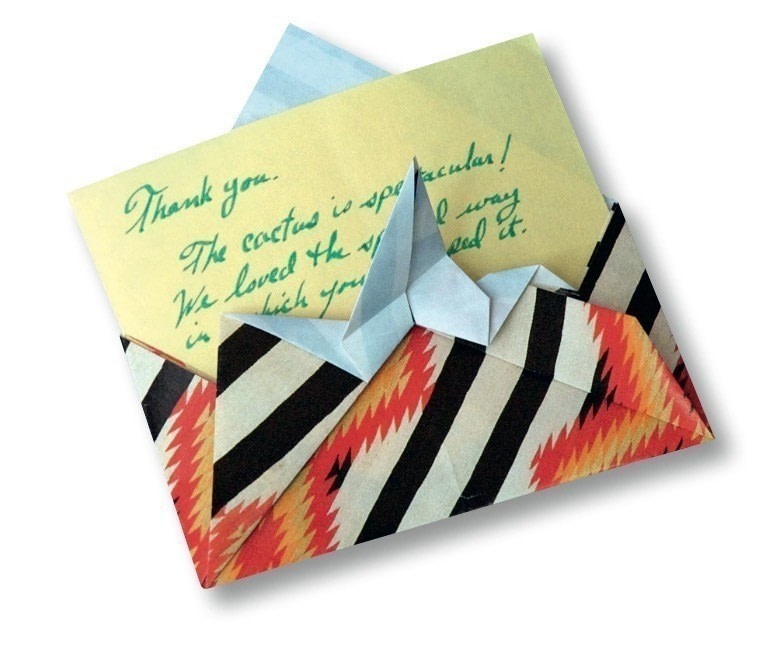
Whenever you receive a nicely wrapped gift, don’t throw away the gift
wrap! Say “Thank You!” by folding a sample square into this lovely and fun envelope. A 10-inch square (25 cm) works well. Birds folded from stronger papers flap better and last longer. The design allows for plenty of artistic and creative modification.
Tags
© 2024 Michael G. LaFosse / Tuttle Publishing · Reproduced with permission.
-
 Spanky H. favorited Flapping Bird Envelopes
02 Oct 10:25
Spanky H. favorited Flapping Bird Envelopes
02 Oct 10:25
-
Alissa B. favorited Flapping Bird Envelopes
25 Sep 15:06
-
 Tuttle Publishing published her project Flapping Bird Envelopes
23 Sep 06:00
Tuttle Publishing published her project Flapping Bird Envelopes
23 Sep 06:00
You Will Need
-
 Step 1
Begin with the display side of the paper facing down. White side up if using origami paper. Fold in half corner to corner both ways. Unfold.
-
 Step 2
Fold all four corners to meet at the center where the creases cross.
-
 Step 3
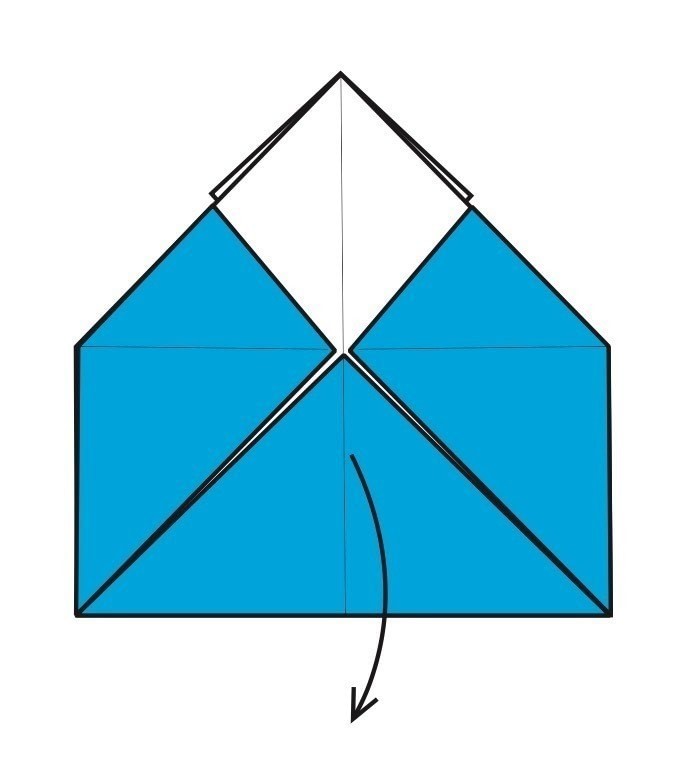
(1) Unfold only the bottom flap. (2) Turn the paper over, left to right.
-
 Step 4
One at a time, fold and unfold the bottom edges. Use the left and right obtuse corners to help: they should each touch the center crossing creases.
-
 Step 5
You now have a mountain and valley crease pattern that will let you move the bottom three corners to meet at the crossing creases in the middle of the paper. Look ahead at the next drawing to see the shape.
-
 Step 6
Turn the paper over, top to bottom.
-
 Step 7
Unfold the bottom flap.
-
 Step 8
Pull out the indicated left and right flaps to fold the bottom area up and flat. Look ahead.
-
 Step 9
Your paper should look like this. Turn over, left to right.
-
 Step 10
A flat item can be inserted now or later. Fold the top flap down, into the envelope. This flap would also cover the inserted item.
-
 Step 11
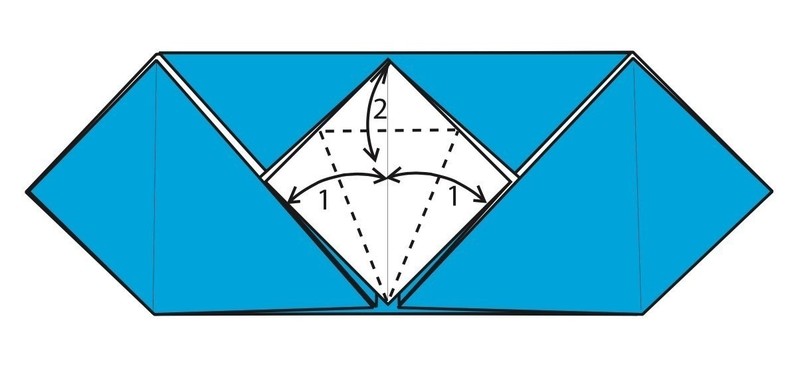
Pre-crease for a petal fold: 1. Fold the bottom left and right edges of the center shape to meet at the middle. Unfold. 2. Fold down the top corner at the level of the top of the creases just formed. Unfold.
-
 Step 12
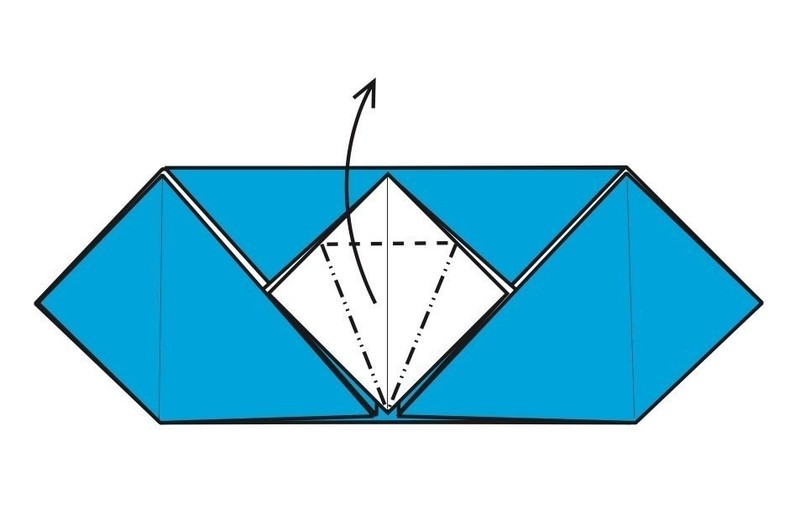
Petal-fold: lift the top layer up and fold in the sides as you flatten the shape into a tall diamond.
-
 Step 13
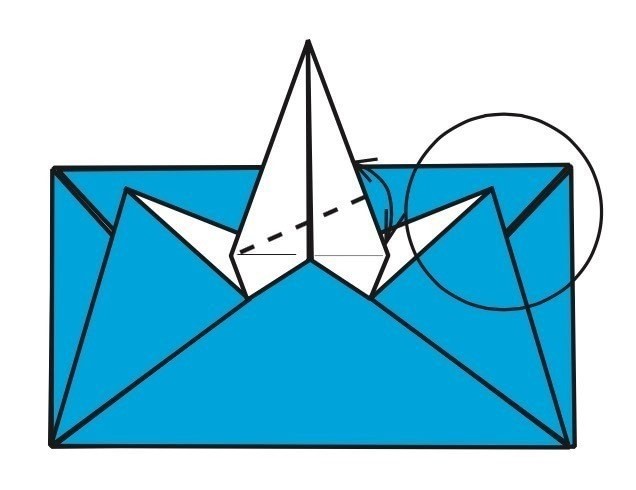
Inside-reverse fold the indicated points to form the neck and the tail of the flapping bird. A large flap of paper is attached to each and will follow.
-
 Step 14
Fold the left and right corners inward and behind the flaps, locking the envelope.
-
 Step 15
Install the fold in the wing, toward the head. (The head will be formed at the point in the circle on the right.) You could use the left side point for the head, and fold the wing toward the left.
-
 Step 16
Inside-reverse fold the tip of the right point down for the head. Fold the excess flap behind the head.
-
 Step 17
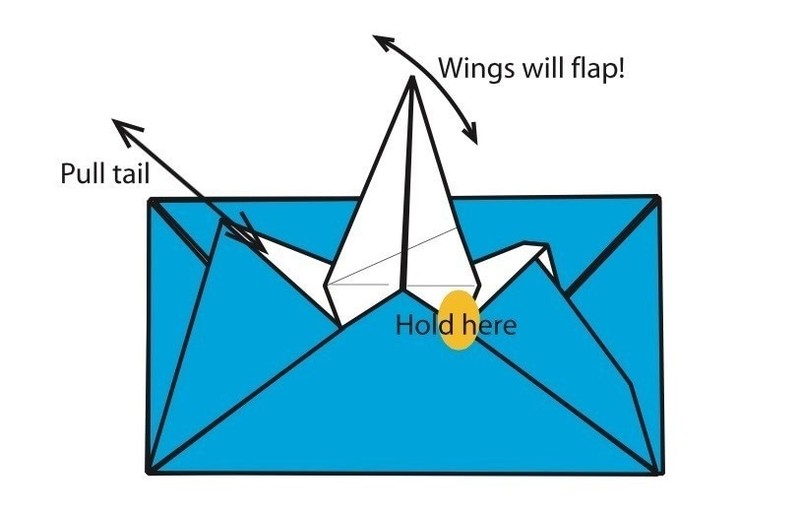
The finished Flapping Bird Envelope. Hold the envelope at the base of the bird’s neck, then pull the tail in and out to make the wing flap. Now that’s airmail!