


About
Birds Love Cake!
I made these needle felted bird cake toppers for a friend's wedding. I took pictures while I was making them, not intending to make a tutorial, so sorry if things seem a little jumbled, I hope you'll be able to follow along though!
Everything is open to interpretation, you should just use this as an idea to get started :) I am not going over needle felting techniques, but this should be easy enough for an advanced-beginner to follow.
Tags
-
 Scarlet Draven favorited Felted Bird Wedding Cake Toppers
19 Jan 03:32
Scarlet Draven favorited Felted Bird Wedding Cake Toppers
19 Jan 03:32
-
 Step 1
First, I decided how big I wanted my finished bird to be, about 4 inches tall, and sketched it out on paper.
I then took a piece of bailing wire and made a loose, not-very-neat ball, to use as the middle of the bird base. The legs and feet were made by twisting floral wire around itself, which I then attached to the wire ball base.
-
 Step 2
Next, I used a binder clip to keep the legs upright, and painted them- one set black, one set white, with enamel (in this case, I just used nail polish).
Let them dry *completely* before moving on.
-
 Step 3
On the time consuming part! Being felting your roving around the wire ball, being careful to avoid hitting the wire with your needles too much. I like to take some roving and stuff it into the wire first, and wrap it around a few times.
For this step, go ahead and use a larger gauge needle, as you're just creating a base to build off of.
-
 Step 4
I realized I needed a guide for the shape and size of the bird sideways, so I went ahead and sketched that out.
Continue building off the wool base to extend the body out. In this case, I made most of it white, then added the black on top. Start using your smaller gauge needles at this point to make the body look a little neater.
-
 Step 5
No pictures of the in-between steps- sorry! I separately created wing-shaped pieces then felted them onto the body completely, but they would look cute extended out as well~
Time to create the head! Make a round ball, for the groom I brought the black up to a point on his head, but you can decorate as you see fit, then attach it to the body- don't try to stab the needles directly from the top of the head towards the body, needle the head and body at the 'neck' area to attach the two pieces. Go ahead and neaten up your work with your smallest needles.
-
 Step 6
Onto the eyes and beak! For the eyes, I took needle and thread and brought it across the head so I could felt the eyes on accurately. You could use beads or small buttons instead.
Take a small piece of orange felt and cut a diamond shape for the beak, and sew it on.
For the bride bird, I took a small scrap of lace and some beads to create a cute little veil to fancy her up.
-
 Step 7
Again, sorry for the lack of additional photos... Onto the base!
I didn't know what size the cake would be, or what would be going on with it at all, so I used some heart-shaped Styrofoam pieces I found at the craft store. You could also use a wood base or whatever else strikes your fancy.
I painted them with white gesso paint, then lacquered them with sparkly polish and glued ribbon around the edges.
Create a few small holes where the feet will stand, just large enough to feed some 26G wire through- time to wire your birds to the base! I looped the wire near the legs and, ah, 'toes', then pulled it all through the holes in the base, then simply twisted it all together.
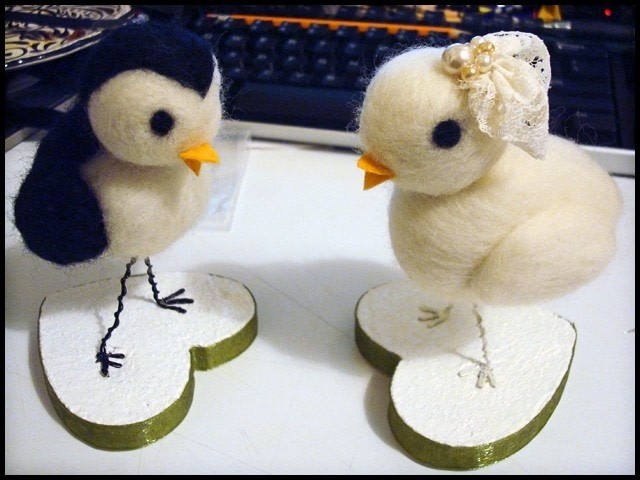
And voila! Two cute birds ready to tie the knot!


Comments


