About
Make your own felt polka dot birdie!
A quick and easy way to make a felt birdie.. which turned out looking like a cross between a birdie and a whale owing to a stitching error.
Still, it looks cute, all the same, so here it is. :)
-
 Sarah Sylvia S. favorited Felt Polka Dot Birdie
19 Jul 04:32
Sarah Sylvia S. favorited Felt Polka Dot Birdie
19 Jul 04:32
-
 B* published her project Felt Polka Dot Birdie
02 Nov 05:41
B* published her project Felt Polka Dot Birdie
02 Nov 05:41
You Will Need
-
 Step 1
Gather some polka dot felt fabric as well as a matching coloured felt of your choice and size.
Cut out two sets (for the front and back) of the outline of the birdie.
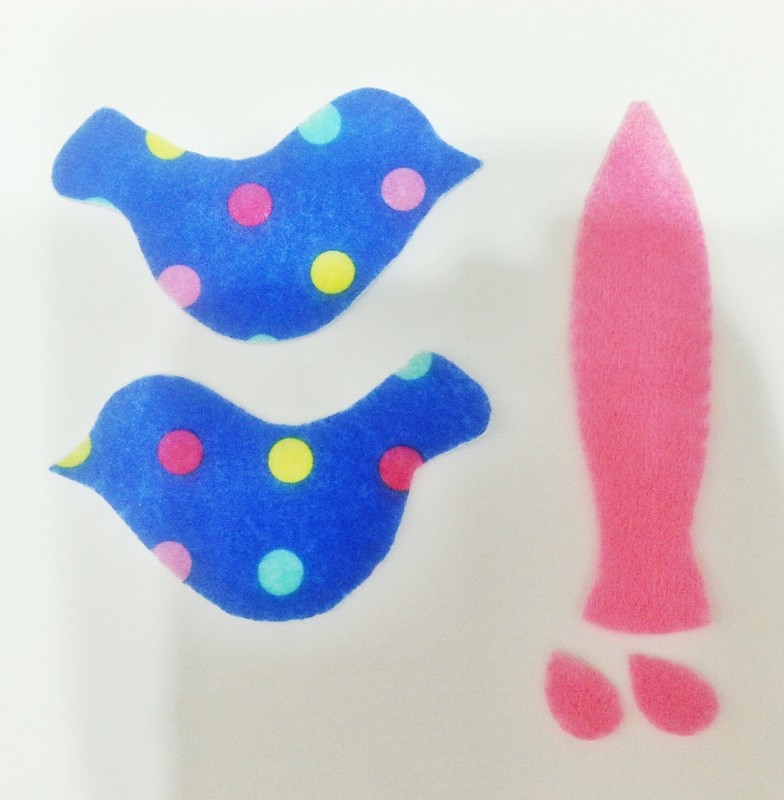
Also cut out one elongated piece from the matching felt for the stomach and two smaller teardrop-shaped pieces for the wings on either side of the bird's body as shown. -
 Step 2
Position the small wings of a matching colour (I chose to use the same coloured felt for the wings and stomach but you could experiment with your choice of colour) and stitch the small wings onto each of the front and back felt pieces of the body.
You could use either the backstitch or running stitch in a contrasting colour to stitch the wings onto either sides of the body.
-
 Step 3
1. Position and stitch along the top edges of both sides of the polka felt fabric (from just under the 'beak' then back over to the top of the head and body and finally to the bottom of the tail) using the whip stitch in matching embroidery thread.
2. Next, position (or tack if needed) the elongated felt of the stomach to the sides of the bottom edge of either sides of the birdie's body.
3. Be careful to position the beginning of this piece of felt from the 'neck' region of the birdie leading to the bottom of the tail (so that it does not turn out to look more like a 'whale' or a whistle as mine admittedly looks like from certain angles!)4. Stitch along each side of the stomach using the whip stitch in matching embroidery thread. Just before you reach the end, fill the birdie with stuffing before the final stitches.
And, you're done! :)