


About
Create colorful stained glass pendants using glass floral stones, nail polish and spray paint.
I came up with this idea to use up a hefty supply of large, flat, glass floral stones taking up space in my craft cabinet. I also had a large supply of inexpensive nail polishes on hand from other craft projects.
Making these pendants does require patience (waiting times between steps), attention to detail and a steady hand. If you enjoy intricate crafting, you will enjoy this project. It is less time intensive in the long haul if you work on several pendants at a time.
Each time I wear one of these pendants, I receive tons of compliments. They make wonderful gifts. This is a versatile pendant that can be worn with many different shades.
Tags
-
 Kd L. favorited Faux Stained Glass Pendant
22 Dec 19:26
Kd L. favorited Faux Stained Glass Pendant
22 Dec 19:26
-
rene c. favorited Faux Stained Glass Pendant
29 Oct 16:03
-
 Emma H. favorited Faux Stained Glass Pendant
01 Nov 21:36
Emma H. favorited Faux Stained Glass Pendant
01 Nov 21:36
-
 Leia B. favorited Faux Stained Glass Pendant
20 Mar 23:07
Leia B. favorited Faux Stained Glass Pendant
20 Mar 23:07
-
vikki g. favorited Faux Stained Glass Pendant
14 Aug 17:21
-
 Cindy S. favorited Faux Stained Glass Pendant
16 Jul 02:19
Cindy S. favorited Faux Stained Glass Pendant
16 Jul 02:19
-
 BarryBelcher favorited Faux Stained Glass Pendant
02 Jun 13:06
BarryBelcher favorited Faux Stained Glass Pendant
02 Jun 13:06
-
Susanna Q. added Faux Stained Glass Pendant to Accessories
08 Apr 23:55
-
 Sue W. favorited Faux Stained Glass Pendant
07 Mar 18:14
Sue W. favorited Faux Stained Glass Pendant
07 Mar 18:14
- Monika Gottindottir favorited Faux Stained Glass Pendant 28 Jan 00:56
-
 Step 1
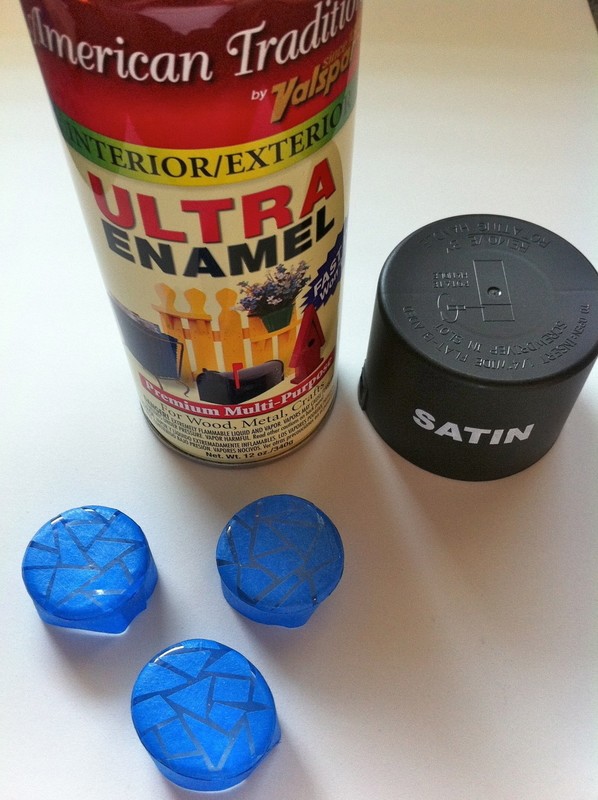
While you can purchase high-quality glass tiles (cabochons) to complete this project, I simply went to a local craft store and bought a bag of large, flat glass floral stones.
For best results, try to find floral stones that are clear and don't have an iridescent glaze. While the iridescent glaze is pretty, it does not produce the best results on painted glass projects.
The floral stones will have a flat side(which is the side you will paint), and a domed side (from which side you will view the painted image).
-
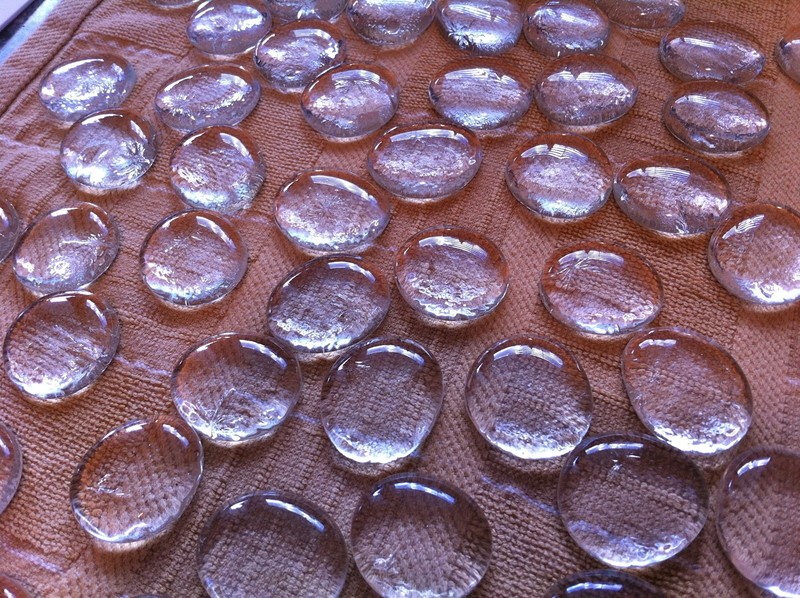
 Step 2
Wash and dry the glass floral stones to remove any residue. Sort through the stones to find ones that are fairly uniform in shape (circular or oval) and have no scratches or imperfections on the dome.
There may be minor air bubbles in the glass or small imperfections on the flat side, but those imperfections become invisible for the most part once you paint the stone and are viewing the image from the top.
-
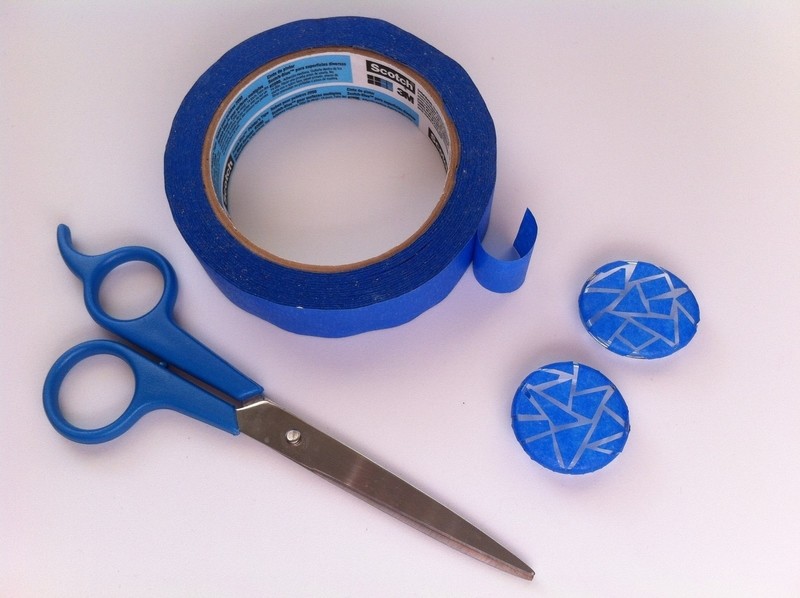
 Step 3
After selecting your preferred stones, turn the stones upside down (so the flat side is facing up).
Cut small triangles and various shapes out of painter tape, and arrange the shapes on the flat side of the stone so it creates a mosaic type of pattern.
Leave a fairly uniform amount of space around each piece of tape as shown in this photo. All the exposed areas will eventually become a solid color grid. All the areas you are taping off will eventually be painted different colors.
-
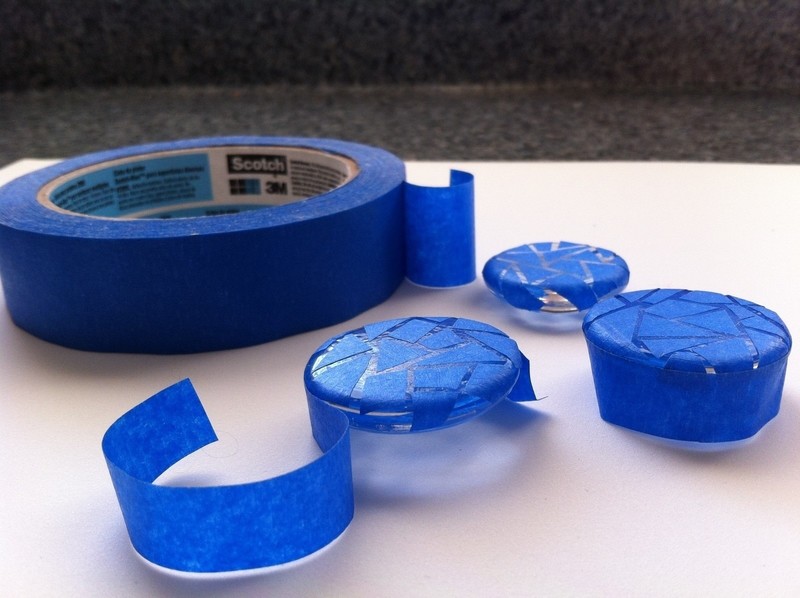
 Step 4
Here is a close-up of the stone after the mosaic pattern has been completed.
Tip: Wrap the tape slightly over the rim of the stone. Don't cut the shapes off right at the rim/edge. When you start painting the color panels later, you will want the color to extend slightly beyond the rim and over the edge of the stone.
-
 Step 5
After you have completed the mosaic pattern on the flat side of the stone, add a final piece of tape around the perimeter of the stone as shown in the photo. The edge of the tape should be positioned slightly below the rim of the stone.
-
 Step 6
Here is a close-up of the stone fully taped off before you apply the initial layer of paint to create the grid.
Tip: Run you fingernail across all the tape to ensure it has adhered well to the stone. This will prevent any paint from leaking under the taped off area.
-
 Step 7
Time to apply some black spray paint to create the grid. You can use whatever color you wish to create the grid, but I used black enamel paint (Satin finish). Through trial and error, I discovered that using spray paint works better than applying paint or nail polish with a brush to create the grid. There is less tendency for the paint to seep under the taped off areas.
Depending on the paint you are using, apply 2-3 light coats. Don't spray too heavily.
Tip: Allow adequate time for the paint to dry between applications. When the paint is dry between coats, check your progress by turning the stone over to view the grid from the top. This way you can clearly see if the paint is not evenly applied.
-
 Step 8
Here is a close-up of the initial layers of paint to create the grid.
-
 Step 9
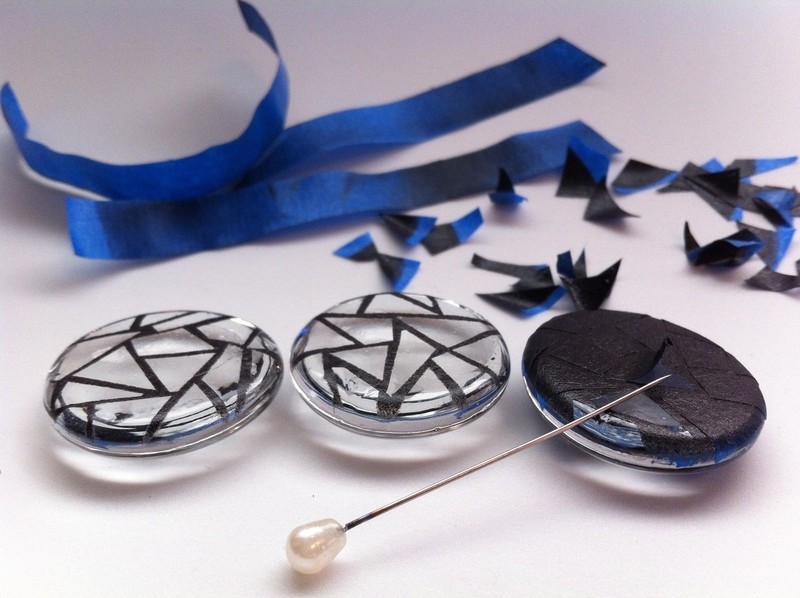
After the paint has fully dried, carefully peel off the tape from the outer rim, then, using a needle to assist you, pick off the small triangles and other shapes you adhered to the stone earlier.
Work very slowly as you peel off the small pieces of tape so you don't take off any areas of the grid.
-
 Step 10
After you have peeled off all the tape, carefully inspect the stone to see if the grid is intact or if there is any stray paint that needs to be cleaned before moving to the next step.
I cautiously use pointed Q-tips (these are actually made for cleaning mascara boo-boos) and 100% Acetone (nail polish remover) to clean off any stray paint.
If small areas of the grid flecked off while removing the tape, you can use a small detail paint brush (available at any art store) and some black nail polish to touch up those areas. (The paint brush can be easily cleaned afterwards in 100% Acetone nail polish remover).
-
 Step 11
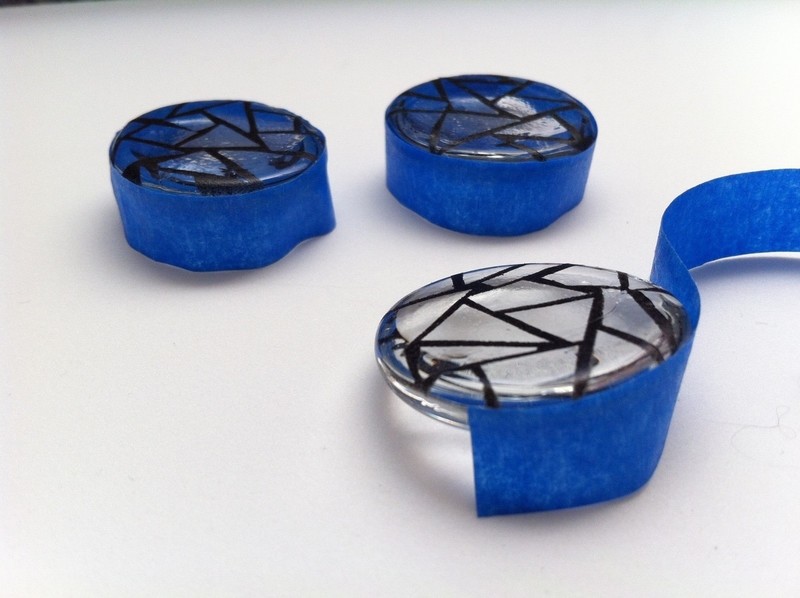
Once you have inspected the grid and are ready to move forward, reapply a piece of tape around the perimeter of the stone. Once again, the tape should be applied slightly below the rim/edge of the stone as shown in this photo.
-
 Step 12
Your next step is to seal the grid. This is an important step before you apply any nail polish with a brush. If you drag a brush over the grid without applying this layer of protection, it is possible the grid will bleed into the polish. (Ask me how I know this?!!!)
Spray one or two light coats of clear enamel over the grid.
Allow adequate time for drying.
-
 Step 13
Next, apply one or two layers of a fine-glitter, holographic top coat. While all other nail polishes in this project can be inexpensive ones you find at the dollar store, do try to find a nice holographic fine-glitter top coat for this step.
The one I use is INM's Northern Lights. It is a topcoat that comes in either silver or gold holographic glitter.
The properties of the holographic polish make the final stained glass pendant appear to shimmer in the light.
-
 Step 14
After applying the holographic top coat, you can now brush on various colors of nail polish.
I use very inexpensive, opaque, cream-style nail polishes.
Stay away from glitter nail polishes or polishes with pearlescent or other unique finishes. Simple cream colors work best on this project.
It usually takes about 3 coats to fully cover each colored section.
As the layers dry, hold the stone up to the light and view it from the front to ensure you aren't missing any areas.
For the most part, I use the brush from the nail polish bottle to apply the color, but in some instances, I utilize a small detail paint brush to ensure the polish is fully distributed all the way to the edges of the grid. You don't want even the smallest area left unpainted as it will show through when viewing the pendant from the front.
If you use a regular paint brush to apply the polish, you can clean it afterwards with 100% acetone nail polish remover.
-
 Step 15
Once all the colored nail polishes have dried, it is time to finish painting the back of the pendant.
I tried doing this different ways, but found the following to work the best.
Apply one or two coats of a semi-transparent red across the entire back. For whatever reason, the red seems to brighten up the colors when you view the pendant from the front. Allow adequate drying time between coats.
Apply one or two coats of black polish. Allow adequate drying time between coats. The final black coats are optional, but will deepen the colors slightly. The black polish will also give the pendant a more finished appearance.
Finish off the pendant with one or two coats of clear polish.
After applying the final coat of nail polish, peel off the tape around the stone. You may need to use a Q-tip and some nail polish remover to tidy up the edge.
-
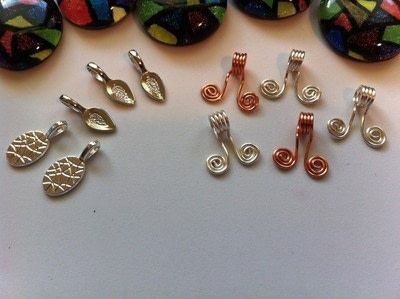 Step 16
You are almost done! Time to pick a bail to glue onto the back of the pendant. You can find pendant bails at your local craft store (such as the two different bails shown on the left in this photo). Or, you can make your own bails out of jewelry wire (such as the bails appearing on the right in this photo).
For these bails, I used 6 1/2 inches (16.5 cm) of 18-gauge jewelry wire. I made 4 loops around a small mandrel then spiraled the ends as shown.
-
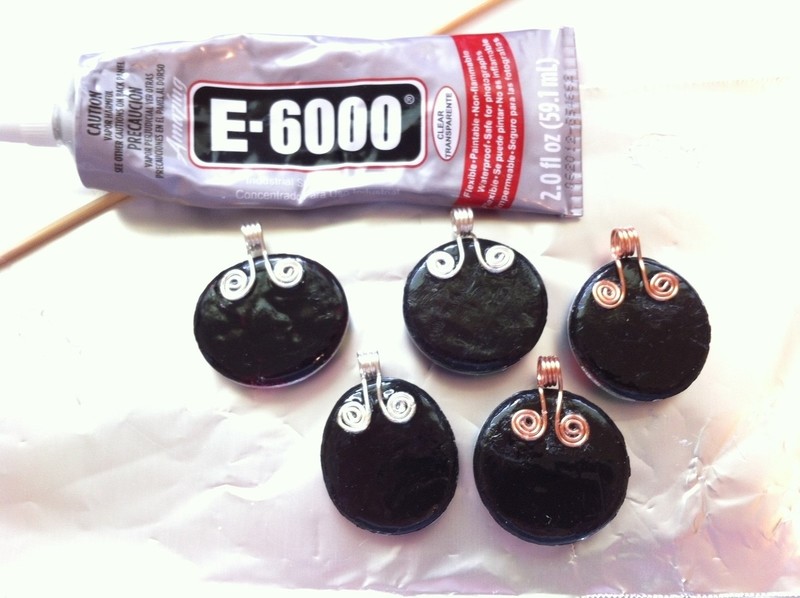
 Step 17
Using a strong adhesive, such as E-6000 glue (excellent for jewelry), position your bails then glue them in place. Allow 24 hours for them to dry before trying to wear your pendant.
After drying, you can pick off any excess glue on the back of the pendant. DO NOT use any kind of solvent to remove the excess glue as it could also take off the nail polish.
-
 Step 18
Time to enjoy your beautiful faux stained glass pendant.
-
 Step 19
Wear your pendant on a chain or wire choker. Prepare to be complimented!


Versions


Comments


