


About
I’m so excited. I have just made my first successful pair of fairy wings! .
Here is my little boy kindly modeling them for me, and yes he actually wanted to wear them
In my research on how to make fairy wings I found mostly tutorials on the wire coat hanger technique, you know, you get the coat hangers (or just wire shapes) cover them with pantyhose and join them together. But of course I had to be different.
I wanted something a bit lighter and not so awkward so I decide to use layered tulle.
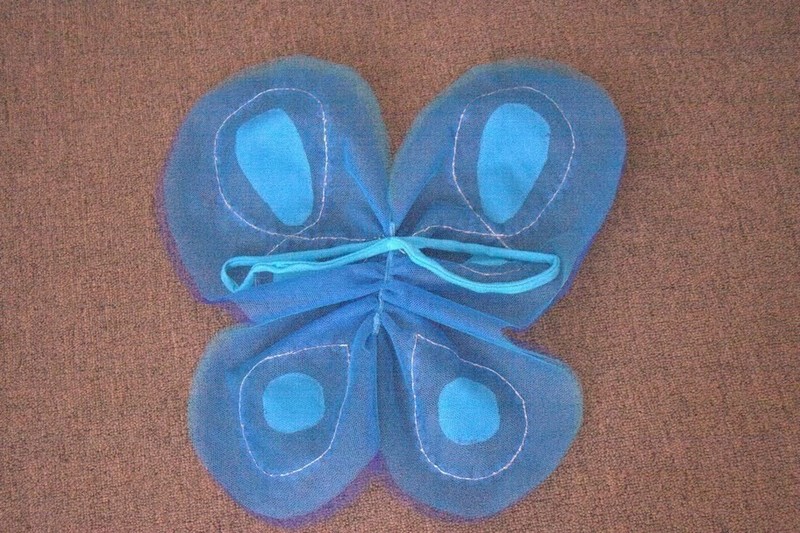
I used four layers, two turquoise and two dark blue, cut into a wing shape and then gathered up the middle. The two colours were overlapped slightly when I stacked them to show a variation of colour at the edges.
Tags
-
 Key West Witch favorited Fairy Wings
06 May 18:54
Key West Witch favorited Fairy Wings
06 May 18:54
You Will Need
-
 Step 1
To cover up the stitching I sewed on some blue cord/braid over the top. I put shapes in the middle of the tulle and stitched around the edges through all the layers.
-
 Step 2
I also threaded some fishing wire through the wings in a loopy pattern for stiffness. To cover this up, on the back where you see most of the wings I sewed braid over the top of the wire and on the front I used some silver dimensional fabric paint.
For the straps I covered some elastic with fabric and hand stitched them in place on the front.
I had lots of fun making these. If I was going to make them quicker I think I would cut the wing shapes smaller and use more layers of tulle. Then there won’t be the need to add anything to stiffen them out.

Comments


