


About
Embroidery
Please excuse the random threads, forgot to trim them before photo!
Made this for my GCSE Textiles last year.
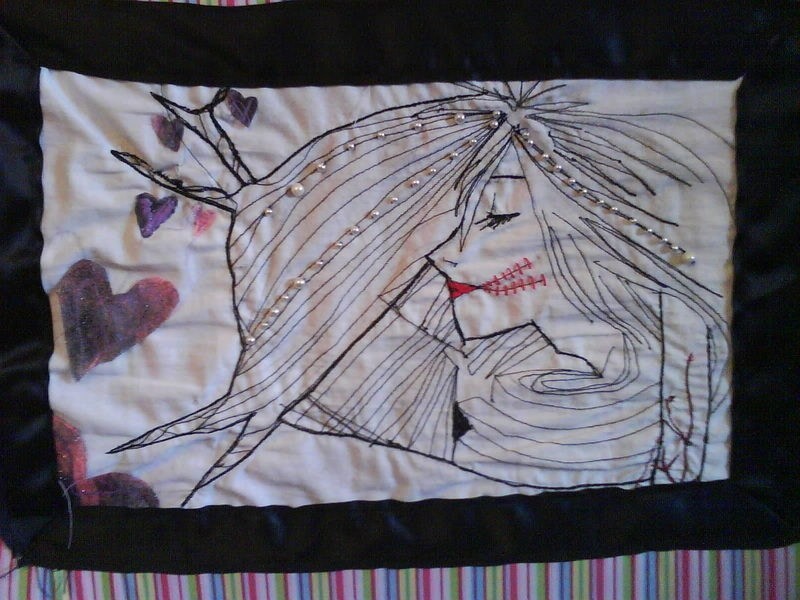
There are two pictures, but the only difference is one uses black and red thread, with plastic pearls, and the bottom one uses any colour thread you can get your hands on, and yarn couched in the hair.
-
 RaspberrySourZ added Embroidery Wall Hanging to Projects I want to try.
15 Aug 20:35
RaspberrySourZ added Embroidery Wall Hanging to Projects I want to try.
15 Aug 20:35
-
 Step 1
I used about 30x15cm rectangle of white cotton to begin with. Sketch out your design on the cotton, and begin to machine stitch the hair, and the other bits that only need a running stitch.
-
 Step 2
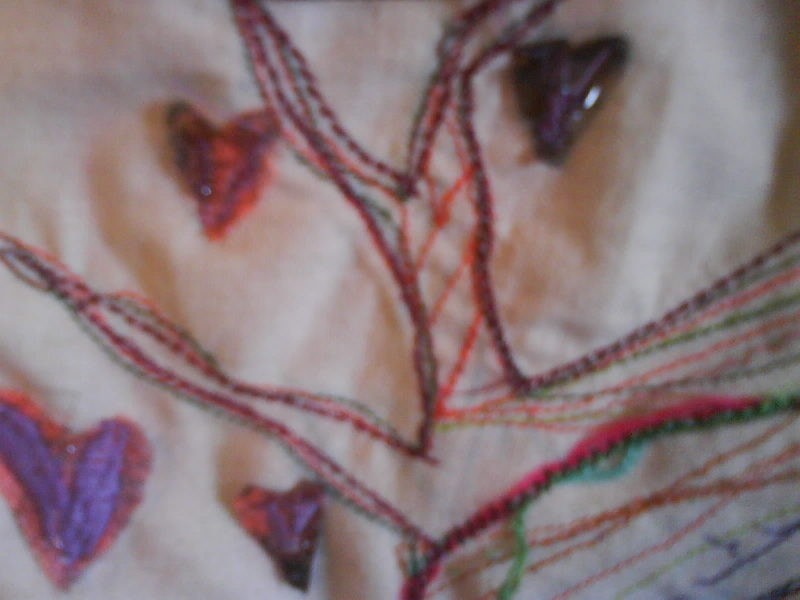
Use a thicker width stitch to outline features, like the branches on the tree, strands of hair and the girls face.
Once you are all finished with the black, you can stitch the lips and veins. -
 Step 3
Hand stitch the pearls onto the black image, sewing along a strand of hair.
-
 Step 4
Using a zigzag stitch, couch the yarn into the hair. Try and use really bright colours to contrast with the other image.
-
 Step 5
Option one: Get a handful of Angelina Fibre. Spread it out between 2 sheets of newspaper, and iron. You will 6 small hearts, 2 medium and 2 big hearts. Applique them on the branches and down to the bottom left corner.
Option two: Make hearts from scraps of fabric, same quanity
-
 Step 6
Almost done! Now you just need to neaten up the edges of your white peices. I made a thick black ribbon border by cutting 4 lengths to size, sewing them together and then onto the white cotton.
-
 Step 7
I had a canvas frame lying about, so I mounted my images onto a background fabric then stretched the fabric across the frame and stapled it on.
MAKE SURE YOU STAPLE THE FABRIC TO THE MIDDLE OF THE FRAME FIRST, AND THEN AROUND.


Really creative, awesome job
Am in my first year of GCSE textiles
ot it back last month, just need to find a place to hang it.