


About
Very easy, and only require a few materials! :)
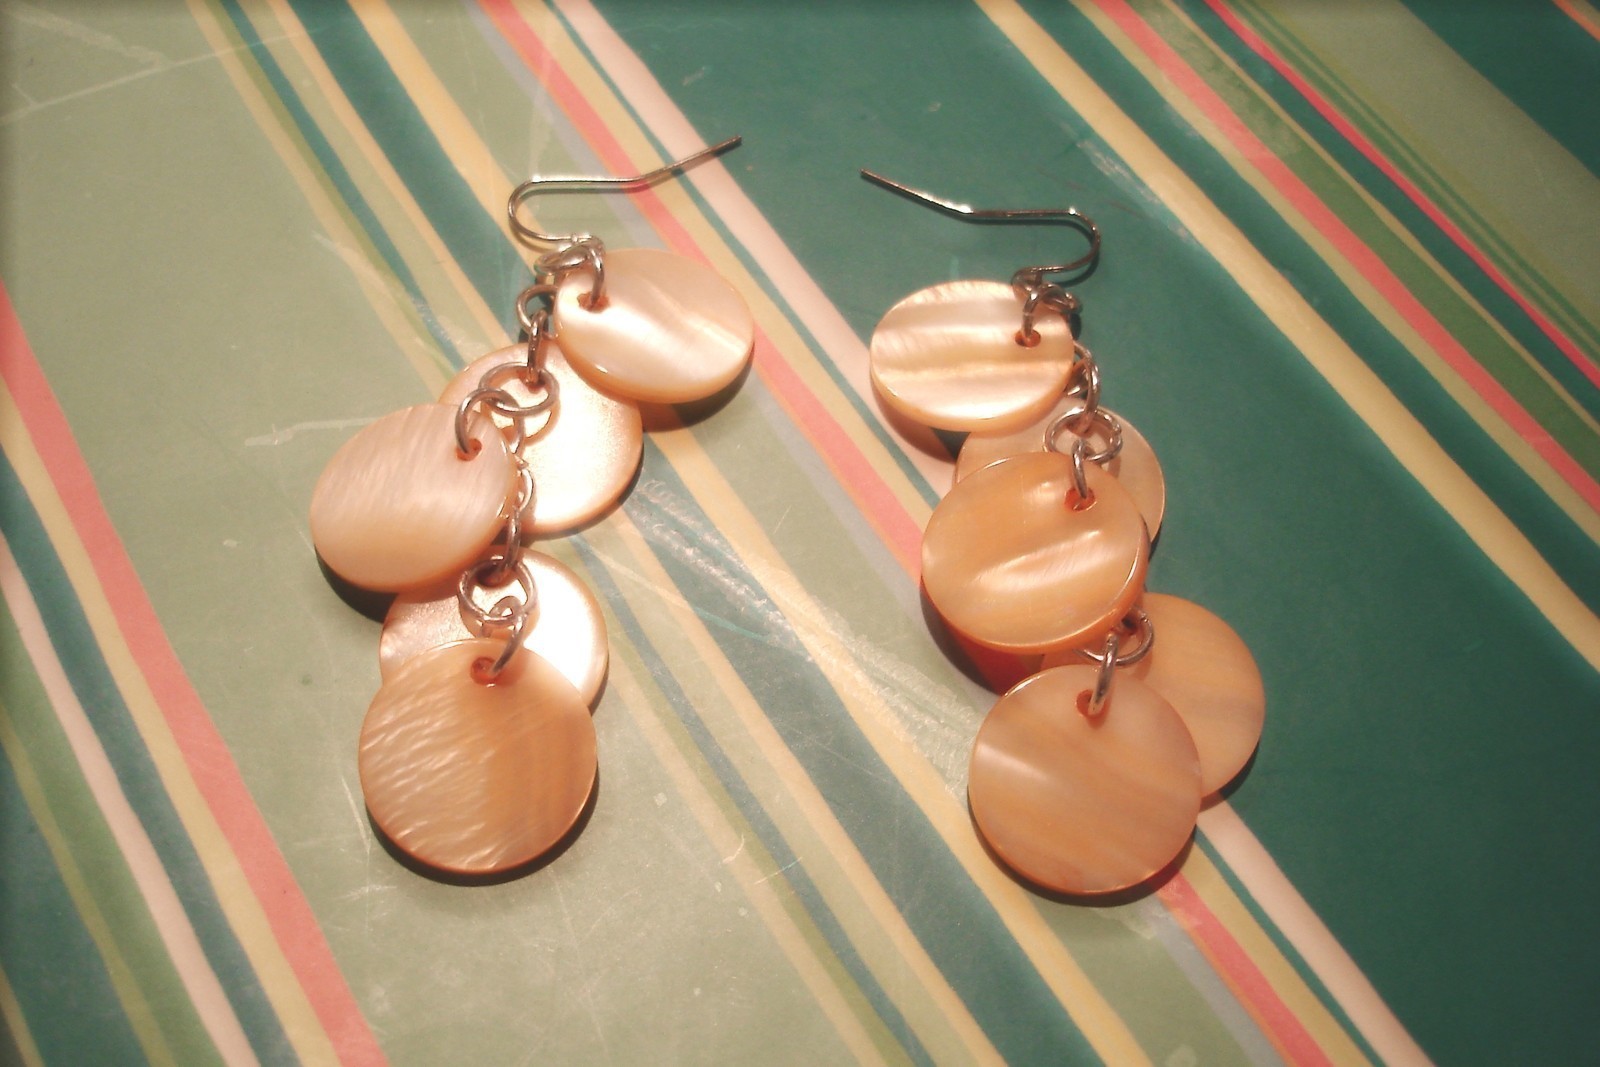
My first tutorial--hope you enjoy!!
I found a bunch of buttons at my local sewing store in the sale bin--69¢ for 12. I thought they would look great as earrings, but didn't want to do something crazy to make them. I finished them in about 20 minutes, from what I remember.
Great for beginners! And I know you can get creative with any other beads, trinkets or whatever else using the jump ring chain thing I have going on.
NOTE: When attaching rings with beads on them, the orientation of the bead (front or back of earring) changes the look. Anyway looks nice, but experiment with what you like!
-
 Marla D favorited Easy Pretty Dangly Earrings
23 May 17:56
Marla D favorited Easy Pretty Dangly Earrings
23 May 17:56
-
 Aïcha P. added Easy Pretty Dangly Earrings to Bijoux
19 Apr 19:49
Aïcha P. added Easy Pretty Dangly Earrings to Bijoux
19 Apr 19:49
-
Lashanda P. favorited Easy Pretty Dangly Earrings
11 Jan 21:04
-
 Randi A. favorited Easy Pretty Dangly Earrings
15 Sep 08:02
Randi A. favorited Easy Pretty Dangly Earrings
15 Sep 08:02
-
 Step 1
First off, make sure you have all of your materials:
- Some amount of single-holed buttons or beads (I used ten, 5 for each earring)
- Twice as many jump rings as you have buttons/beads
- 2 earring hooks
- Jewelry pliers, or any pliers you have lying around, as long as their nose fits into the jump rings -
 Step 2
Open up one of your jump rings using the pliers so that you can fit in other rings.
-
 Step 3
Slide one of the earring hooks onto the jump ring and squeeze closed using the pliers.
-
 Step 4
Take one of the beads and another jump ring. Open up the jump ring and slide in the bead. Before you close it, slide the jump ring that was attached to the earring hook onto your open jump ring.
-
 Step 5
You will now have an earring hook attached to a jump ring attached to another jump ring, attached to a bead.
-
 Step 6
Now, open up another jump ring and attach it to the jump ring with the bead. You will have a nice row of jump rings with a bead hanging on the side.
-
 Step 7
Open yet another jump ring, attach it to the last jump ring on the earring, and before closing, attach a bead. Do you see the pattern? Repeat this for the rest of the earring and this pattern will result:
- Earring Hook, Jump Ring, Jump Ring with Bead, Jump Ring, Jump Ring with Bead, Jump Ring, Jump Ring with Bead, Jump Ring. Jump Ring with Bead, Jump Ring, Jump Ring with Bead
-
 Step 8
AND...you're done! Fancy danglies in a super short amount of time! And inexpensive too! Enjoy! But don't forget; to disinfect. ;)
*PS: I used my last two beads to make a matching necklace as seen in one of the main project pictures. I used the same method with the jump rings and strung it onto a neck chain! If you have leftovers, this is a nice way to use 'em up :)


