


About
Easy and quick choker
I was asked for a how-to for my cameo choker - for the tutorial I made a choker exactly the same way, but with slightly different colors and decoration ;D
Again I hope everything will be understandable... if you have any questions please ask. If you find any words that obviously aren't English please tell me, too ^^
-
 Jenny P. added Easy And Quick Choker to Accessories DIY
30 Apr 00:27
Jenny P. added Easy And Quick Choker to Accessories DIY
30 Apr 00:27
-
 Kay T. favorited Easy And Quick Choker
12 Nov 08:24
Kay T. favorited Easy And Quick Choker
12 Nov 08:24
-
 kendermouse favorited Easy And Quick Choker
24 Jul 22:56
kendermouse favorited Easy And Quick Choker
24 Jul 22:56
-
 Laura Panda Scissorshands added Easy And Quick Choker to To make...
06 Jul 07:58
Laura Panda Scissorshands added Easy And Quick Choker to To make...
06 Jul 07:58
-
Laura R. Aurora Horrora favorited Easy And Quick Choker
20 May 22:16
-
 Miss_Fit added Easy And Quick Choker to Necklace Like Things
30 Mar 23:37
Miss_Fit added Easy And Quick Choker to Necklace Like Things
30 Mar 23:37
-
 Miaka entered their project Easy And Quick Choker to Mix Tape Zine
16 Jul 12:19
Miaka entered their project Easy And Quick Choker to Mix Tape Zine
16 Jul 12:19
-
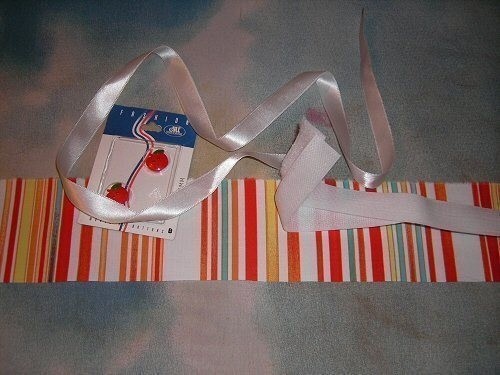
 Step 1
Gather your material... I forgot to put the bias tape there, sorry.
The length of the fabric is your neck size + ~3cm, for the width you have to decide how wide your choker is going to be, for example 2cm. Add 1cm seam allowance and multiply this by 2 -> the width would be 6cm. -
 Step 2
Fold your fabric, right side on right side
-
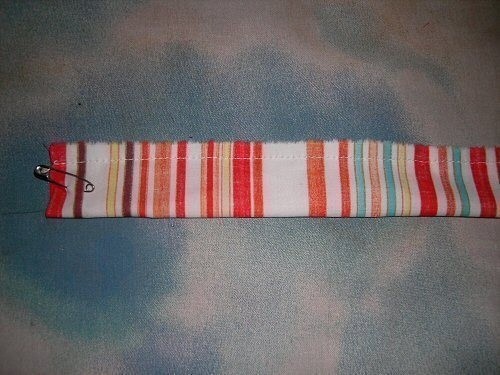
 Step 3
Sew the open side, remembering your seam allowance.
The safety pin is used to make the next step easier... -
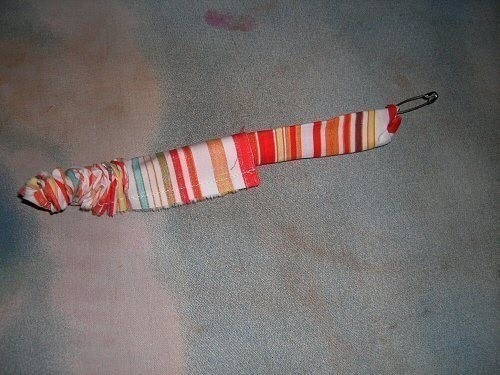
 Step 4
... which is turning the fabric inside out.
-
 Step 5
Have fun ironing it!
-
 Step 6
Now sew along the sides of the choker... this isn't really a "must", but it makes it look nicer ;)
-
 Step 7
Now it's time for the bias tape... Cut two pieces that are slightly longer than the open side of your choker. Sew them on the open sides like shown in the picture
-
 Step 8
Fold the sides around the choker like shown in the picture. Then fold the other side around.
I really hope this makes sense Oo But I guess most people have used bias tape, so... erm.You don't have to use bias tape by the way, you can also use a zigzag stitch to stop the end from fraying.
-
 Step 9
Sew the folded bias tape on. Now you should either have a choker with neat ends or started planning to shoot me for my bad explanations ;_;
-
 Step 10
Cut two pieces of velcro that are a bit smaller than 3cm, that's how much the choker should overlap.
Sew them onto the ends of the choker.Use the softer side of the velcro for the side of the choker that will be facing your neck. That way it won't scratch if you don't close the choker completely.
-
Step 11
Now your choker is finished except for the decoation.
For the black/white coker I sewed some lace onto the sides of the choker and a cameo in the middle of it.The other steps show how I did the decoraion the the colorful one...
-
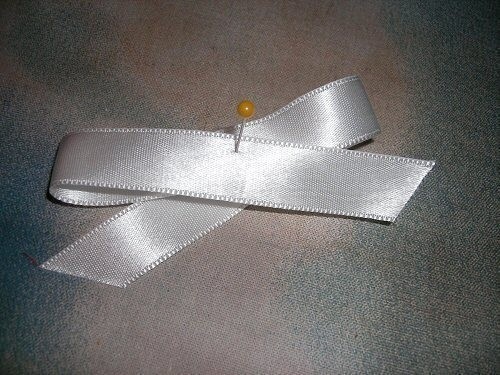
 Step 12
Take your ribbon and fold it like a bow. You will probably have to fiddle about a bit with the length of the ribbon until it looks good
-
 Step 13
Sew the "knot" of the bow with a few stitches (and yes, I mean by hand ^^)
-
 Step 14
Sew the bow to the middle of the coker
-
 Step 15
Sew the button onto the "knot" of the bow so the stitches will be hidden. And guess what?
It's finished!


Krass, wirkt völlig anders... Gnaaaah, ich will Halsbänder nähen... JETZT... .____.