


About
Simple, Chic, Inexpensive, Timeless Wall Art
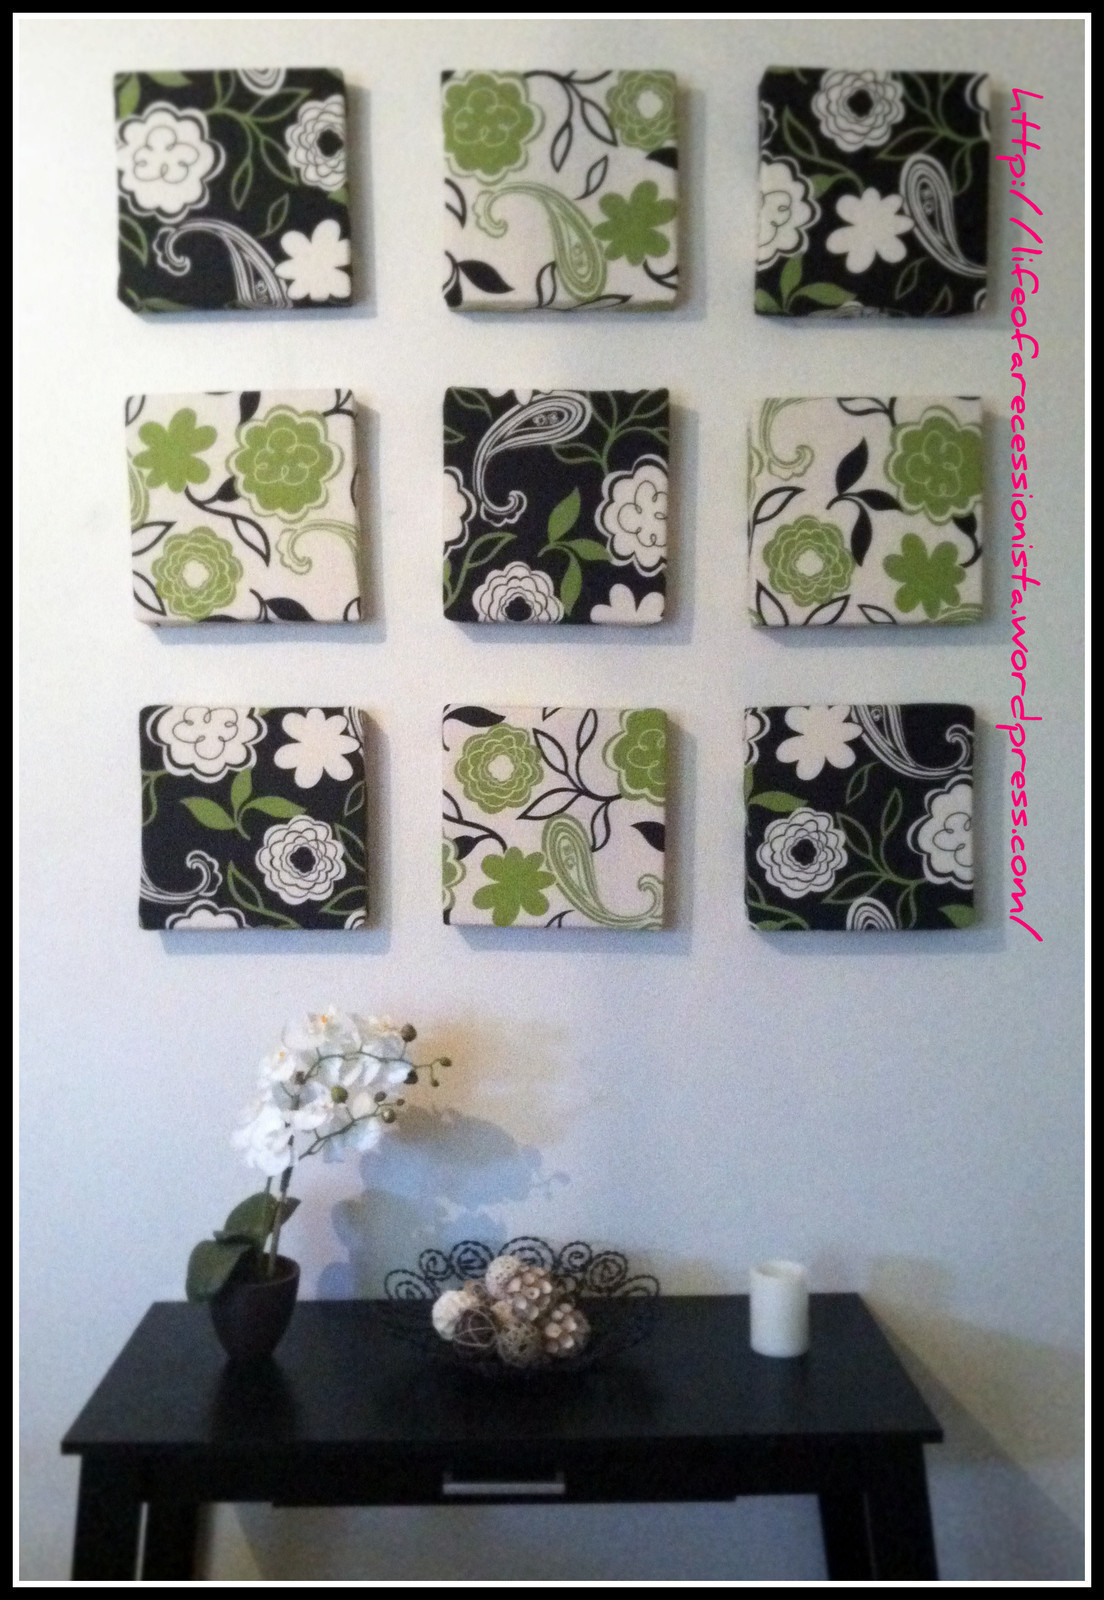
I have this huge bare wall in my apartment and needed something to tie together my green walls with the black accents in my kitchen. Honestly, the results were much better than I expected. This DIY consists basically of covered pieces of styrofoam. It is super easy, inexpensive and looks amazing. I covered the foam with fabric to give it that “canvas” style look. In total I spent $40 to create the display ($20 foam, $16 fabric, and $4 glue; the rest I had lying around the house). I purchased the table at Walmart for $50.
-
 Amanda P. added Easy Diy Wall Art to Canvas Art
17 Jun 22:25
Amanda P. added Easy Diy Wall Art to Canvas Art
17 Jun 22:25
-
Jill P. added Easy Diy Wall Art to Home Decor
19 Oct 11:41
-
Jill P. favorited Easy Diy Wall Art
19 Oct 11:40
-
 witterings favorited Easy Diy Wall Art
13 May 09:58
witterings favorited Easy Diy Wall Art
13 May 09:58
-
Kursus 7. favorited Easy Diy Wall Art
10 Dec 06:52
-
Dee D. favorited Easy Diy Wall Art
06 Feb 18:42
-
Rebecca M. favorited Easy Diy Wall Art
05 Jan 14:45
-
Mignon D. favorited Easy Diy Wall Art
20 Jan 22:11
-
 Sarah S. added Easy Diy Wall Art to Things to spruce up a room
19 Jan 06:19
Sarah S. added Easy Diy Wall Art to Things to spruce up a room
19 Jan 06:19
-
 ash.pem.9 favorited Easy Diy Wall Art
15 Aug 22:29
ash.pem.9 favorited Easy Diy Wall Art
15 Aug 22:29
-
 Step 1
Measure and cut the foam into the desired shape. I chose to cut it into squares. Tip: I would recommend purchasing the white solid foam. The one I purchased was the clear, “plasticky” one and unfortunately would soak up the glue like a sponge.
-
 Step 2
Cut the cardboard pieces into the same shape as the foam and glue it onto what will be the backside of your wall display. Tip: I used office folders that I had lying around the house and cut them down the middle and as you can see, they’re not the same size as the foam. This didn’t help much in step #4 since the foam soaks up the glue from the fabric so I would recommend that the cardboard be the same size as the foam. Trust me.
-
 Step 3
Measure your fabric so that you have enough to completely cover the front and sides of the foam but leaving an opening in the backside. I purchased two different fabrics. they were the same pattern but inverted colors. Since I had a total of nine foam squares, I cut 5 squares of one fabric and 4 of the other to create a checkerboard effect.
-
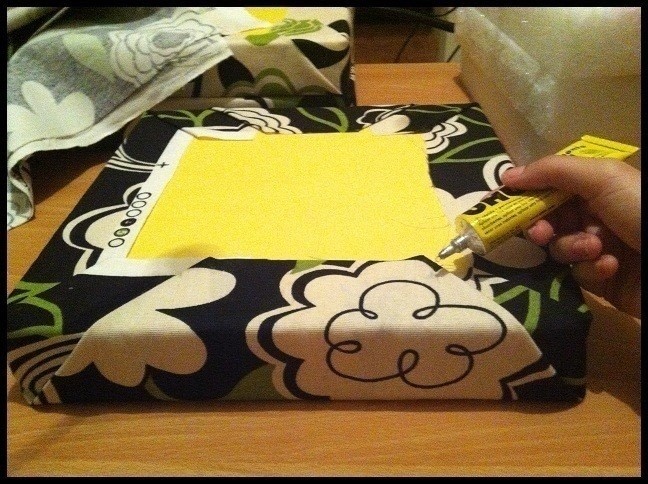
 Step 4
Glue the fabric onto the foam squares leaving the cardboard side exposed. Let dry for 24 hours. Tip: Fold the fabric as if you were wrapping a gift and glue the ends and the corners where you would apply tape if you were wrapping a gift. Let dry 24 hours.
-
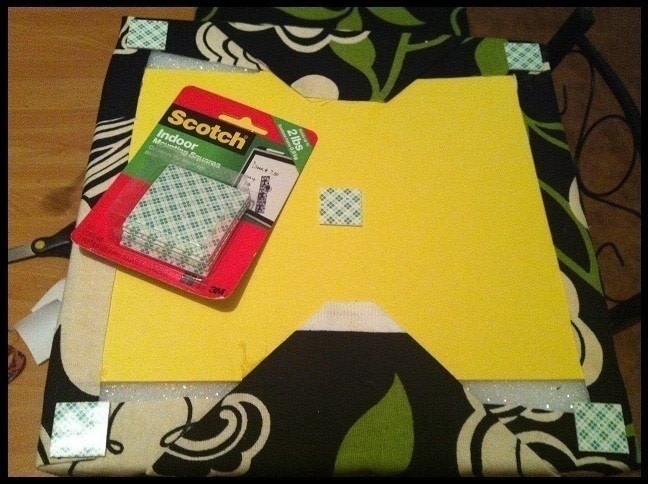
 Step 5
Apply the mounting squares to the back of your display. Hang on the wall and your done!


Comments


