

About
Easy to Pick Up, Hard to Put Down: Basic Wallet with Two Pockets
LEVEL 2: TIME: 20 minutes
While a wallet can simply be an accessory that gets the job done, a duct tape wallet can be designed to fit your needs perfectly and express your personal style at the same time. Plus, making your own wallet out of duct tape will save you a trip to the department store and allow you to keep some of your hard-earned cash in that wallet.
-
 Miss_Fit favorited Duct Tape Wallet
07 Jul 03:12
Miss_Fit favorited Duct Tape Wallet
07 Jul 03:12
-
 Wendy Z. favorited Duct Tape Wallet
22 Nov 16:20
Wendy Z. favorited Duct Tape Wallet
22 Nov 16:20
-
 Suzi T. favorited Duct Tape Wallet
08 Nov 18:57
Suzi T. favorited Duct Tape Wallet
08 Nov 18:57
-
 Nava J. favorited Duct Tape Wallet
27 Oct 19:16
Nava J. favorited Duct Tape Wallet
27 Oct 19:16
-
 Julie K. favorited Duct Tape Wallet
26 Oct 12:25
Julie K. favorited Duct Tape Wallet
26 Oct 12:25
-
 Southern Crafter added Duct Tape Wallet to To-make list
23 Oct 06:37
Southern Crafter added Duct Tape Wallet to To-make list
23 Oct 06:37
-
 emmabota73 favorited Duct Tape Wallet
14 Oct 03:25
emmabota73 favorited Duct Tape Wallet
14 Oct 03:25
-
 Kay Bay favorited Duct Tape Wallet
06 Oct 09:47
Kay Bay favorited Duct Tape Wallet
06 Oct 09:47
-
 Houghton Mifflin Harcourt published her project Duct Tape Wallet
10 Sep 09:07
Houghton Mifflin Harcourt published her project Duct Tape Wallet
10 Sep 09:07
-
 Step 1
Measure 3 1/2 inches up from the bottom of the duct tape fabric and mark it with a dry erase marker. Fold the bottom of the fabric up along this mark.
-
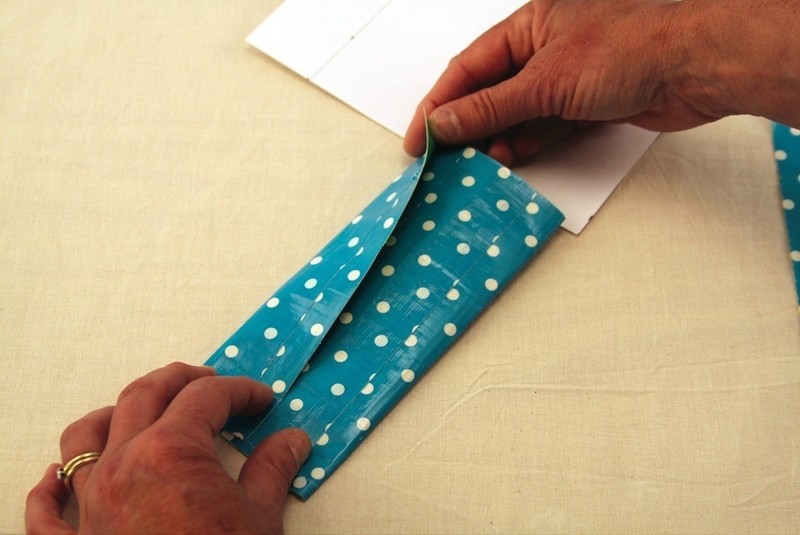
 Step 2
Fold the top of the fabric down so that its crease rests on the top of the bottom flap. The duct tape fabric should now resemble an envelope.
-
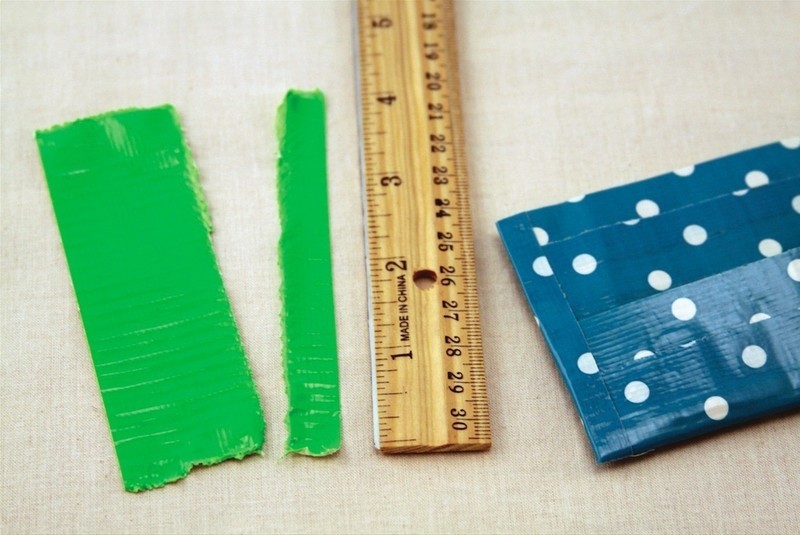
 Step 3
Cut a 4-inch-long piece of duct tape and cut or rip it in half lengthwise, creating two 4-inch strips of duct tape.
-
 Step 4
Seal the short edges of the envelope by laying the 4-inch strips over the open ends. The top flap of the envelope now forms a pocket on the front.
-
 Step 5
Flip the envelope over and fold the strips of tape onto themselves lengthwise to seal the ends.
-
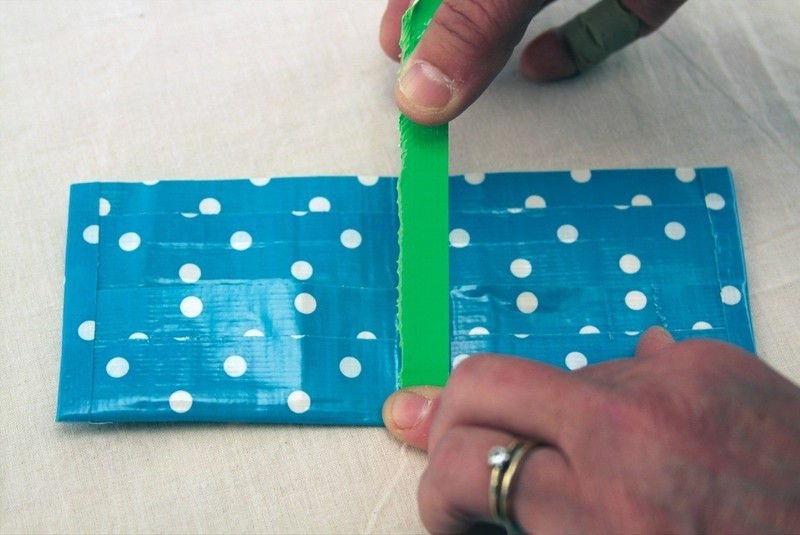
 Step 6
You now have a sealed envelope with a pocket on one side. Open the envelope back up by cutting all the way along the long top side. This will be the part of the wallet where you keep your money. Be sure that the top opening and the existing pocket both have their openings facing the same direction. Trim any overhanging corners of tape.
-
 Step 7
Now you’ll create the individual wallet pockets for the cards. Begin by tearing off a strip of duct tape about 1/4 inch wide and a little longer than the width of the wallet.
-
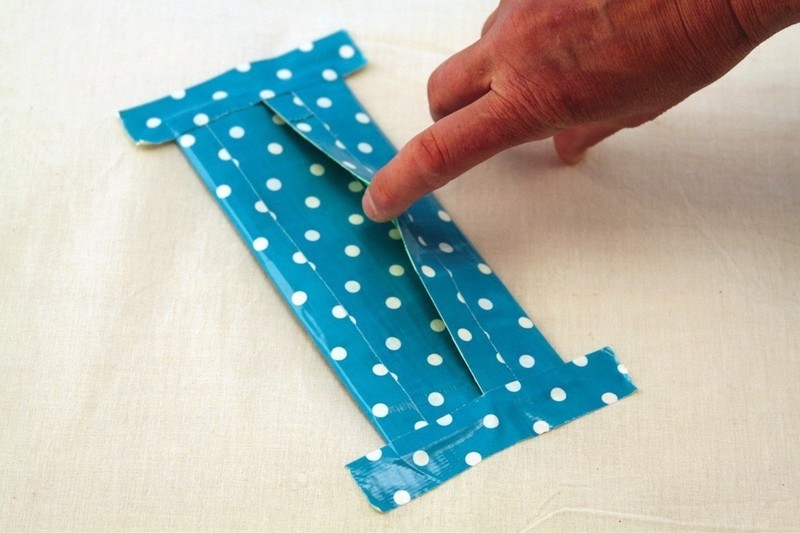
 Step 8
Fold the wallet in half and mark the center with a marker or by creasing it with your finger. Take the strip of duct tape and lay it down the center of the wallet, dividing the front pocket into 2 separate pockets. Tuck any overhanging tape inside the larger money pocket.
-
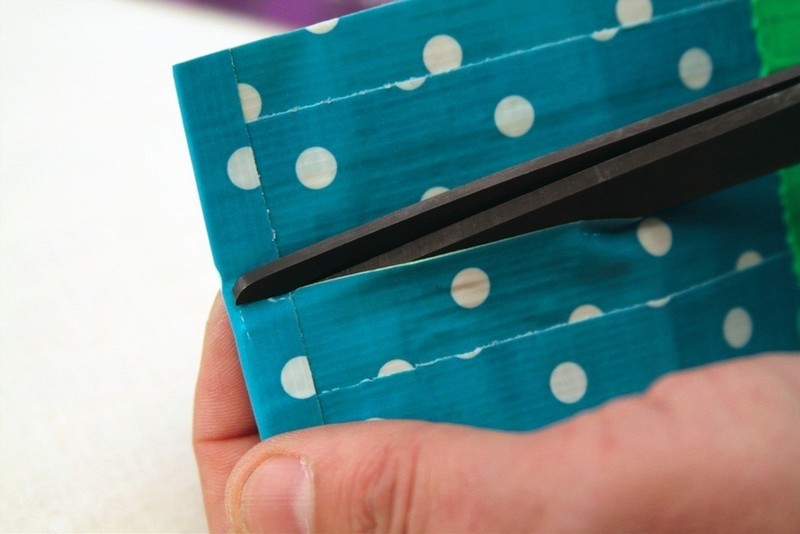
 Step 9
Snip the sealed tape edges where the pocket is formed to allow enough room for the cards. Depending on the size of the wallet, this may not be necessary. Test with the card to see if they will need more room.