

About
"I move from dreamer to dreamer, from dream to dream, hunting for what I need. Slipping and sliding and flickering through dreams; and the dreamers will wake and wonder why this dream seemed different, wonder how real their lives can truly be." Dream, in SANDMAN: "Season of Mists", episode 1
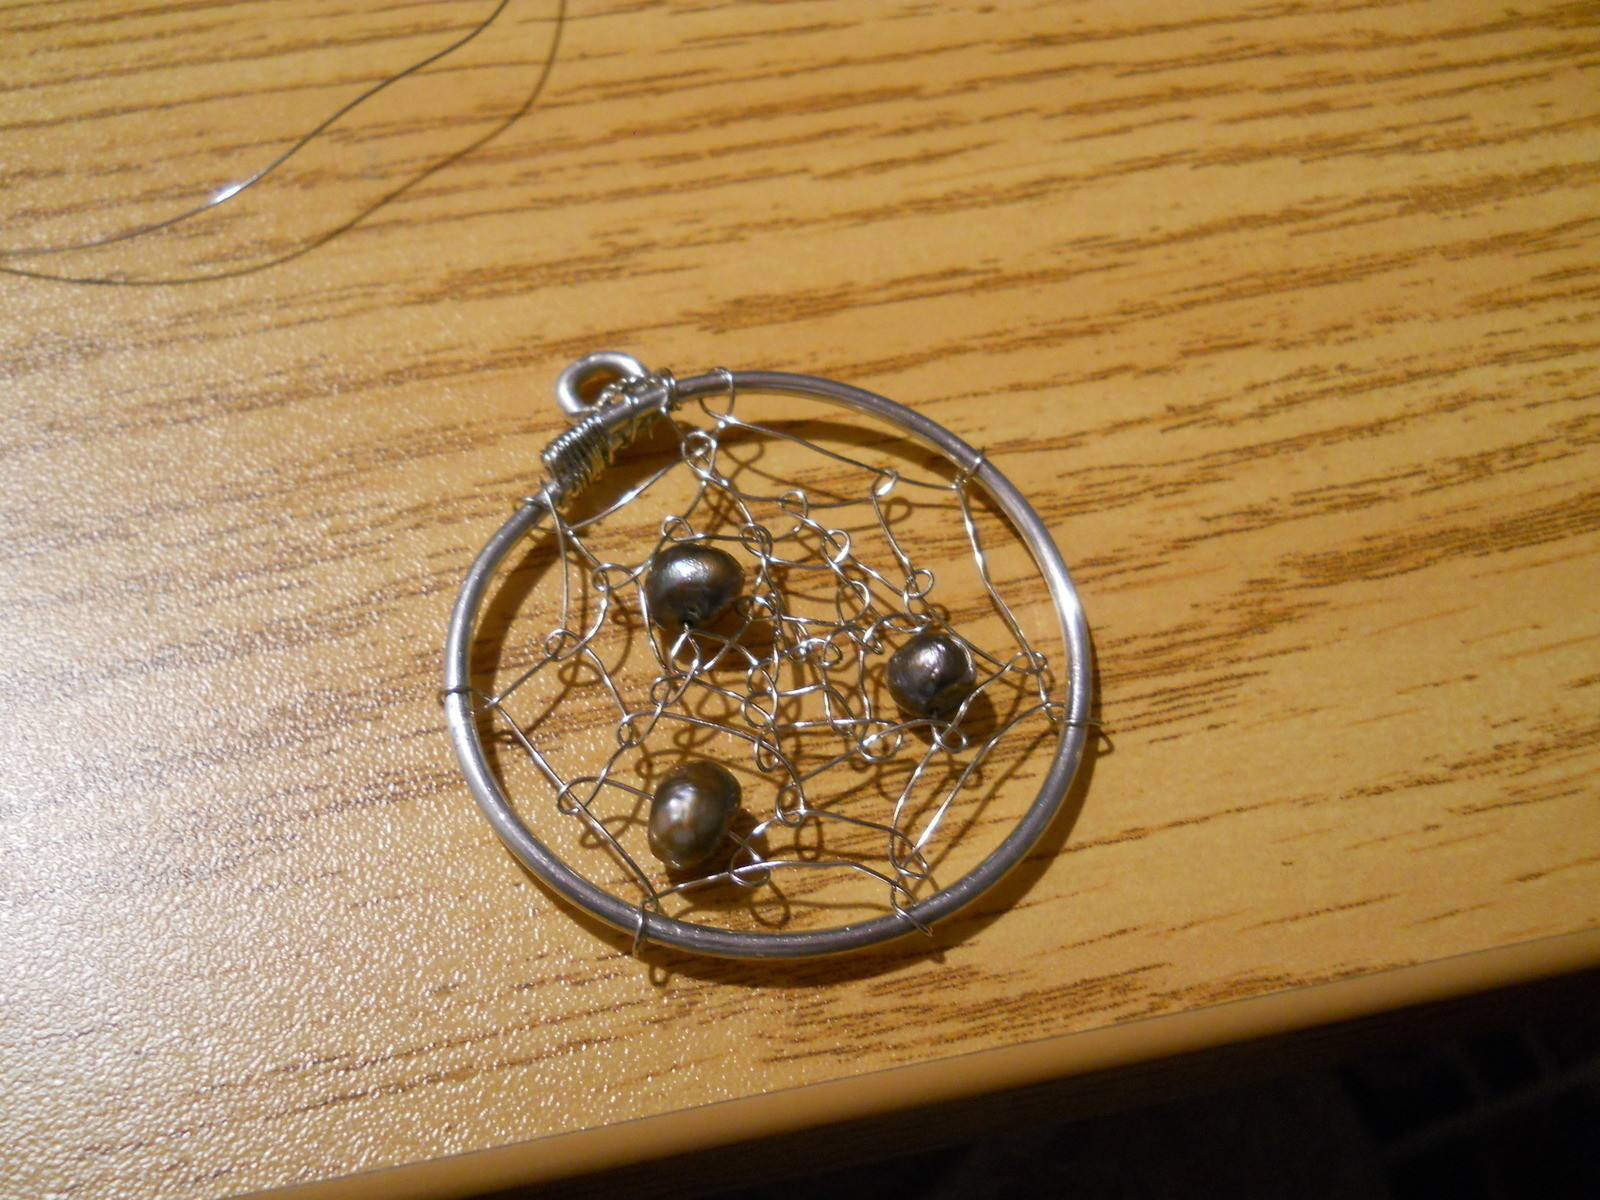
Made this for my little sister.
I decided to make a tutorial for this because the woman who made the video I used as a guide kept putting her hands in front of the pendant as she completed each step, which made it sort of hard to follow. The pictures are a little blurry, and the directions may not be too clear, but I hope this helps.
-
 Key West Witch added Dream Catcher Pendant to Jewelry
30 Jun 03:59
Key West Witch added Dream Catcher Pendant to Jewelry
30 Jun 03:59
-
 Blanca G. favorited Dream Catcher Pendant
05 Sep 04:37
Blanca G. favorited Dream Catcher Pendant
05 Sep 04:37
-
 Teresa D. favorited Dream Catcher Pendant
28 Feb 10:38
Teresa D. favorited Dream Catcher Pendant
28 Feb 10:38
-
 Dark added Dream Catcher Pendant to To do
21 Nov 22:49
Dark added Dream Catcher Pendant to To do
21 Nov 22:49
-
 terry.svennes favorited Dream Catcher Pendant
16 Sep 20:57
terry.svennes favorited Dream Catcher Pendant
16 Sep 20:57
-
 DocDoolittle favorited Dream Catcher Pendant
29 Jul 11:44
DocDoolittle favorited Dream Catcher Pendant
29 Jul 11:44
-
breanna w. favorited Dream Catcher Pendant
23 Jun 07:15
-
 AbsintheFairy favorited Dream Catcher Pendant
22 Jun 16:45
AbsintheFairy favorited Dream Catcher Pendant
22 Jun 16:45
- Sofie Vandersmissen added Dream Catcher Pendant to Jewelry 15 Apr 10:27
-
siena h. added Dream Catcher Pendant to beads
16 Mar 21:50
-
 Step 1
Gather supplies.
-
 Step 2
straighten out a length of 12 gauge wire.
-
 Step 3
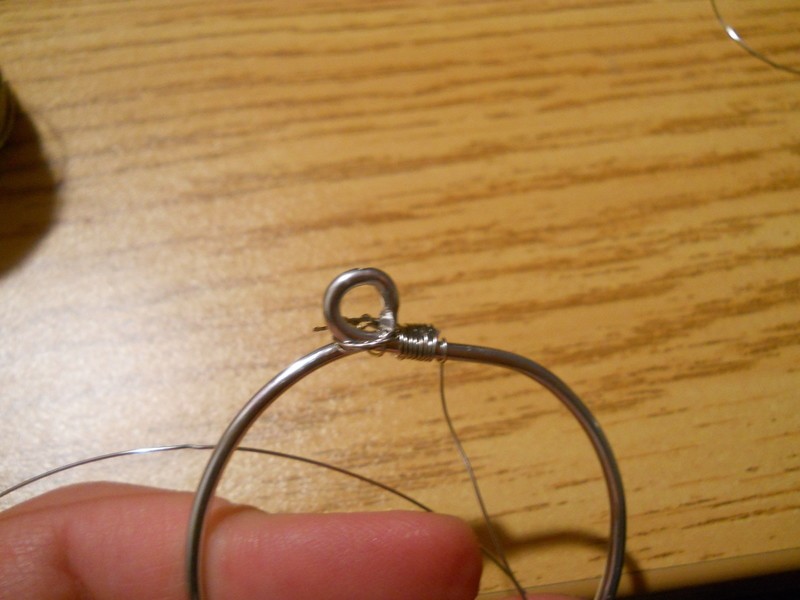
using the needle-nose pliers, make a loop at the end of the wire.
-
 Step 4
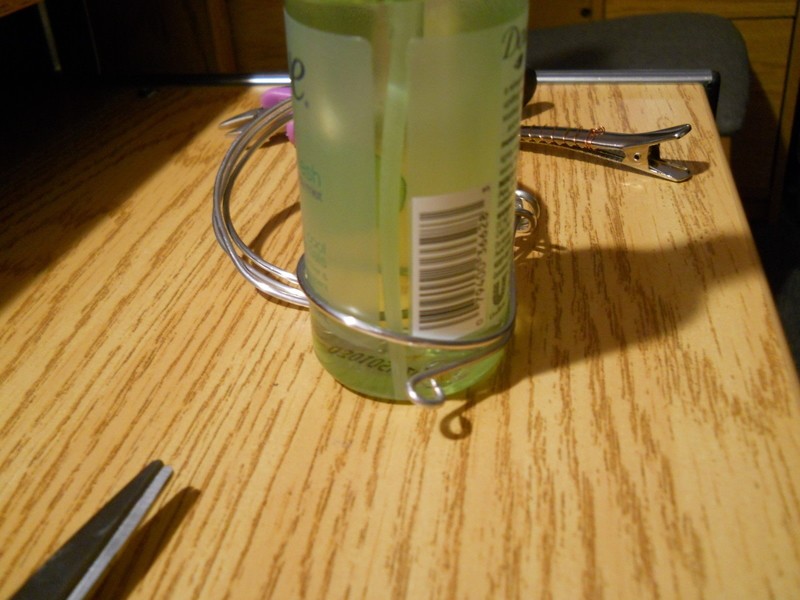
wrap the 12-gauge wire around the cylindrical object of your choosing, making sure it overlaps a bit.
-
 Step 5
cut the wire so there is a little less than a quarter-of-an-inch overlap.
-
 Step 6
slide the end of your 26 or 28 gauge wire through the loop in the 12 gauge wire.
bend the 26 or 28 gauge wire around the 12 gauge wire and twist it tight. continue to twist until the shorter end of the wire is used up.
-
 Step 7
wrap the twisted part of the wire around the base of the 12 gauge wire loop.
-
 Step 8
take your 26 or 28 gauge wire and begin to wrap it around the 12 gauge wire where it overlaps.
-
 Step 9
make sure the wire is tight around the overlap when you are finished with step 8.
-
 Step 10
bend the wire into a wide u-shape a little less than an inch wide.
-
 Step 11
bend the 26 or 28 gauge wire behind the 12 gauge wire.
-
 Step 12
now, pull the end of the wire back around the 12 gauge wire, making sure it slips through the gap between where the 12 and 26(28) gauge wire first meets.
it should make a closed loop.
this is the first 'link'
-
 Step 13
continue doing this the entire way around the 12-guage wire circle.
here's the second 'link'.
-
 Step 14
when you're making your last link, make it as close to the first loop (near where the 12 gauge overlap was wrapped).
i actually overlapped my last loop over my first one. whatever is easiest for you.
-
 Step 15
for your second row, make the first loop near the center dip of the first 'link'.
-
 Step 16
second link of second row.
-
 Step 17
to add a bead, just thread any kind of bead you want onto the wire before you close a link.
-
 Step 18
end of second row.
continue with the loops and links and beads until it gets too small to work with any more.
-
 Step 19
to finish off, i just wove the end of the 26 (28) gauge wire back up through the loops, then wrapped it around the base of 12-gauge loop, then snipped it off.
and you're done.


http://www.youtube.com/watch?v=qkUU-2AXAa4