


About
Create a double-exposure portrait photo
Double exposure photography can create amazing results but you can create a similar effect with photo editing software, even if you don't own a film camera.
-
 Cindy S. favorited Double Exposure Portrait
29 Aug 14:08
Cindy S. favorited Double Exposure Portrait
29 Aug 14:08
-
 panteznabnch favorited Double Exposure Portrait
01 May 00:58
panteznabnch favorited Double Exposure Portrait
01 May 00:58
-
 Kay G. favorited Double Exposure Portrait
28 Jun 03:30
Kay G. favorited Double Exposure Portrait
28 Jun 03:30
-
 greenstyle added Double Exposure Portrait to Wishlist
21 Oct 20:18
greenstyle added Double Exposure Portrait to Wishlist
21 Oct 20:18
-
 mountainlove added Double Exposure Portrait to photography
11 Sep 01:15
mountainlove added Double Exposure Portrait to photography
11 Sep 01:15
-
 KBunker favorited Double Exposure Portrait
27 May 20:22
KBunker favorited Double Exposure Portrait
27 May 20:22
-
 alexandra.wood.148 favorited Double Exposure Portrait
16 May 01:38
alexandra.wood.148 favorited Double Exposure Portrait
16 May 01:38
-
 Chudames favorited Double Exposure Portrait
21 Mar 00:49
Chudames favorited Double Exposure Portrait
21 Mar 00:49
-
 Trista favorited Double Exposure Portrait
07 Mar 13:33
Trista favorited Double Exposure Portrait
07 Mar 13:33
-
 Rainbow Wyvern favorited Double Exposure Portrait
01 Feb 09:22
Rainbow Wyvern favorited Double Exposure Portrait
01 Feb 09:22
You Will Need
-
 Step 1
Start by opening a portrait photo that you like in your favourite photo editing proram. You can use any photo you like but if it's already quite an interesting photo that you love, the results will be even better. Here's one of me at a wedding recently blowing some bubbles.
-
 Step 2
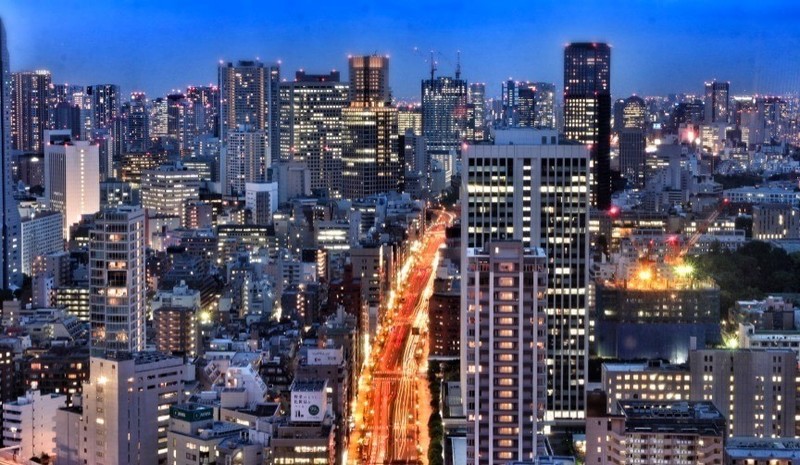
Now create a second layer on top and paste in your contrasting photo. Something with a lot of texture, such as a nature photo or city scene work well but you can get creative and try all kinds of things. I'm going to use a photo I took of the Tokyo skyline.
-
 Step 3
Set the blending mode on the top contrasting layer to Screen so that your portrait shows through.
-
 Step 4
Reposition, scale and rotate the top contrasting photo until you find a position you like. I tried to positioned mine so that the light trails from the traffic would look like they were being blown through the bubbles.
-
 Step 5
Hide the top layer and then select the focus point of your bottom portrait layer. I made my focus the bubbles and my face.
-
 Step 6
Feather your selection by about 150 pixels.
-
 Step 7
Select the inverse.
-
 Step 8
Darken the outside edges of your focal point.
-
 Step 9
Now, desaturate your portrait layer.
-
 Step 10
Adjust the levels to give the portrait a strong contrast, making the light areas bright white and dark areas dark black.
-
 Step 11
Make the top contrasting layer visible again.
-
 Step 12
Use a soft eraser brush set to 50% opacity to erase the top photograph around any areas you'd like to bring out of the portrait, such as the eyes, nose, mouth and bubbles in this photo.
-
 Step 13
Use a soft paint brush set to 50% selected with the colour black to paint any areas on the bottom portrait layer that you don't want to shine through.
-
 Step 14
Adjust the levels and saturation of the finished photo until you're happy with it and then you're done!


I only have an old version of PSE and tried it tonight. My results were diabolical. A combination of a poor choice of photos plus me. Never mind I'll have another go another time.