


About
make a notebook with your favourite movie/fashion brand/model (etc!) as your cover!
I have always loved collecting postcards. There are Zo cards (advertisements in the form of postcards) available all around Singapore. Then there comes a point when there are just too many of these postcards lying around in my house so I had to use them for something else, something more useful...
-
 Karen D. added Diy Cheap And Easy Notebook! to Papercraft
16 May 23:36
Karen D. added Diy Cheap And Easy Notebook! to Papercraft
16 May 23:36
-
 Conner W. added Diy Cheap And Easy Notebook! to book crafts
16 Jul 14:19
Conner W. added Diy Cheap And Easy Notebook! to book crafts
16 Jul 14:19
-
 Elentine added Diy Cheap And Easy Notebook! to Misc Crafts
15 Jun 23:15
Elentine added Diy Cheap And Easy Notebook! to Misc Crafts
15 Jun 23:15
-
 PetiteElefant favorited Diy Cheap And Easy Notebook!
02 Jan 22:58
PetiteElefant favorited Diy Cheap And Easy Notebook!
02 Jan 22:58
-
 DocDoolittle added Diy Cheap And Easy Notebook! to Bookies
19 Sep 11:08
DocDoolittle added Diy Cheap And Easy Notebook! to Bookies
19 Sep 11:08
-
 Misato M. favorited Diy Cheap And Easy Notebook!
19 Jun 12:17
Misato M. favorited Diy Cheap And Easy Notebook!
19 Jun 12:17
-
 Quickanimator favorited Diy Cheap And Easy Notebook!
09 Jan 14:57
Quickanimator favorited Diy Cheap And Easy Notebook!
09 Jan 14:57
-
 michelle d. favorited Diy Cheap And Easy Notebook!
06 Nov 11:57
michelle d. favorited Diy Cheap And Easy Notebook!
06 Nov 11:57
-
 Step 1
Gather your magazines.
-
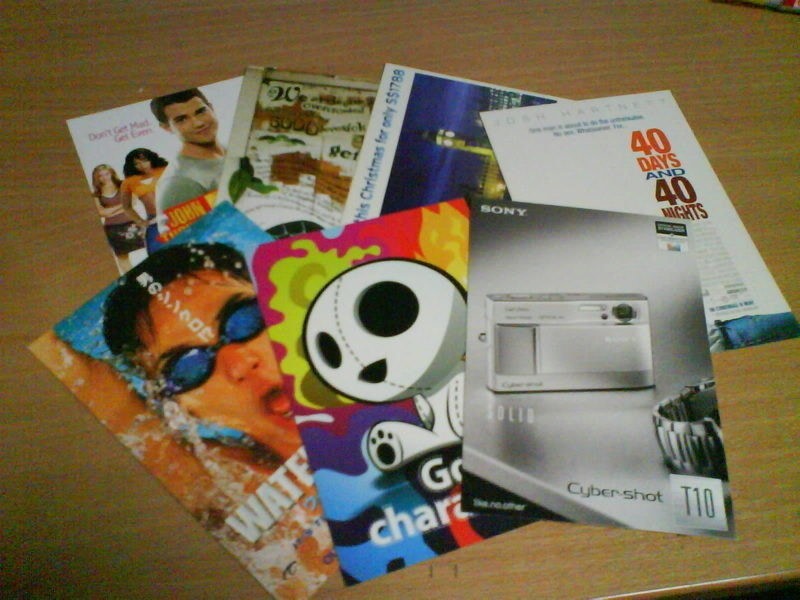
 Step 2
Gather your postcards too.
-
 Step 3
Go flip through all those pages of the magazines to find one that will work great as a cover for your magazine.
I usually choose advertisements and pictures of models.
-
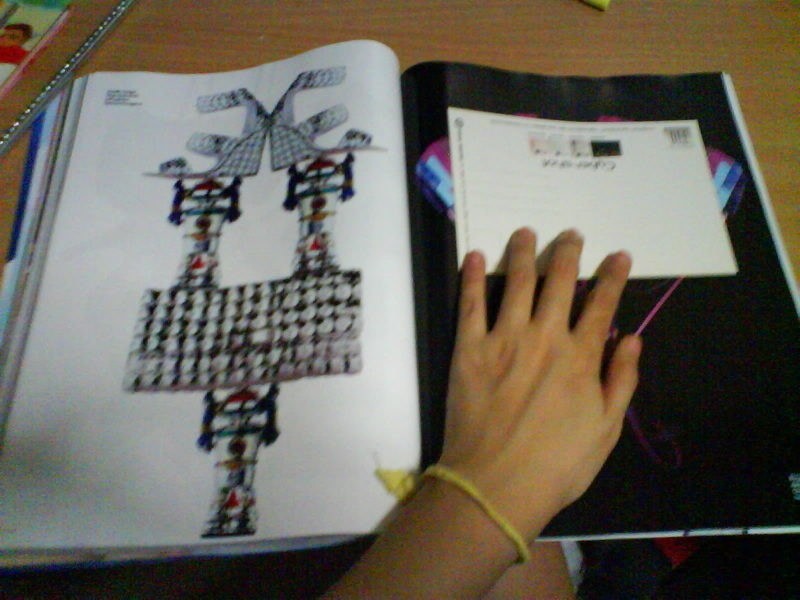
 Step 4
Place your postcard over the picture that you have chosen. Position it the way you would like your cover to look.
-
 Step 5
You can either trace the postcard on the page...
-
 Step 6
or cut it out directly using a penknife.
-
 Step 7
After getting the cover, it's time to choose a backing.
I usually choose from the same page/advertisement so that the notebook has a uniform design.
-
 Step 8
Repeat the same for the backing as you did for the cover.
-
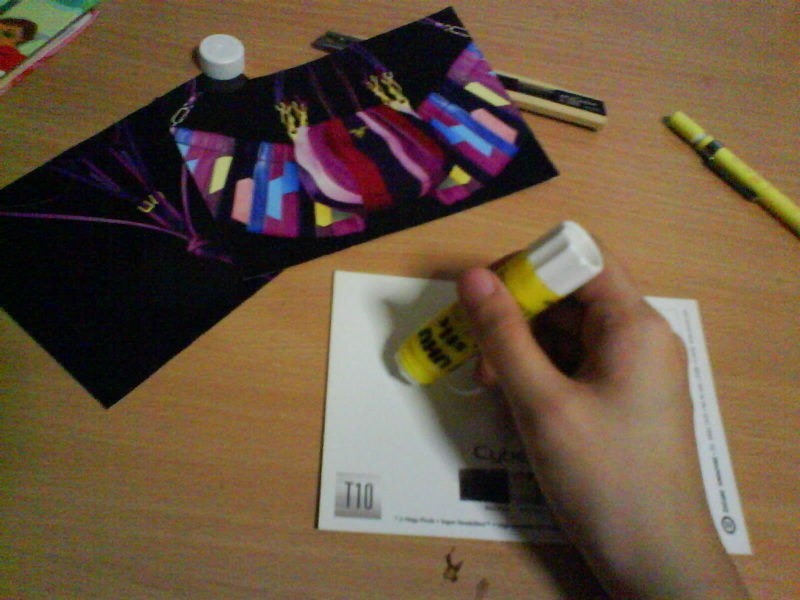
 Step 9
Apply glue all over the postcard. Ensure that the ENTIRE postcard is covered so that the no air bubbles will be formed later when we fold the postcard.
Then align the magazine cutout on the postcard.
-
 Step 10
Press down firmly and smoothen the cutout on the postcard gently.
You can use another postcard/cardboard to help you with this.
-
 Step 11
Collect those A4 coloured paper. I have lots of these coloured printing papers at home!
-
 Step 12
Fold the A4 paper into half along the length.
-
 Step 13
Cut the folded line using penknife. I like to use a penknife because it's fast and gives a relatively smooth edge.
-
 Step 14
Fold the paper into half again.
-
 Step 15
And then cut it along the folded line again.
You should get these uniform 4 quarters of the A4 paper.
-
 Step 16
Gather all 4 pieces and fold it into half again.
-
 Step 17
Get the cover of the notebook again.
Paste clear tape along all 4 sides of the cover. Only half of the clear tape should be lined on the front of the cover.
-
 Step 18
Then, fold and press the tape down on the back of the cover.
This creates a protective lining for the cover.
For those who wants a cleaner look can wrap the entire cover with clear plastic!
-
 Step 19
Cut away any excess tape.
-
 Step 20
When all 4 sides of the cover are lined with the tape, it's time to fold the cover!
Slowly and carefully, bring the breadth together, then press down firmly at the centre of the cover.
-
Step 21
Put around 15 pieces of the paper together. You can experiment with different number of pieces to see what is the maximum number of pieces that your stapler can go through.
you have your notebook! :)


Comments


