

About
A unique way to take the old and make it new
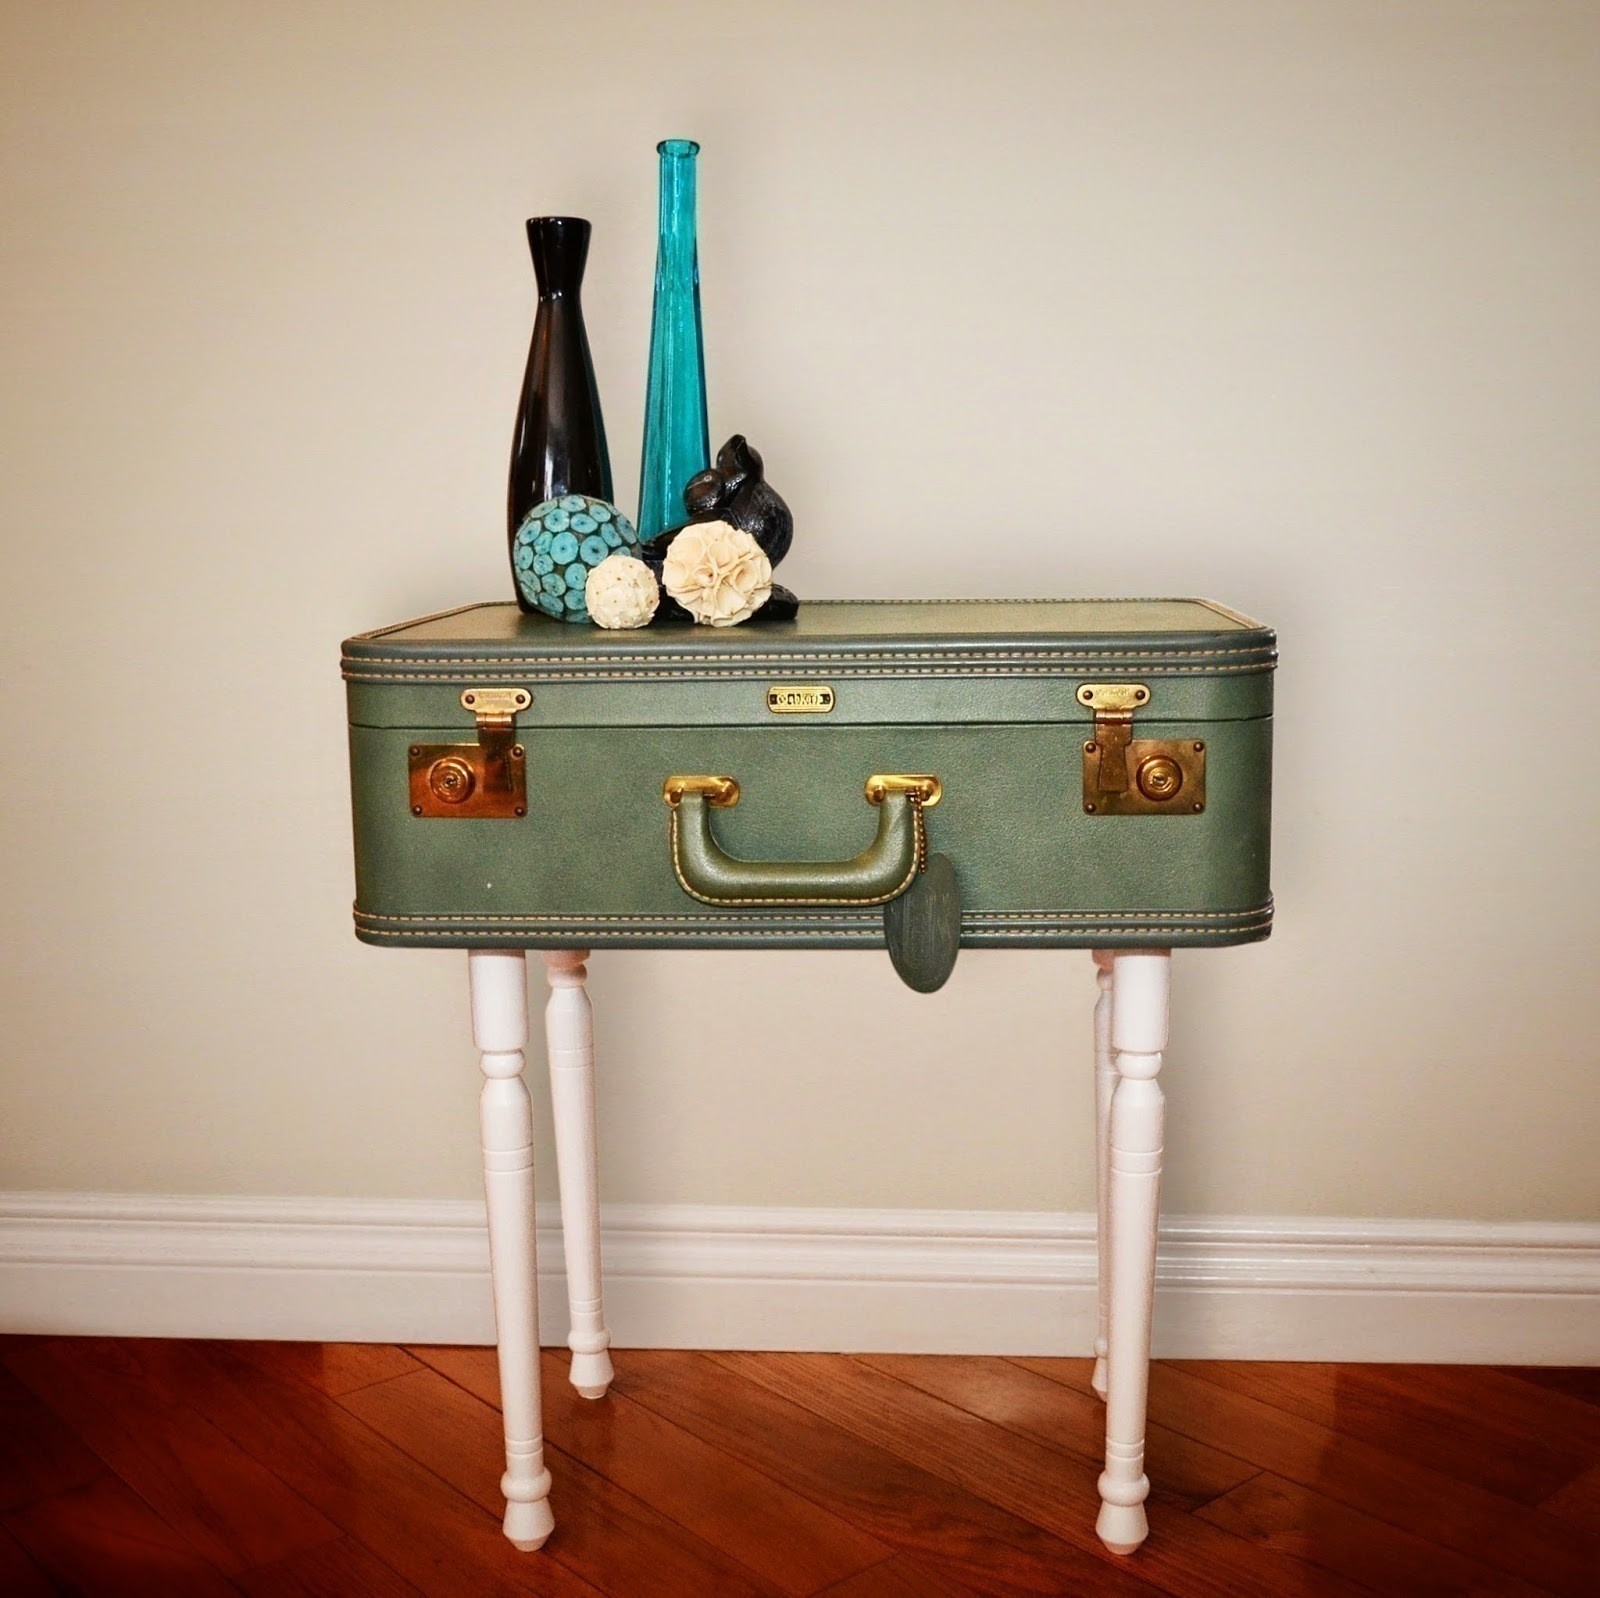
Hello Everyone! This has to be the most exciting DIY I have ever done and it is the reason I started this blog. I am so extremely happy with how it turned out, it's extremely easy to do and looks so fantastic and is such a unique piece of furniture to have in your home. It is a little pricey but if your a bargain hunter you can find any of this stuff at a thrift store. Now without further adieu, lets jump right into the DIY!
Downloads
- 102521_2F2014-06-11-221639-blog9.JPG 264 KB [ Download ]
-
 christinabw added Diy Vintage Suitcase Table to DIY The Room: New Girl
10 Oct 01:28
christinabw added Diy Vintage Suitcase Table to DIY The Room: New Girl
10 Oct 01:28
-
 Alissa B. favorited Diy Vintage Suitcase Table
18 Jul 00:39
Alissa B. favorited Diy Vintage Suitcase Table
18 Jul 00:39
-
 jolene r. added Diy Vintage Suitcase Table to That Spare Room
20 May 01:06
jolene r. added Diy Vintage Suitcase Table to That Spare Room
20 May 01:06
-
 Maryann C. favorited Diy Vintage Suitcase Table
12 Apr 15:07
Maryann C. favorited Diy Vintage Suitcase Table
12 Apr 15:07
-
 susan g. favorited Diy Vintage Suitcase Table
01 Apr 16:59
susan g. favorited Diy Vintage Suitcase Table
01 Apr 16:59
-
 Sierra H. favorited Diy Vintage Suitcase Table
18 Mar 02:53
Sierra H. favorited Diy Vintage Suitcase Table
18 Mar 02:53
-
 Amanda B. favorited Diy Vintage Suitcase Table
25 Feb 23:21
Amanda B. favorited Diy Vintage Suitcase Table
25 Feb 23:21
-
 HerNameIsAlixx added Diy Vintage Suitcase Table to DIY The Room - Palaye Royale
29 Nov 13:50
HerNameIsAlixx added Diy Vintage Suitcase Table to DIY The Room - Palaye Royale
29 Nov 13:50
-
 Tara Rees added Diy Vintage Suitcase Table to DREAM HOME
27 Nov 23:28
Tara Rees added Diy Vintage Suitcase Table to DREAM HOME
27 Nov 23:28
-
 Maggs added Diy Vintage Suitcase Table to Household
08 Aug 21:13
Maggs added Diy Vintage Suitcase Table to Household
08 Aug 21:13
You Will Need
-
 Step 1
I started with painting the legs of the table. This was so I could allow them to dry overnight. In order to get them to stand up while I was painting them, I screwed them into their top plates. This allowed them to stand up on their own. In order to make drying time quicker and the look of the paint to be consistent I recommend doing 4 thin coats.
tip: I used an interior paint for a high traffic area and a built in primer. This will allow the paint to withstand anything you throw at it, and will make cleaning it off a breeze.
The following day I started by cutting a piece of wood to sit in the bottom of my suitcase. This was to add stability when my legs are screwed into the bottom. I first measured out my suitcase and cut out a rectangle out of the plywood. Next, since my suitcase has rounded corners, I cut a 45 degree angle at my corners 1 ½ inches in. This allowed the wood to fit like a glove inside my suitcase.
-
 Step 2
For this next step remove your wood for now. We are going to begin to place and drill the spots for the top plates.
-
 Step 3
Place your plates where you would like your legs to sit and mark each of the holes. I placed mine 1 ½ inches in from the sides. A good tip after you've marked your spots is to take a nail or screw and hammer a dent. This will allow your screws to sit in a groove and make screwing them in a lot easier.
-
 Step 4
After you have marked your spots, drill through the suitcase. Make sure to use some pressure and be careful. The fabric makes it a little difficult and can cause your drill to get stuck.
-
 Step 5
Put your wood back into your suitcase. At this point I would suggest getting a buddy. This makes your life a lot easier. You are going to want to put pressure on the wood. Hold the case sideways with the lid open. Get your buddy to press on the wood, avoid putting your hands where the plate is sitting, as the screws are going to come through. Use your drill to tighten the screws into the wood. You will feel it catch.
tip: do opposites when it comes to screwing in your screws. Start with the top right and then the bottom left. This will allow your plate not to move while you're working on the others.
-
 Step 6
You're basically finished now. All you have to do is screw in your legs and stand it up!
This DIY is so simple and so wonderful! I recommend it to everyone, and if you need help cutting wood or using power tools always be sure to ask.


Comments

