


About
Grab an old suitcase, some pretty papers & paint..and take your crafty supplies on the road!
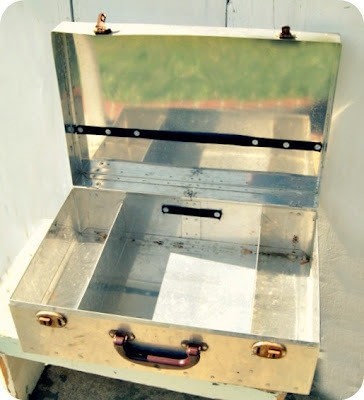
The second we finished our Beach Bungalow paper packs we just had to get this project done. I've had it sorta planned for a while. We had this old metal suitcase which was just the perfect size and happened to have great compartments inside as well as a convenient elastic strap on the underside of the lid. We were thinking of changing up the picnic format a bit by replacing the food with art supplies and planning an artful day trip. Papers, trims, markers, decoupage medium, paint, clippings, photos, scissors, brushes, and plenty more. This old suitcase went from dingy to dazzling in just a few hours.
-
 CrazyCatCouple added Diy Traveling Art Kit to up-cycle
09 Jul 00:44
CrazyCatCouple added Diy Traveling Art Kit to up-cycle
09 Jul 00:44
-
 Lindsay H. favorited Diy Traveling Art Kit
23 Dec 08:54
Lindsay H. favorited Diy Traveling Art Kit
23 Dec 08:54
-
 Rhonda G. commented on Diy Traveling Art Kit
17 Sep 16:46
Rhonda G. commented on Diy Traveling Art Kit
17 Sep 16:46
-
 Kinhime Dragon commented on Diy Traveling Art Kit
12 Apr 14:56
Kinhime Dragon commented on Diy Traveling Art Kit
12 Apr 14:56
-
Pamela J. favorited Diy Traveling Art Kit
01 Nov 21:57
-
 amyistheparty favorited Diy Traveling Art Kit
18 Apr 21:13
amyistheparty favorited Diy Traveling Art Kit
18 Apr 21:13
-
 Wiolet Kaspara favorited Diy Traveling Art Kit
26 Oct 17:00
Wiolet Kaspara favorited Diy Traveling Art Kit
26 Oct 17:00
-
Kinhime Dragon favorited Diy Traveling Art Kit
17 Aug 22:53
-
 Rachel B. favorited Diy Traveling Art Kit
15 Aug 19:09
Rachel B. favorited Diy Traveling Art Kit
15 Aug 19:09
-
 Lorrie B. added Diy Traveling Art Kit to crafts
31 May 16:48
Lorrie B. added Diy Traveling Art Kit to crafts
31 May 16:48
-
 Step 1
First we gave it a good cleaning with paper towels and soapy water.
-
 Step 2
cleaned the inside too!
-
 Step 3
Then we borrowed some metal polish and a wire brush from my brother Walt...(I don't know if I ever mentioned that polishing is one of Walt's fave hobbies)...we did a bit of scrubbing and wiped off the excess mess with a rag. It feels like magic when you see the rust just vanish.
-
 Step 4
We spray painted the inside with some aqua Rustoleum.
-
 Step 5
Since we were going to be using lighter colored papers we figured we should prime the gray metal box white. Sometimes if you decoupage light paper onto darker colors the papers will be dulled by the dark surface showing through. We used some masking tape to cover the hardware before we painted it. (We scuffed up the surface with some sandpaper first)
-
 Step 6
After the paint dried we then cut our papers into squares and rectangles and decoupaged them to the box in a pieced together quilt-like pattern. Once the papers were all adhered and totally dry we then gave it a clear topcoat for protection. We love using Decoupage from DecoArt. But you could of course use Mod Podge.
-
 Step 7
We then did a hand painted aqua scallop rim and with some extra scraps of our floral papers made a cute little paper bunting to dress up the interior.
-
 Step 8
It was so fun gathering up all of our essentials. The things we always grab when sitting down to art journal or paper craft. How fun is it, knowing how different all of our Traveling Art Kits would be? :)


Comments


