


About
String Art
I had 10 wooden boards laying around my house and wasn't sure what to do with them. String art was the only idea that kept hitting me. I've seen spirograph string arts but never attempted to make one, so I thought... lets give it a try. The ones I've made are really simple and beginner friendly since this is my first attempt as well.
-
 Rae G. favorited Diy Rainbow Spirograph String Art
04 Sep 21:20
Rae G. favorited Diy Rainbow Spirograph String Art
04 Sep 21:20
-
 KarmaHappens favorited Diy Rainbow Spirograph String Art
27 Jan 01:28
KarmaHappens favorited Diy Rainbow Spirograph String Art
27 Jan 01:28
-
 Jessi R. favorited Diy Rainbow Spirograph String Art
23 Aug 23:01
Jessi R. favorited Diy Rainbow Spirograph String Art
23 Aug 23:01
-
 Simmy favorited Diy Rainbow Spirograph String Art
22 Jun 06:13
Simmy favorited Diy Rainbow Spirograph String Art
22 Jun 06:13
-
 Sierra H. favorited Diy Rainbow Spirograph String Art
18 Mar 01:38
Sierra H. favorited Diy Rainbow Spirograph String Art
18 Mar 01:38
-
Zainabap S. favorited Diy Rainbow Spirograph String Art
26 Dec 10:12
-
 alyssa favorited Diy Rainbow Spirograph String Art
07 Dec 03:07
alyssa favorited Diy Rainbow Spirograph String Art
07 Dec 03:07
-
 Richter B. favorited Diy Rainbow Spirograph String Art
03 Dec 00:57
Richter B. favorited Diy Rainbow Spirograph String Art
03 Dec 00:57
-
 Tierra T. favorited Diy Rainbow Spirograph String Art
14 Nov 21:20
Tierra T. favorited Diy Rainbow Spirograph String Art
14 Nov 21:20
-
 sadie b. favorited Diy Rainbow Spirograph String Art
09 Nov 22:21
sadie b. favorited Diy Rainbow Spirograph String Art
09 Nov 22:21
You Will Need
-
 Step 1
Mark the center of the board. Prepare pencil and compass, making sure that the point of the compass and the point of the pencil are in the same level. Set the point of the compass on the center of the board. Draw a circle on the board by keeping 0.5 inch or 1 inch border around the circle. You can draw more circles similarly.
-
 Step 2
It's better if you mark the places where you want to hammer the nails. Use a transparent ruler to mark the nails' position along traced the circle. I marked points after every 1 cm.
-
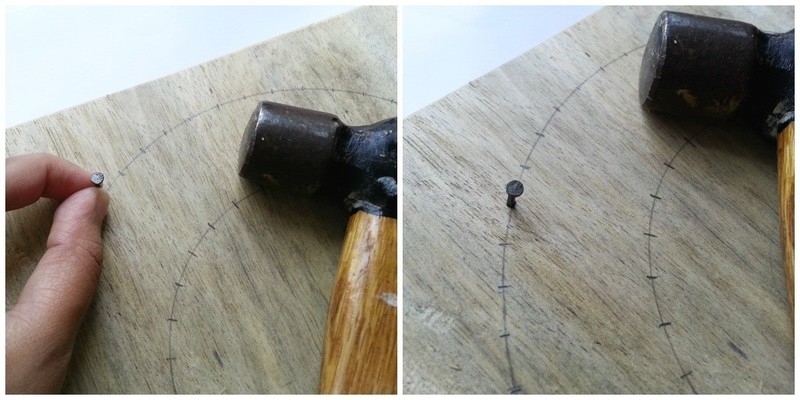
 Step 3
Done marking? Now start hammering the nails on the marked points along the traced circle. Hammer the nails half way into the wooden board.
-
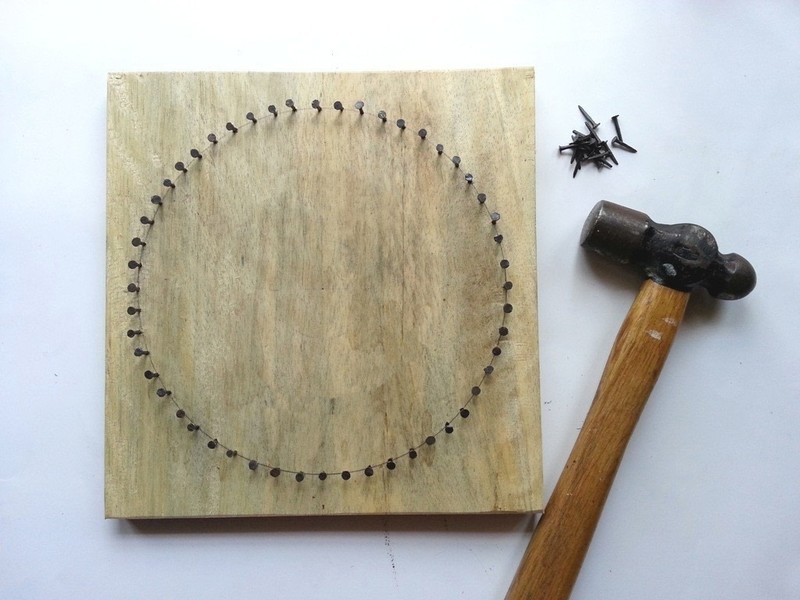
 Step 4
This step takes time and it can be quite boring but you have to hammer the nails patiently since the whole art depends on the nails' position.
-
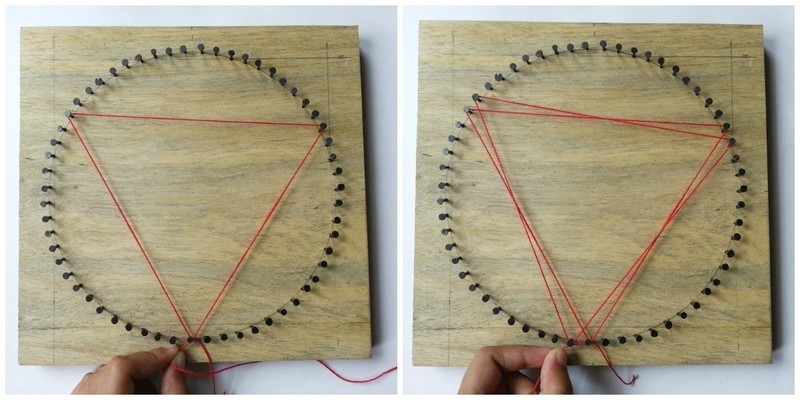
 Step 5
Select a nail as a starting point. Take a string, wrap it around any nail and tie a knot. Apply a drop of glue on the knot to make that it is secure.
-
 Step 6
Count the nails and try to create a equilateral triangle with the string, by wrapping it around the nails. After making the first triangle you'll return to the starting point again. Simply skip that nail and go to the next one. Create another equilateral triangle by wrapping the string around every next nails of the previous ones.
-
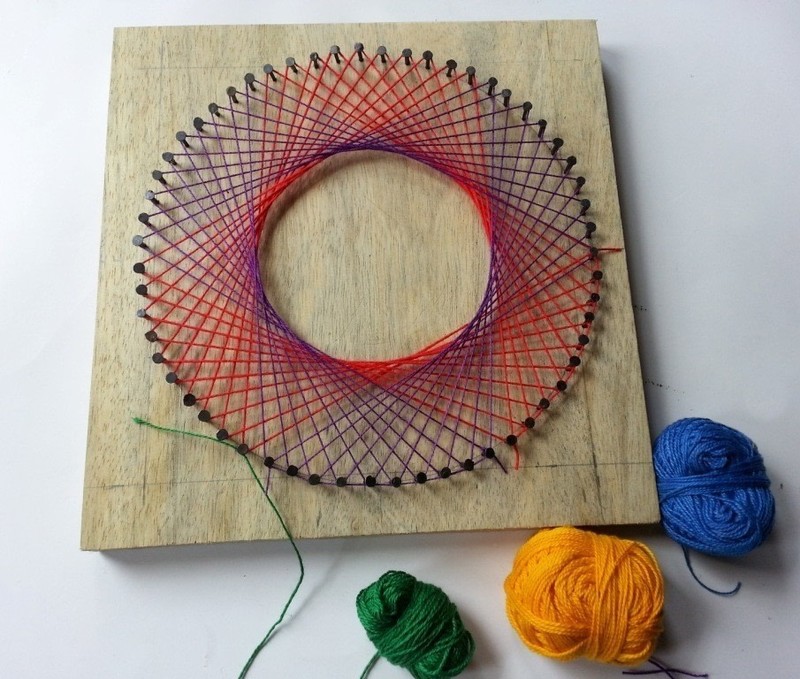
 Step 7
Continue to do the same. Since I'm trying to create a rainbow themed string art I won't be using the same string for the whole art. After wrapping half of the nails wrap the string around the nail near it, tie a knot and cut off the string. Take another string (of different color). Wrap it around the nail next to the previous nail (but not the same nail). Similarly create equilateral triangles until all nails are covered.
-
 Step 8
You can keep the spirograph as it turned out in the previous step or you can also add more colors and layers. In the previous step I used 2 colors but this time I'm going to use 3 colors thus dividing the nails into 3 parts. Create another layer of spirograph by creating more equilateral triangles. Enjoy!


Comments


