About
Make this easy 5-minute DIY origami cardholder to store all your extra cards!
For this super simple tutorial we’ll be making an origami card holder that requires minimal materials and time! I used double sided printed scrapbooking paper for this one but feel free to use any wrapping paper, card or coloured paper.
It’s perfect for a quick trip out when you just need some cash and cards; or perhaps just cause you need that extra card space because your wallet is packed and exploding (like mine, whoops!).
-
 Shirin L. favorited Diy Origami Cardholder
29 Jan 22:47
Shirin L. favorited Diy Origami Cardholder
29 Jan 22:47
-
 Miss_Fit favorited Diy Origami Cardholder
09 Jul 04:25
Miss_Fit favorited Diy Origami Cardholder
09 Jul 04:25
-
 Katrina C. favorited Diy Origami Cardholder
01 May 22:57
Katrina C. favorited Diy Origami Cardholder
01 May 22:57
-
 Jac D. favorited Diy Origami Cardholder
27 Apr 05:24
Jac D. favorited Diy Origami Cardholder
27 Apr 05:24
-
 Lara L. favorited Diy Origami Cardholder
27 Feb 21:31
Lara L. favorited Diy Origami Cardholder
27 Feb 21:31
-
 Millie P. favorited Diy Origami Cardholder
08 Nov 23:00
Millie P. favorited Diy Origami Cardholder
08 Nov 23:00
-
karen b. added Diy Origami Cardholder to papercrafts
04 Nov 16:16
-
 Delyth G. favorited Diy Origami Cardholder
27 Oct 13:11
Delyth G. favorited Diy Origami Cardholder
27 Oct 13:11
-
 Ninni Ninímél Nalíná ♦ ♏ ♦ favorited Diy Origami Cardholder
17 Oct 09:42
Ninni Ninímél Nalíná ♦ ♏ ♦ favorited Diy Origami Cardholder
17 Oct 09:42
-
 Laura favorited Diy Origami Cardholder
17 Oct 01:04
Laura favorited Diy Origami Cardholder
17 Oct 01:04
You Will Need
-
 Step 1
Prepare your 9"x9" paper and ruler/bone folder! You can use any paper, preferably nothing too flimsy or thin, so your cardholder won't fall apart easily!
-
 Step 2
With the right side facing down, fold the paper into half vertically.
-
 Step 3
Fold the halves into halves. You should now have 3 lines down vertically.
-
 Step 4
Using the quarter lines as a guide, fold all 4 corners inwards.
-
 Step 5
Fold inwards at the quarter line. It should look something like this.
-
 Step 6
Flip the whole paper around and fold downwards towards the middle mark. At this point it might be a good idea to use the bone folder to help flatten it at the folds.
-
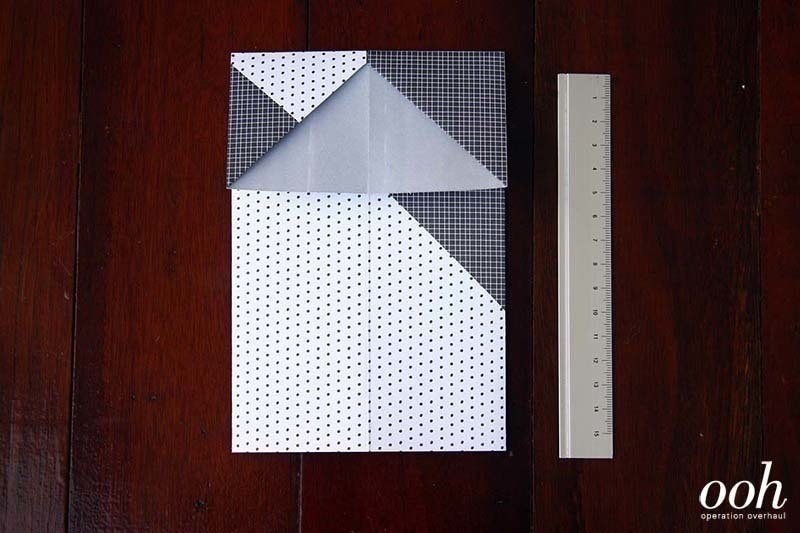
 Step 7
Repeat to the bottom, folding upwards this time. The bottom fold should overlap the top fold (you’ll see why in the next step).
-
 Step 8
Taking the bottom piece, gently tuck it into the top piece and flatten.
-
 Step 9
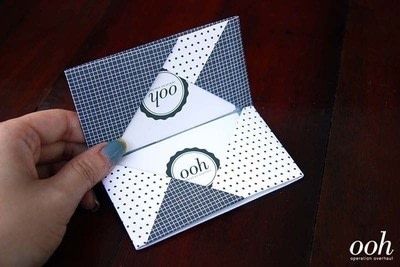
You're done!