


About
Make a Cute Mini Tassel Fringe for a Throw
Transform a basic fleece throw by adding this chic and simple DIY mini tassel fringe detail.
-
 Kaye N. commented on Diy Mini Tassel Fringe
10 Apr 01:26
Kaye N. commented on Diy Mini Tassel Fringe
10 Apr 01:26
-
 Jenee Nicole added Diy Mini Tassel Fringe to Sewing
28 Apr 09:02
Jenee Nicole added Diy Mini Tassel Fringe to Sewing
28 Apr 09:02
-
 Alissa B. favorited Diy Mini Tassel Fringe
29 Dec 19:04
Alissa B. favorited Diy Mini Tassel Fringe
29 Dec 19:04
-
 aprettyfix published her project Diy Mini Tassel Fringe
26 Dec 09:00
aprettyfix published her project Diy Mini Tassel Fringe
26 Dec 09:00
You Will Need
-
 Step 1
Gather the following supplies:
•a fleece blanket or throw
•embroidery floss
•scissors
•threading needle -
 Step 2
Part 1: Making Your Tassels
You will be creating 4 mini tassels out of each bundle of embroidery. First, remove the paper rolls from the ends and lay out your floss. It should look something like this. -
 Step 3
Cut the floss in two.
-
 Step 4
Separate 4 threads from each bundle.
-
 Step 5
Take one bundle and cut in half.
-
 Step 6
To create your mini tassel, you will need one of the small cut bundles and 2 of the long threads. Place one cut bundle on top of a long thread, creating a cross, leaving one long end and one short end. Tie a knot.
Flip the bundle over and tie a second knot on the opposing side.
-
 Step 7
Tuck the small end against one side of the bundle.
-
 Step 8
Pinch the bundle together.
-
 Step 9
Place the other separated thread underneath the pinched bundle.
-
 Step 10
Tie a knot on one side, and then flip the bundle and tie a second knot.
-
 Step 11
To ensure that your knots do not unravel, tuck each strand into the middle of the tied bundle. Do this by inserting your needle into the interior and threading the needle with one of the loose ends.
-
 Step 12
Pull the needle through. Do the same for the second thread.
-
 Step 13
You should now have 2 long threads peeking out from under the tassel.
-
 Step 14
Now you are ready to snip the bottom fringe of the tassel, creating an even edge.
-
 Step 15
You’ve just created your first mini tassel!
-
 Step 16
Part 2: Attaching Your Tassels
After you’ve created all your tassels, it’s time to begin attaching them to your throw. Space yours out according to your personal taste. Mine were spaced out a little over an inch apart. -
 Step 17
First, thread the tail through your needle and feed through the bottom edge. I started from the back side of the throw.
-
 Step 18
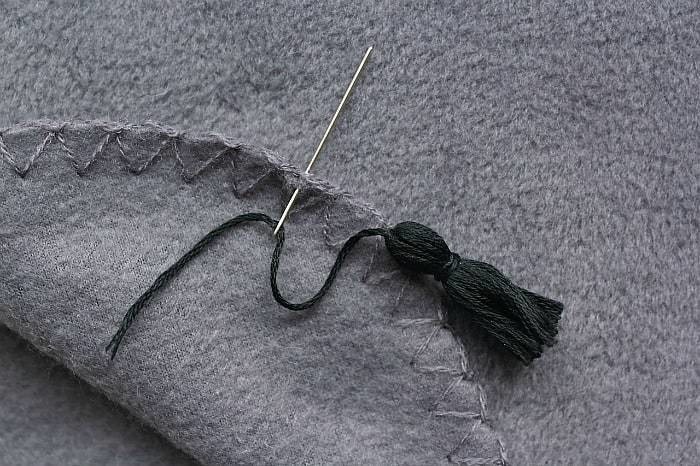
Pull the needle through leaving just enough thread between the tassel ‘head’ and bottom edge of the throw so that the tassel will hang directly below (and not against the back side of the throw). Next, flip the back side of the throw down and push the needle through the top of the tassel ‘head.’
To ensure your tassel remains securely in place, repeat what you just did above by following the same path of the first loop.
-
 Step 19
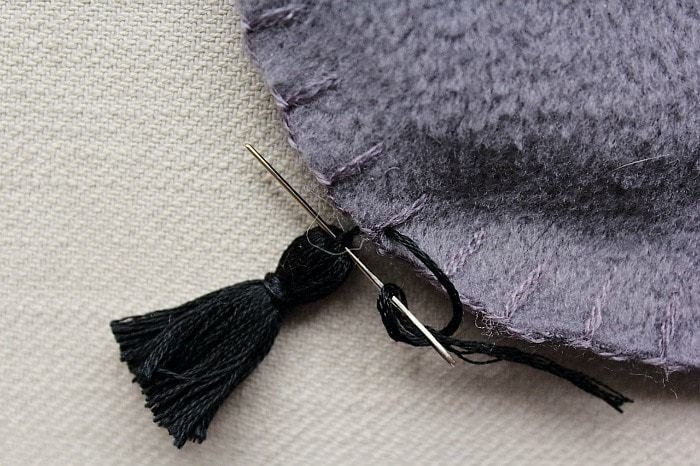
Now you will need to create a finishing knot on the back. To make it as neat as possible, push the needle through the knot you have already created. Tighten and repeat one or two more times.
-
 Step 20
Snip the tail.
-
 Step 21
Give your first tassel a good tug to make sure you are satisfied with your knot before attaching the rest.
-
 Step 22
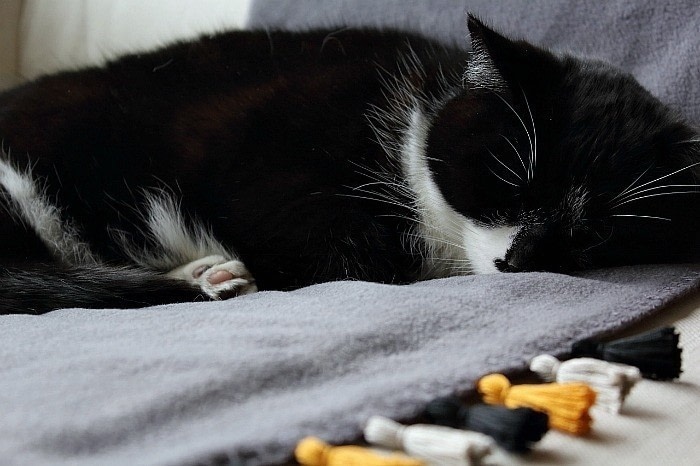
At this stage, you will want to sit back and relax. It will take a while to attach all your tassels. Even our cat Napoleon couldn’t stay awake long enough to see the finished product :)
I attached the tassels along 2 opposing edges. For rectangular throws, the 2 shortest edges are best.
-
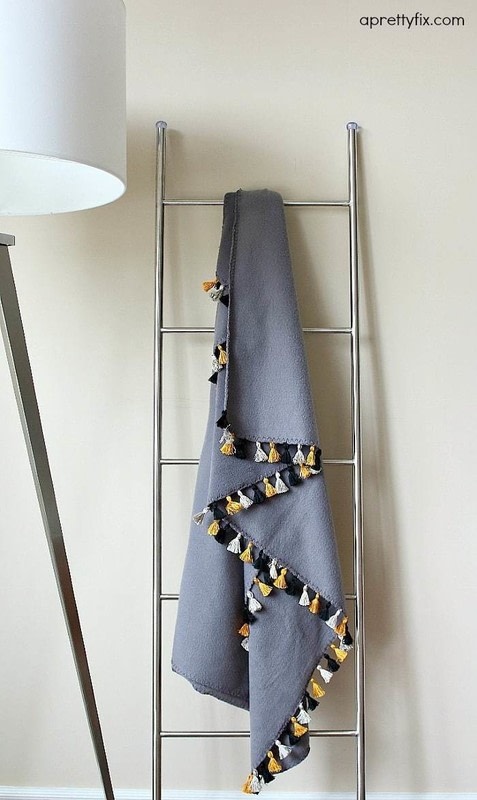
 Step 23
Once you are done, you now have a sweet little throw that is both practical and worth displaying :)
-
 Step 24
A storage basket or blanket storage ladder are also great places to show off your DIY mini tassel fringe!
-
 Step 25
This is a fun project that can add a little love to an old throw. Hope you give this one a try :)


Comments

