![[using shadow box frames+IKEA handles] . Free tutorial with pictures on how to make a tray in under 30 minutes by decorating with box, screws, and fabric. Inspired by ikea. How To posted by Amy_Krist. in the Home + DIY section Difficulty: Easy. Cost: Cheap. Steps: 7](https://images.coplusk.net/project_images/169870/image/2014-03-12-194149-diy_20lucite_20tray.jpg)

About
[using shadow box frames+IKEA handles]
I am in love with almost anything lucite and love that I was able to combine my lucite and organization love into one project.
Tags
-
 Ama R. added Diy Lucite Tray to Jennifer Aniston's Room
25 Aug 23:01
Ama R. added Diy Lucite Tray to Jennifer Aniston's Room
25 Aug 23:01
-
 heather r. added Diy Lucite Tray to To-make list
22 May 18:16
heather r. added Diy Lucite Tray to To-make list
22 May 18:16
-
 Jordyn N. added Diy Lucite Tray to Furniture
13 Apr 16:03
Jordyn N. added Diy Lucite Tray to Furniture
13 Apr 16:03
-
Jordyn N. favorited Diy Lucite Tray
12 Apr 23:30
-
 Sarah B. added Diy Lucite Tray to Housewares
29 Mar 02:59
Sarah B. added Diy Lucite Tray to Housewares
29 Mar 02:59
-
 Amy_Krist published her project Diy Lucite Tray
12 Mar 19:41
Amy_Krist published her project Diy Lucite Tray
12 Mar 19:41
-
 Step 1
To get started, I made a quick trip to Michael's this afternoon and purchased this acrylic shadow box for $8.99. The one I used for this project measured 11" x 14".
-
 Step 2
I have had these IKEA acrylic handles for several months now and have been waiting to use them on just the right project. And here we are! (You cannot beat the price of these...$2.99 for a 6-pack!)
-
 Step 3
The next step is to measure where you want the handles. Place a dot on the frame where your screws will go.
-
 Step 4
Drill, baby, drill! [Be sure to drill slowly as you do not want the frame to crack].
-
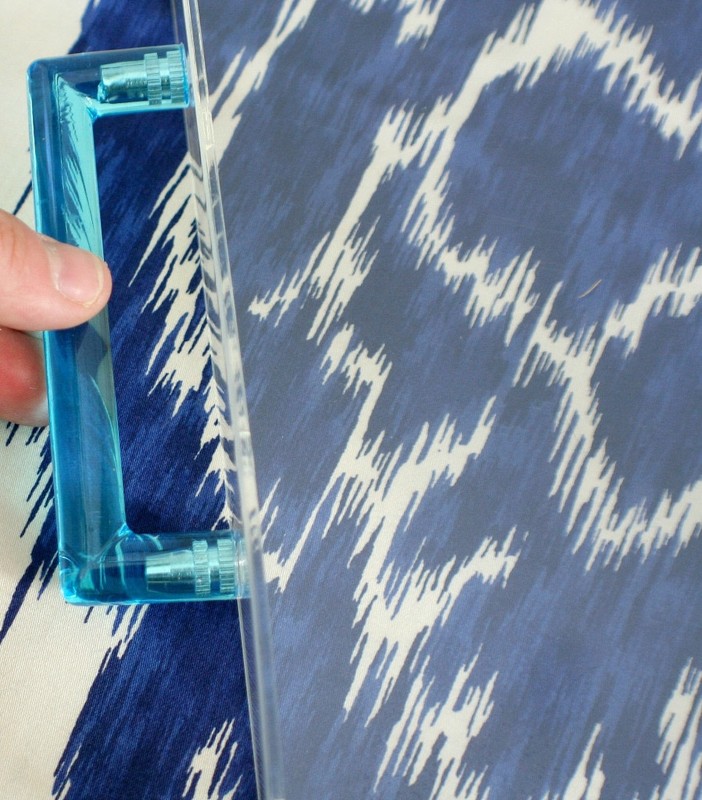
Step 5
Now attach your handles using small screws. The screws that came with the handles were way too long and therefore the handle was not secure at.all. Be sure to use small flat tip screws here.
-
 Step 6
Voila! You can choose to leave as is, or cover the bottom with some funky fabric. Guess what I did...
-
 Step 7
I found a scrap piece of black and white chevron fabric and placed in the bottom of the tray.