
About
Make your holiday cards a smash!
Hello Interneters! Well! The Holiday season is once again approaching, which means the time for taking epic holiday card photos is also approaching. Every year my husband, our dogs and I take some sort of funny/ unique holiday photo and send it out in card form to our nearest and dearest (plus a few others, like Ellen and The President of The United States). With so many years behind us, the pressure for amazing photos has grown and grown…
In any case! Who knows what I will come up with this year (I am certainly running out of ideas), but I can help YOU come up with your card by sharing a DIY for a Holiday Themed Photo Wall! I used this wall for our holiday card and then used it again at a holiday party as a photo booth. Both were fun and the results were great.
-
 Falene M. favorited Diy Holiday Photo Wall / Photo Booth
24 Nov 00:13
Falene M. favorited Diy Holiday Photo Wall / Photo Booth
24 Nov 00:13
-
 Upstairs Circus published her project Diy Holiday Photo Wall / Photo Booth
29 Oct 23:45
Upstairs Circus published her project Diy Holiday Photo Wall / Photo Booth
29 Oct 23:45
You Will Need
-
 Step 1
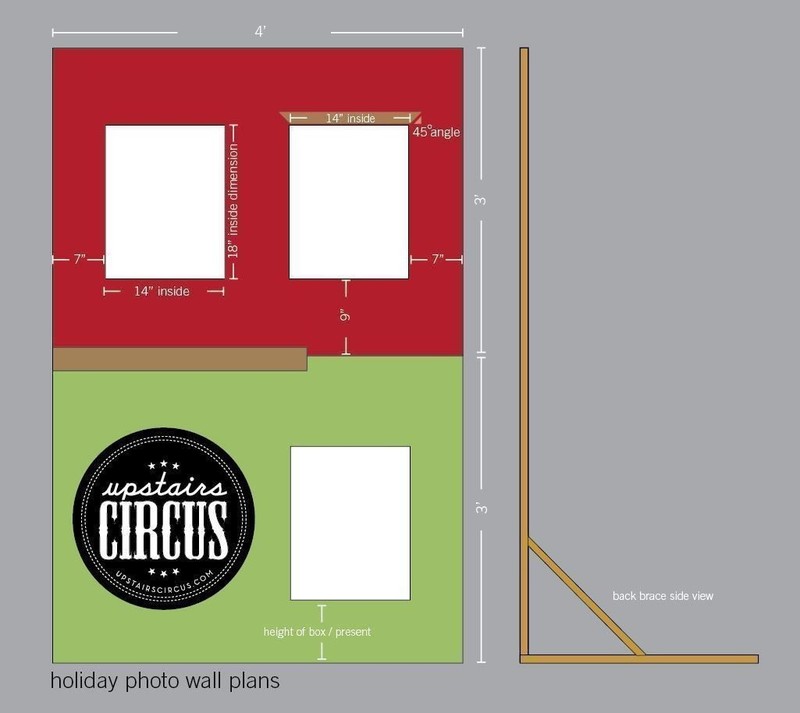
To make it easier, let’s start with the plan...
-
 Step 2
Use miter saw or miter box to cut the moulding for the picture frame holes. Cut 6 pieces with a 18″ inside length and 45 degree outside angles, then cut 6 pieces with a 14″ inside length and 45 degree outside angles.
-
 Step 3
Miter cuts in plan
-
 Step 4
Optional: This is a picture of an engineer. He has to triple check everything before executing. You can skip this step if you are not an engineer and trust your measurements!
-
 Step 5
Cut the frame holes out of the mdf boards using jigsaw or rotozip (with a start hole drilled into the mdf). See plans above for placement.
-
 Step 6
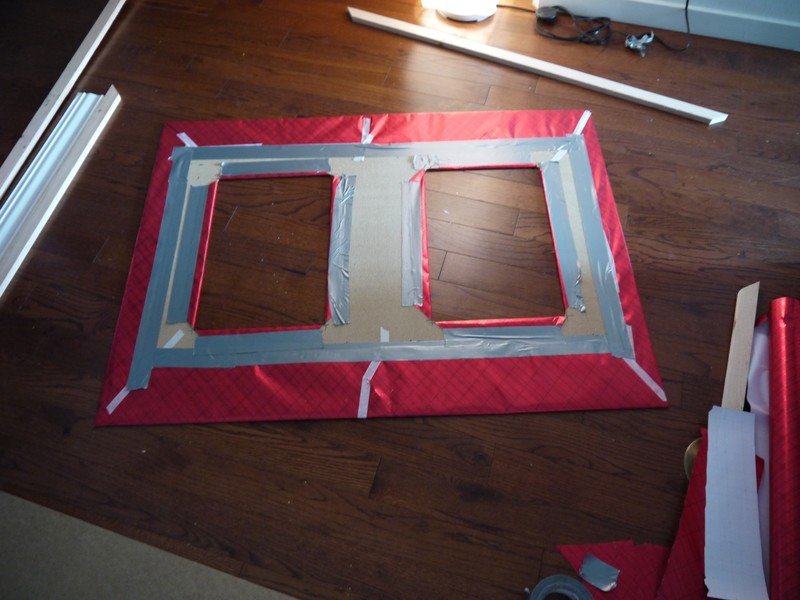
Adhere wrapping paper to top half of wall with spray adhesive and/ or tape
-
 Step 7
Paint the bottom half of the wall your desired color
-
 Step 8
Spray paint all the moulding pieces (including chair rail moulding) your desired color
-
 Step 9
Miter 1 x 2 pieces to create a back brace to attach mdf board to. Screw boards into brace using short screws and a drill.
-
 Step 10
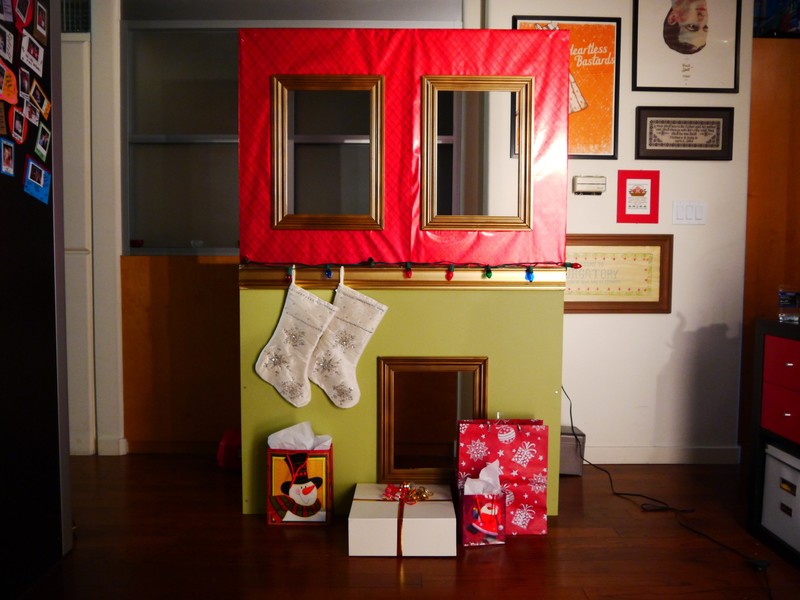
Fasten frame pieces and chair rail piece with Powergrab or screws
-
 Step 11
Use remaining 1 x 2 pieces to make a stand to keep the wall upright (see plans above). Decorate with holiday decor
-
 Step 12
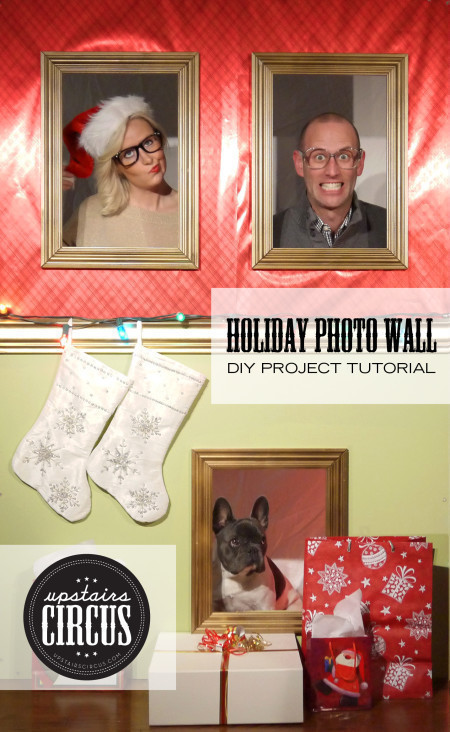
We draped a white sheet behind our wall prior to taking pictures, then we lit it appropriately and let the fun commence!
-
 Step 13
I must say, not every picture turned out amazing of everyone. I used my Photoshop skillz to paste together good shots of everyone until I was happy with the results, then made it into card format, printed and sent to everyone I loved :-)