About
A how-to for the perfect floral design!
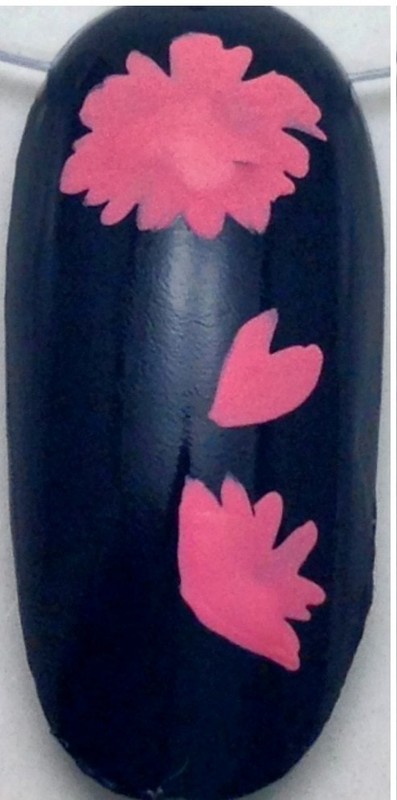
This is such a fun floral pattern - perfect for any season really. I was actually inspired by Vampire Weekend's Modern Vampires of the City floral pattern. This design is fun because it doesn't have to be perfect!
Tags
-
 Key West Witch favorited DIY Floral Nail Art
21 Aug 03:56
Key West Witch favorited DIY Floral Nail Art
21 Aug 03:56
-
 Abby C. favorited DIY Floral Nail Art
25 Mar 15:24
Abby C. favorited DIY Floral Nail Art
25 Mar 15:24
-
 Rhonda G. favorited DIY Floral Nail Art
21 Feb 08:37
Rhonda G. favorited DIY Floral Nail Art
21 Feb 08:37
-
 mmotse03 favorited DIY Floral Nail Art
18 Aug 20:25
mmotse03 favorited DIY Floral Nail Art
18 Aug 20:25
-
 Annlouise L. added DIY Floral Nail Art to Taylor Swift
25 May 08:28
Annlouise L. added DIY Floral Nail Art to Taylor Swift
25 May 08:28
-
Calah L. added DIY Floral Nail Art to NAILS
06 Jan 19:32
-
Calah L. favorited DIY Floral Nail Art
06 Jan 19:32
-
Barbara B. favorited DIY Floral Nail Art
29 Nov 00:33
-
 Toxic Cupcake Killjoy favorited DIY Floral Nail Art
22 Nov 10:09
Toxic Cupcake Killjoy favorited DIY Floral Nail Art
22 Nov 10:09
-
 Celine Does Nails published her project DIY Floral Nail Art
13 Jul 02:54
Celine Does Nails published her project DIY Floral Nail Art
13 Jul 02:54
-
 Step 1
First step is to paint your base polish. For this particular design, I used Sinful Colors "Calypso."
-
 Step 2
Next, use a thin paintbrush and a light pink acrylic paint to make the basic flower shapes.
-
 Step 3
Next step is to start the stems and leaves. I liked to start with a lighter green first.
-
 Step 4
Next, use a darker green paint to add depth to your stems and leaves.
-
 Step 5
Back to the actual flowers, use a red or dark pink paint to add shadows to the flowers. Short, thin strokes are key.
-
 Step 6
I always like to highlight my flowers so in this step I used my white paint to do so.
-
 Step 7
Lastly, I painted white flowers around the others. Super simple and they don't have to be perfect!
-
 Step 8
Lastly last, for this particular design, I used matte top coat.