


About
DIY Camera bag, tote, organizer
On my journey to becoming a photographer I have been challenged to carry around my camera in an attempt to catch that perfect moment or memory. My beloved camera nestled away in it's protective case waiting for it's moment to shine became lonely. Unfortunately the bag screamed "Hey look at me! I'm an expensive camera so steal me and I am ugly!" Needless to say I didn't take it with me much. So I set out, determined, to find a pretty camera bag that didn't look like an invitation to steal. I looked high and low. Prices were more high than low so I put my creative hands to work. I found this fabulous Coach bag on eBay under $50 and bought some fabric and foam at my local Joanne's and got to work. So for around $60 I have a camera bag that I love and a price tag that I love even more. I hope this inspires you to make your own bag to carry around your prized possession.
Tags
-
 dippydiscoball favorited Diy Camera Bag
11 Jul 23:58
dippydiscoball favorited Diy Camera Bag
11 Jul 23:58
-
 Kinhime Dragon favorited Diy Camera Bag
27 Dec 20:15
Kinhime Dragon favorited Diy Camera Bag
27 Dec 20:15
-
 Kyara S. favorited Diy Camera Bag
04 Oct 13:25
Kyara S. favorited Diy Camera Bag
04 Oct 13:25
-
 Pimke added Diy Camera Bag to Upcycling
11 Mar 10:21
Pimke added Diy Camera Bag to Upcycling
11 Mar 10:21
-
 L D. favorited Diy Camera Bag
15 Dec 01:06
L D. favorited Diy Camera Bag
15 Dec 01:06
-
 Cerys J. favorited Diy Camera Bag
02 Jul 04:22
Cerys J. favorited Diy Camera Bag
02 Jul 04:22
-
 Jill favorited Diy Camera Bag
25 May 19:49
Jill favorited Diy Camera Bag
25 May 19:49
-
 Crafterella added Diy Camera Bag to Camera Accessories
25 May 10:41
Crafterella added Diy Camera Bag to Camera Accessories
25 May 10:41
-
 heather.broski.5 favorited Diy Camera Bag
30 Apr 05:24
heather.broski.5 favorited Diy Camera Bag
30 Apr 05:24
-
 kelly.koopman added Diy Camera Bag to To do
19 Apr 09:27
kelly.koopman added Diy Camera Bag to To do
19 Apr 09:27
-
 Step 1
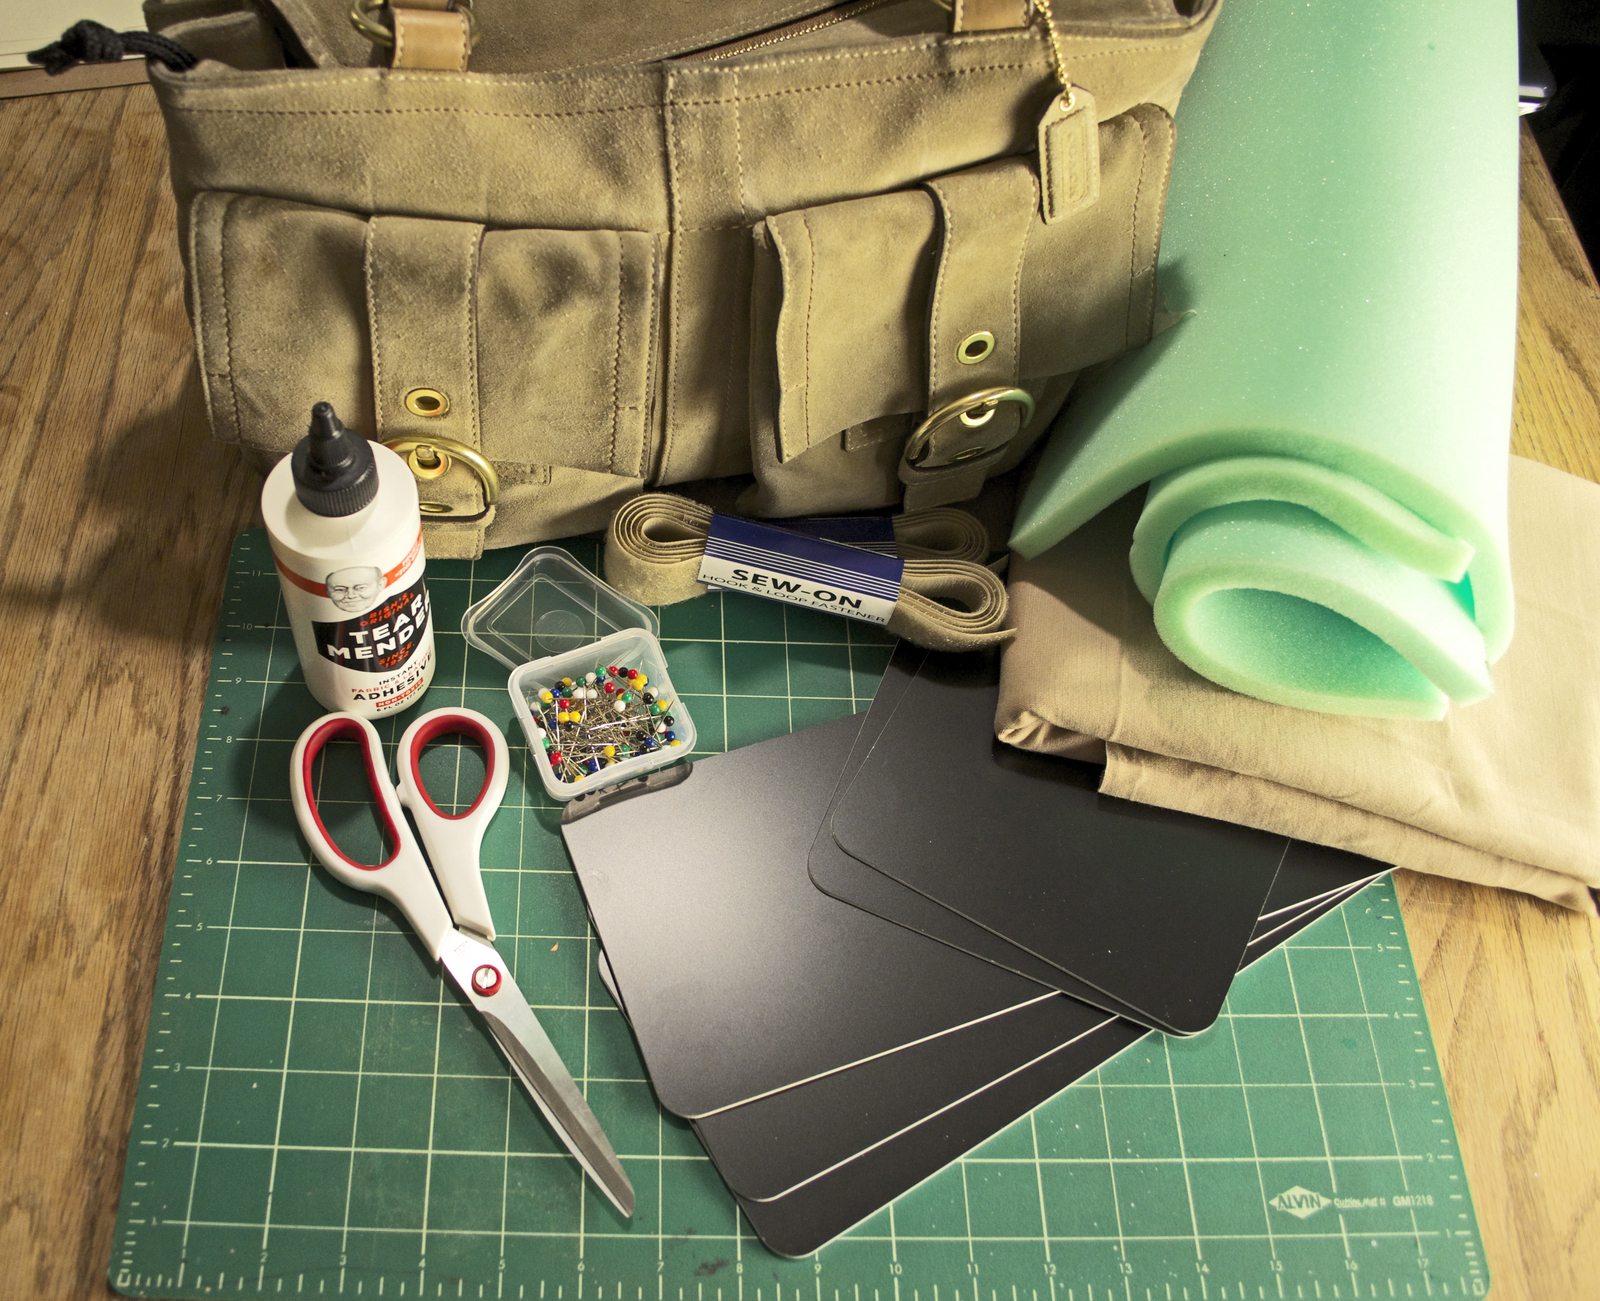
Gather everything you will need:
-A bag of your choosing. making sure it has a flat bottom and is big enough to hold your gear.
-Foam thicker than 1/2"
-Fabric to cover the foam
-scissors
-fabric glue, hot glue or you can sew it
-velcro
-pins to hold the fabric in place as it dries or while you sew
-plastic or cardboard to keep the shape. It goes in between the foam. -
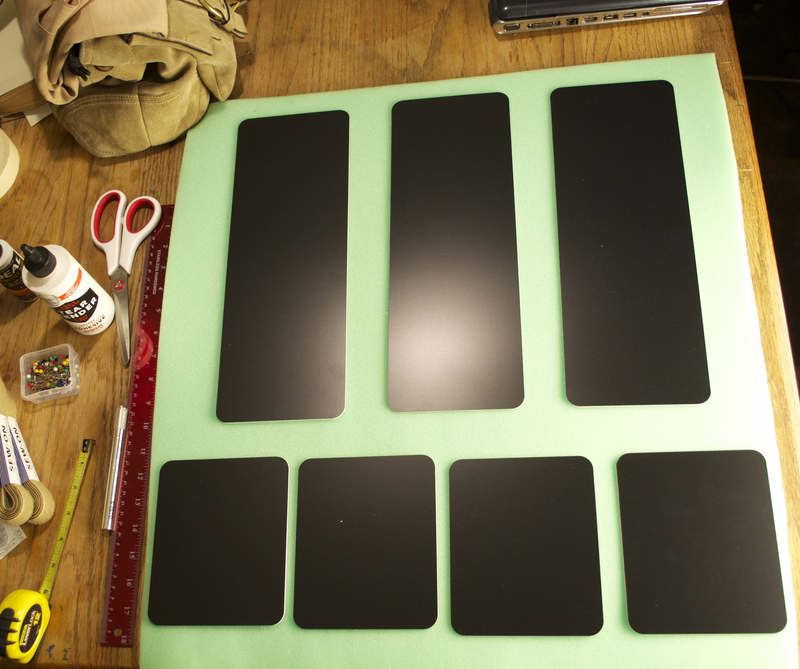
 Step 2
Lay your filler pieces out on the foam to make sure you have enough. I bought remnant pieces which were the cheapest.
-
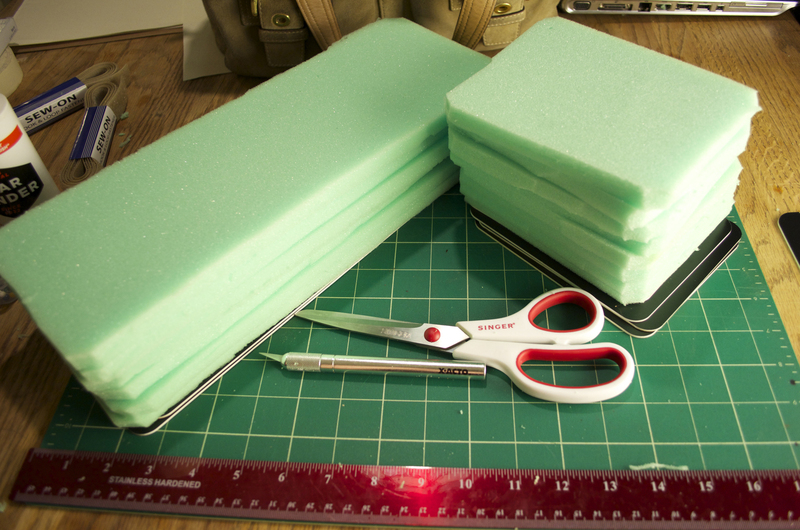
 Step 3
Cut the foam to the desired size making sure it is even. you can use an Xacto knife or scissors.
-
 Step 4
After you wrap the foam around your plastic or cardboard you cover it with the fabric. You don't have to use plastic or cardboard you could opt for a thicker foam if you like. I wanted something to be really durable and protective so I chose the plastic. I made the back and front sides as one piece by wrapping the fabric toward the center. The space in the middle will be the bottom.
-
 Step 5
I made the shorter sides as one pice as well. the middle will be where the bottom piece fits into.
-
 Step 6
I put the longer pieces down first and then the shorter side pieces on top of that. Then i covered the bottom piece separately and placed that on top of the others.
-
 Step 7
I purposely left about an inch of fabric overall to fold over and glue the sides together. You don't have to be neat about it because no one will see the outside.
-
 Step 8
It's starting to take shape. All sides are now glued together.
-
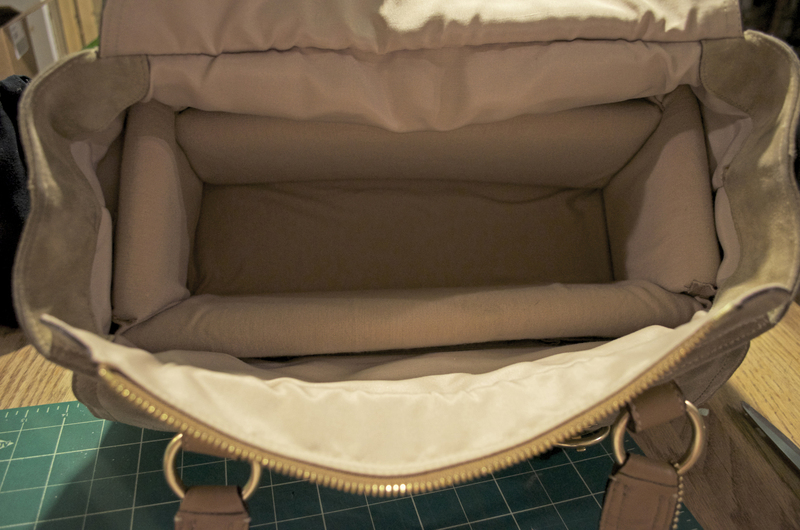
 Step 9
If your measurements are correct, It should fit nicely inside your bag.
-
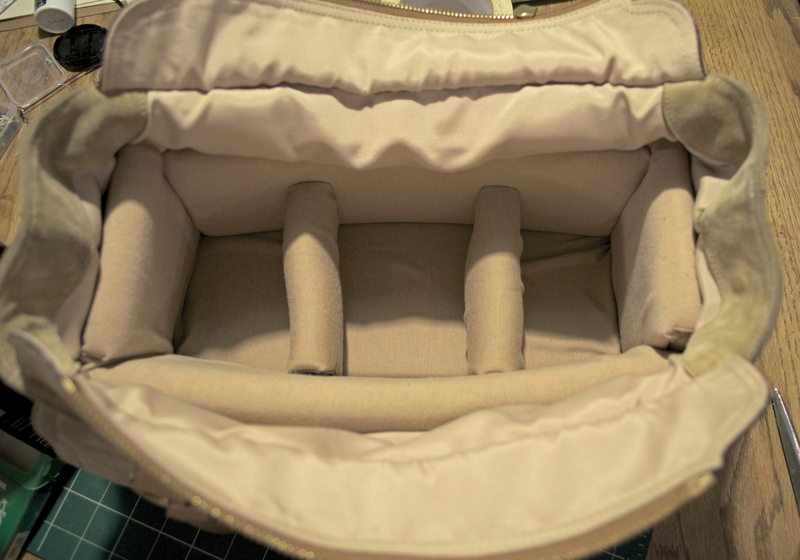
 Step 10
I made two smaller dividers out of foam. There isn't a filler in these. Just foam. I glued two small strips of velcro to each end. I used the scratchy side on these pieces so they wouldn't scratch my lens housing and camera. You will have to glue the fuzzy side to the sides of the interior walls. Two strips spaced evenly from side to side should work on the front and back sides.
-
 Step 11
They fit nicely inside. You can put them wherever you like to accommodate the size of your camera and whatever else you decide to carry around.
-
 Step 12
There is ample room inside for three of my most important lenses and there are pockets on the inside of the bag already to house my charger, cables and filters.
-
 Step 13
You can rearrange to fit whatever life throws at you.
-
 Step 14
Grab a helper or friend if you want.


Comments


