


About
DIY, custom comfy bra!
I have been wanting to make my own bra for awhile now. I am the type of girl who does not fit into Victoria Secret very well! In fact I am so "petite" (and loving it!) that I usually do not wear lined or padded bras at all. I had been struggling to find a cheap or free pattern for a while and decided to make my own! This tutorial will show you how to make a simple, unlined racerback bra.
Tags
-
 Key West Witch favorited Diy Bra
12 Sep 09:28
Key West Witch favorited Diy Bra
12 Sep 09:28
-
 SlinkSkull favorited Diy Bra
22 Jul 00:08
SlinkSkull favorited Diy Bra
22 Jul 00:08
-
 amanda the wizard favorited Diy Bra
12 Jun 04:54
amanda the wizard favorited Diy Bra
12 Jun 04:54
-
 Deniz S. favorited Diy Bra
28 Apr 07:37
Deniz S. favorited Diy Bra
28 Apr 07:37
-
 Alecia B. favorited Diy Bra
01 Jul 01:47
Alecia B. favorited Diy Bra
01 Jul 01:47
-
leila g. favorited Diy Bra
23 Jun 19:21
-
Helle W. favorited Diy Bra
20 Mar 22:28
-
 Julia favorited Diy Bra
11 Mar 10:10
Julia favorited Diy Bra
11 Mar 10:10
-
 Rachel P. published her project Diy Bra
07 Mar 11:16
Rachel P. published her project Diy Bra
07 Mar 11:16
-
 Step 1
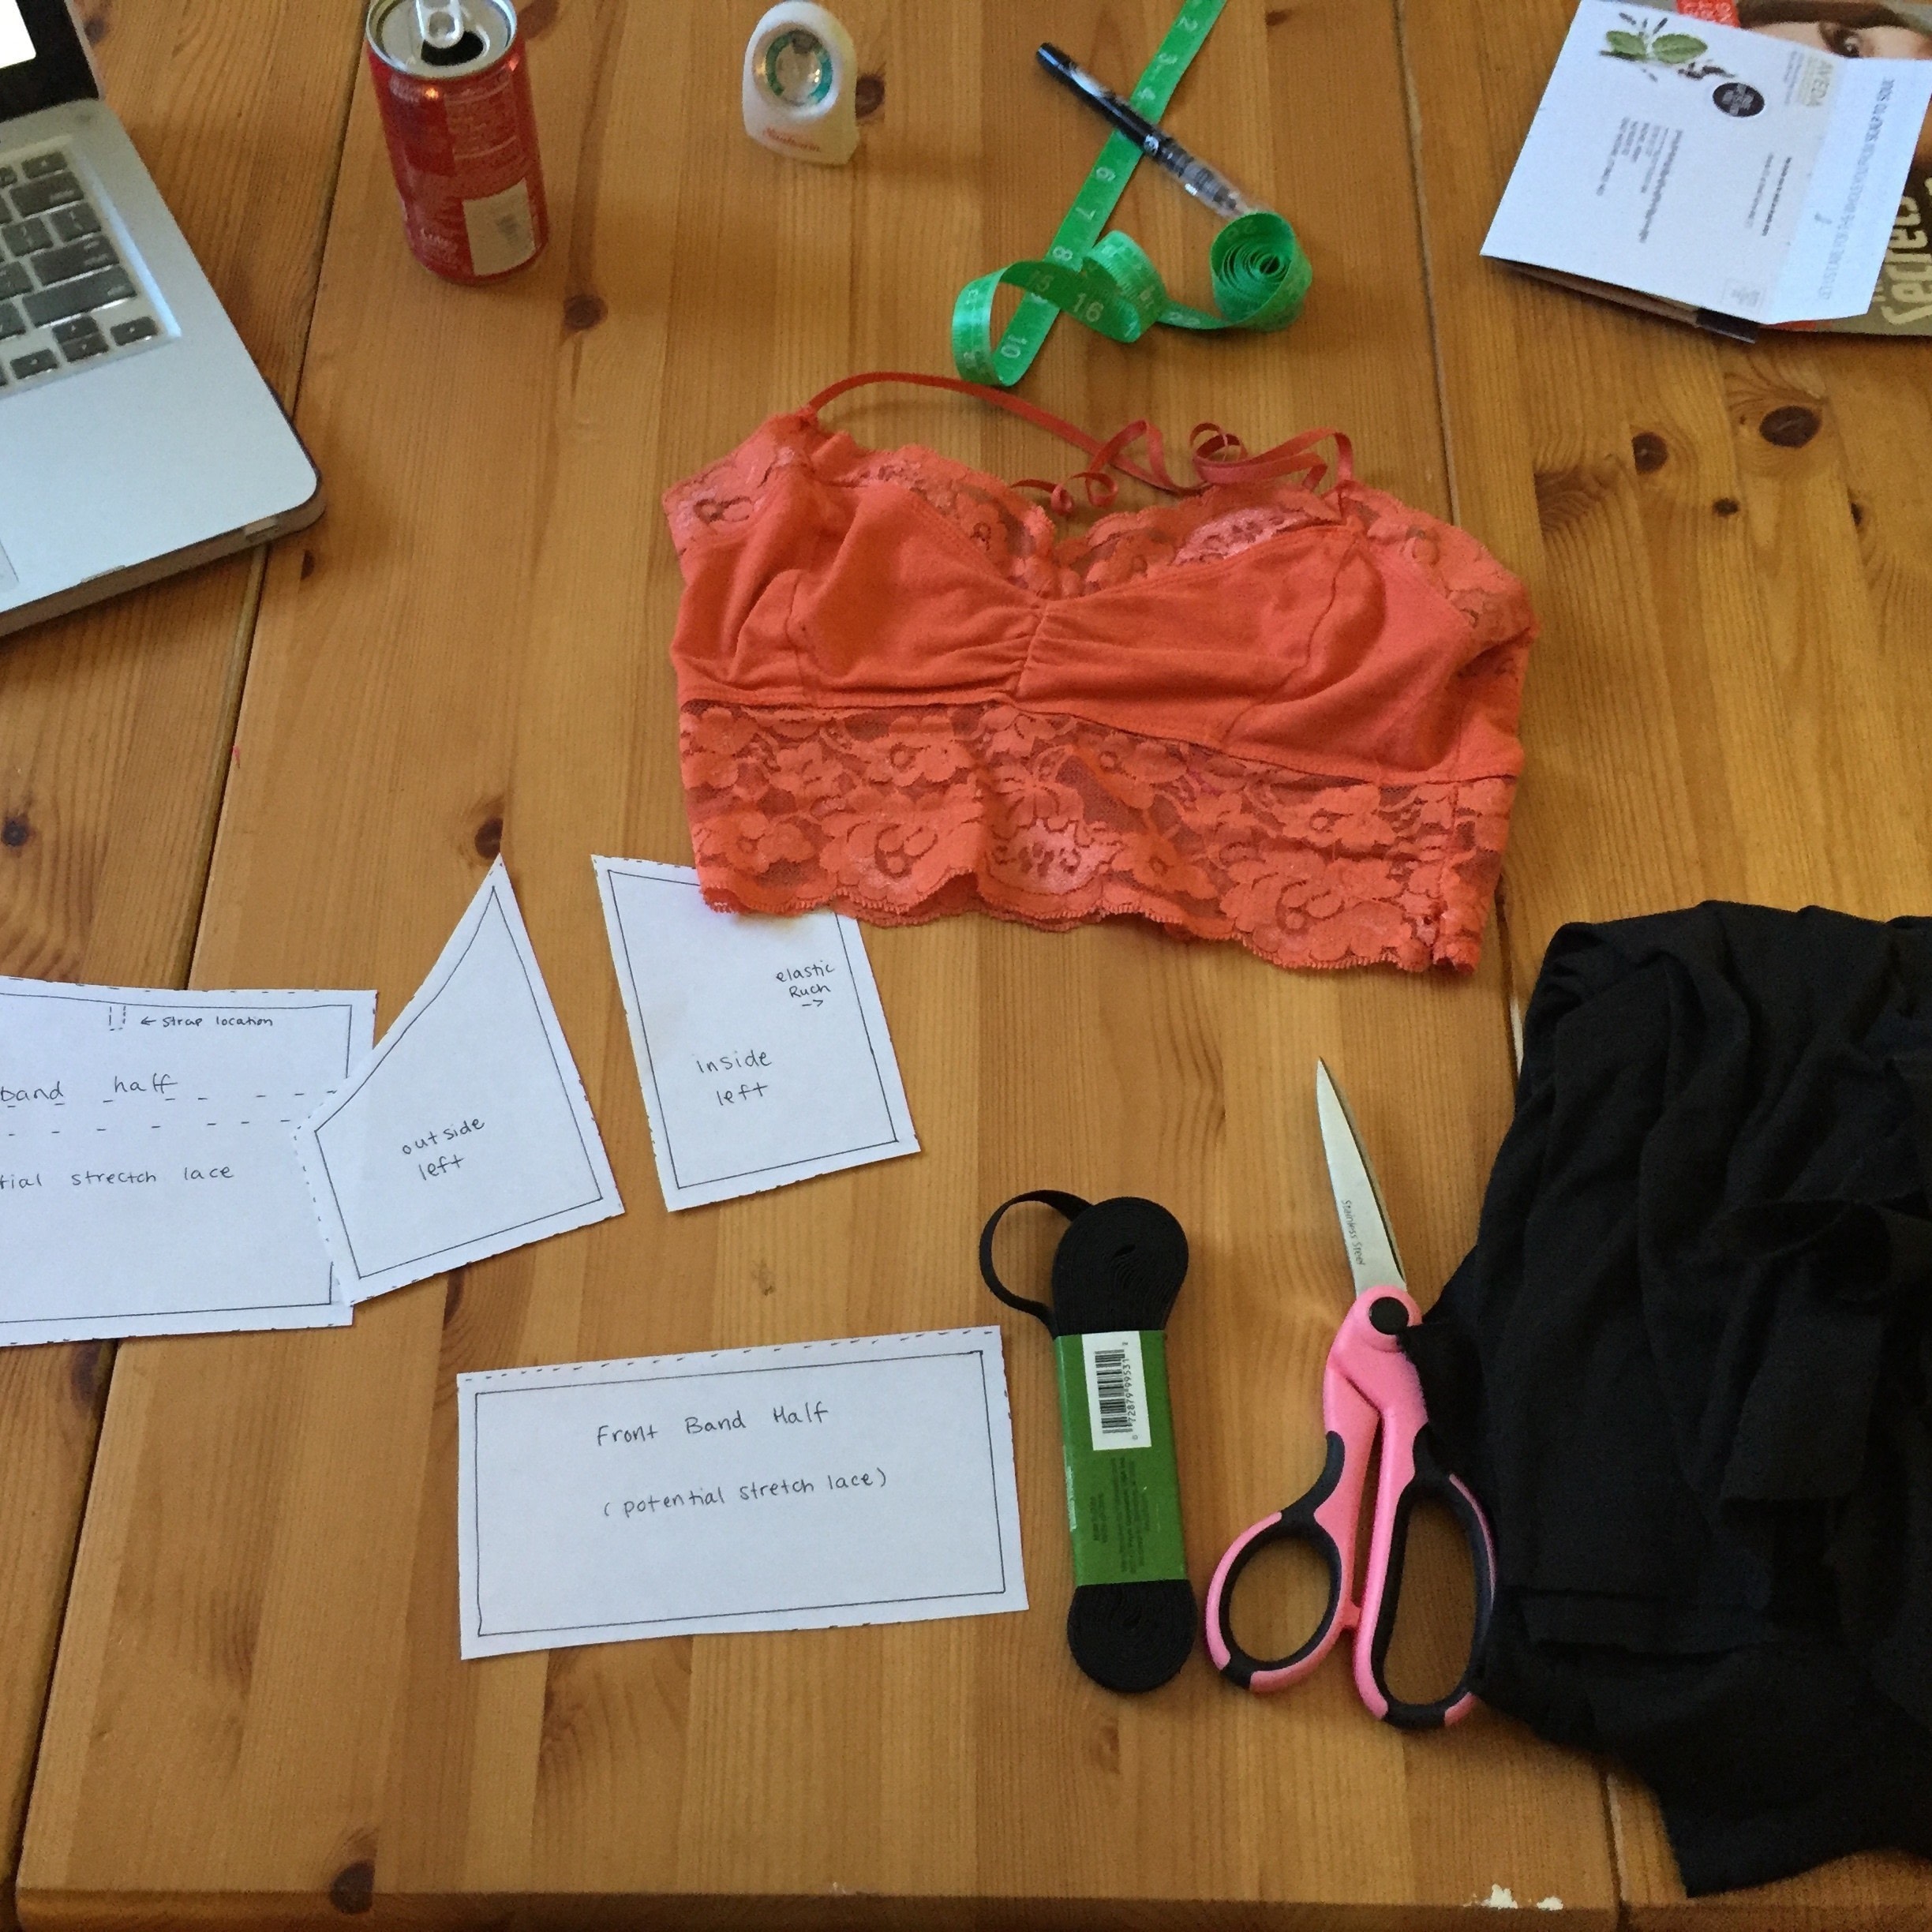
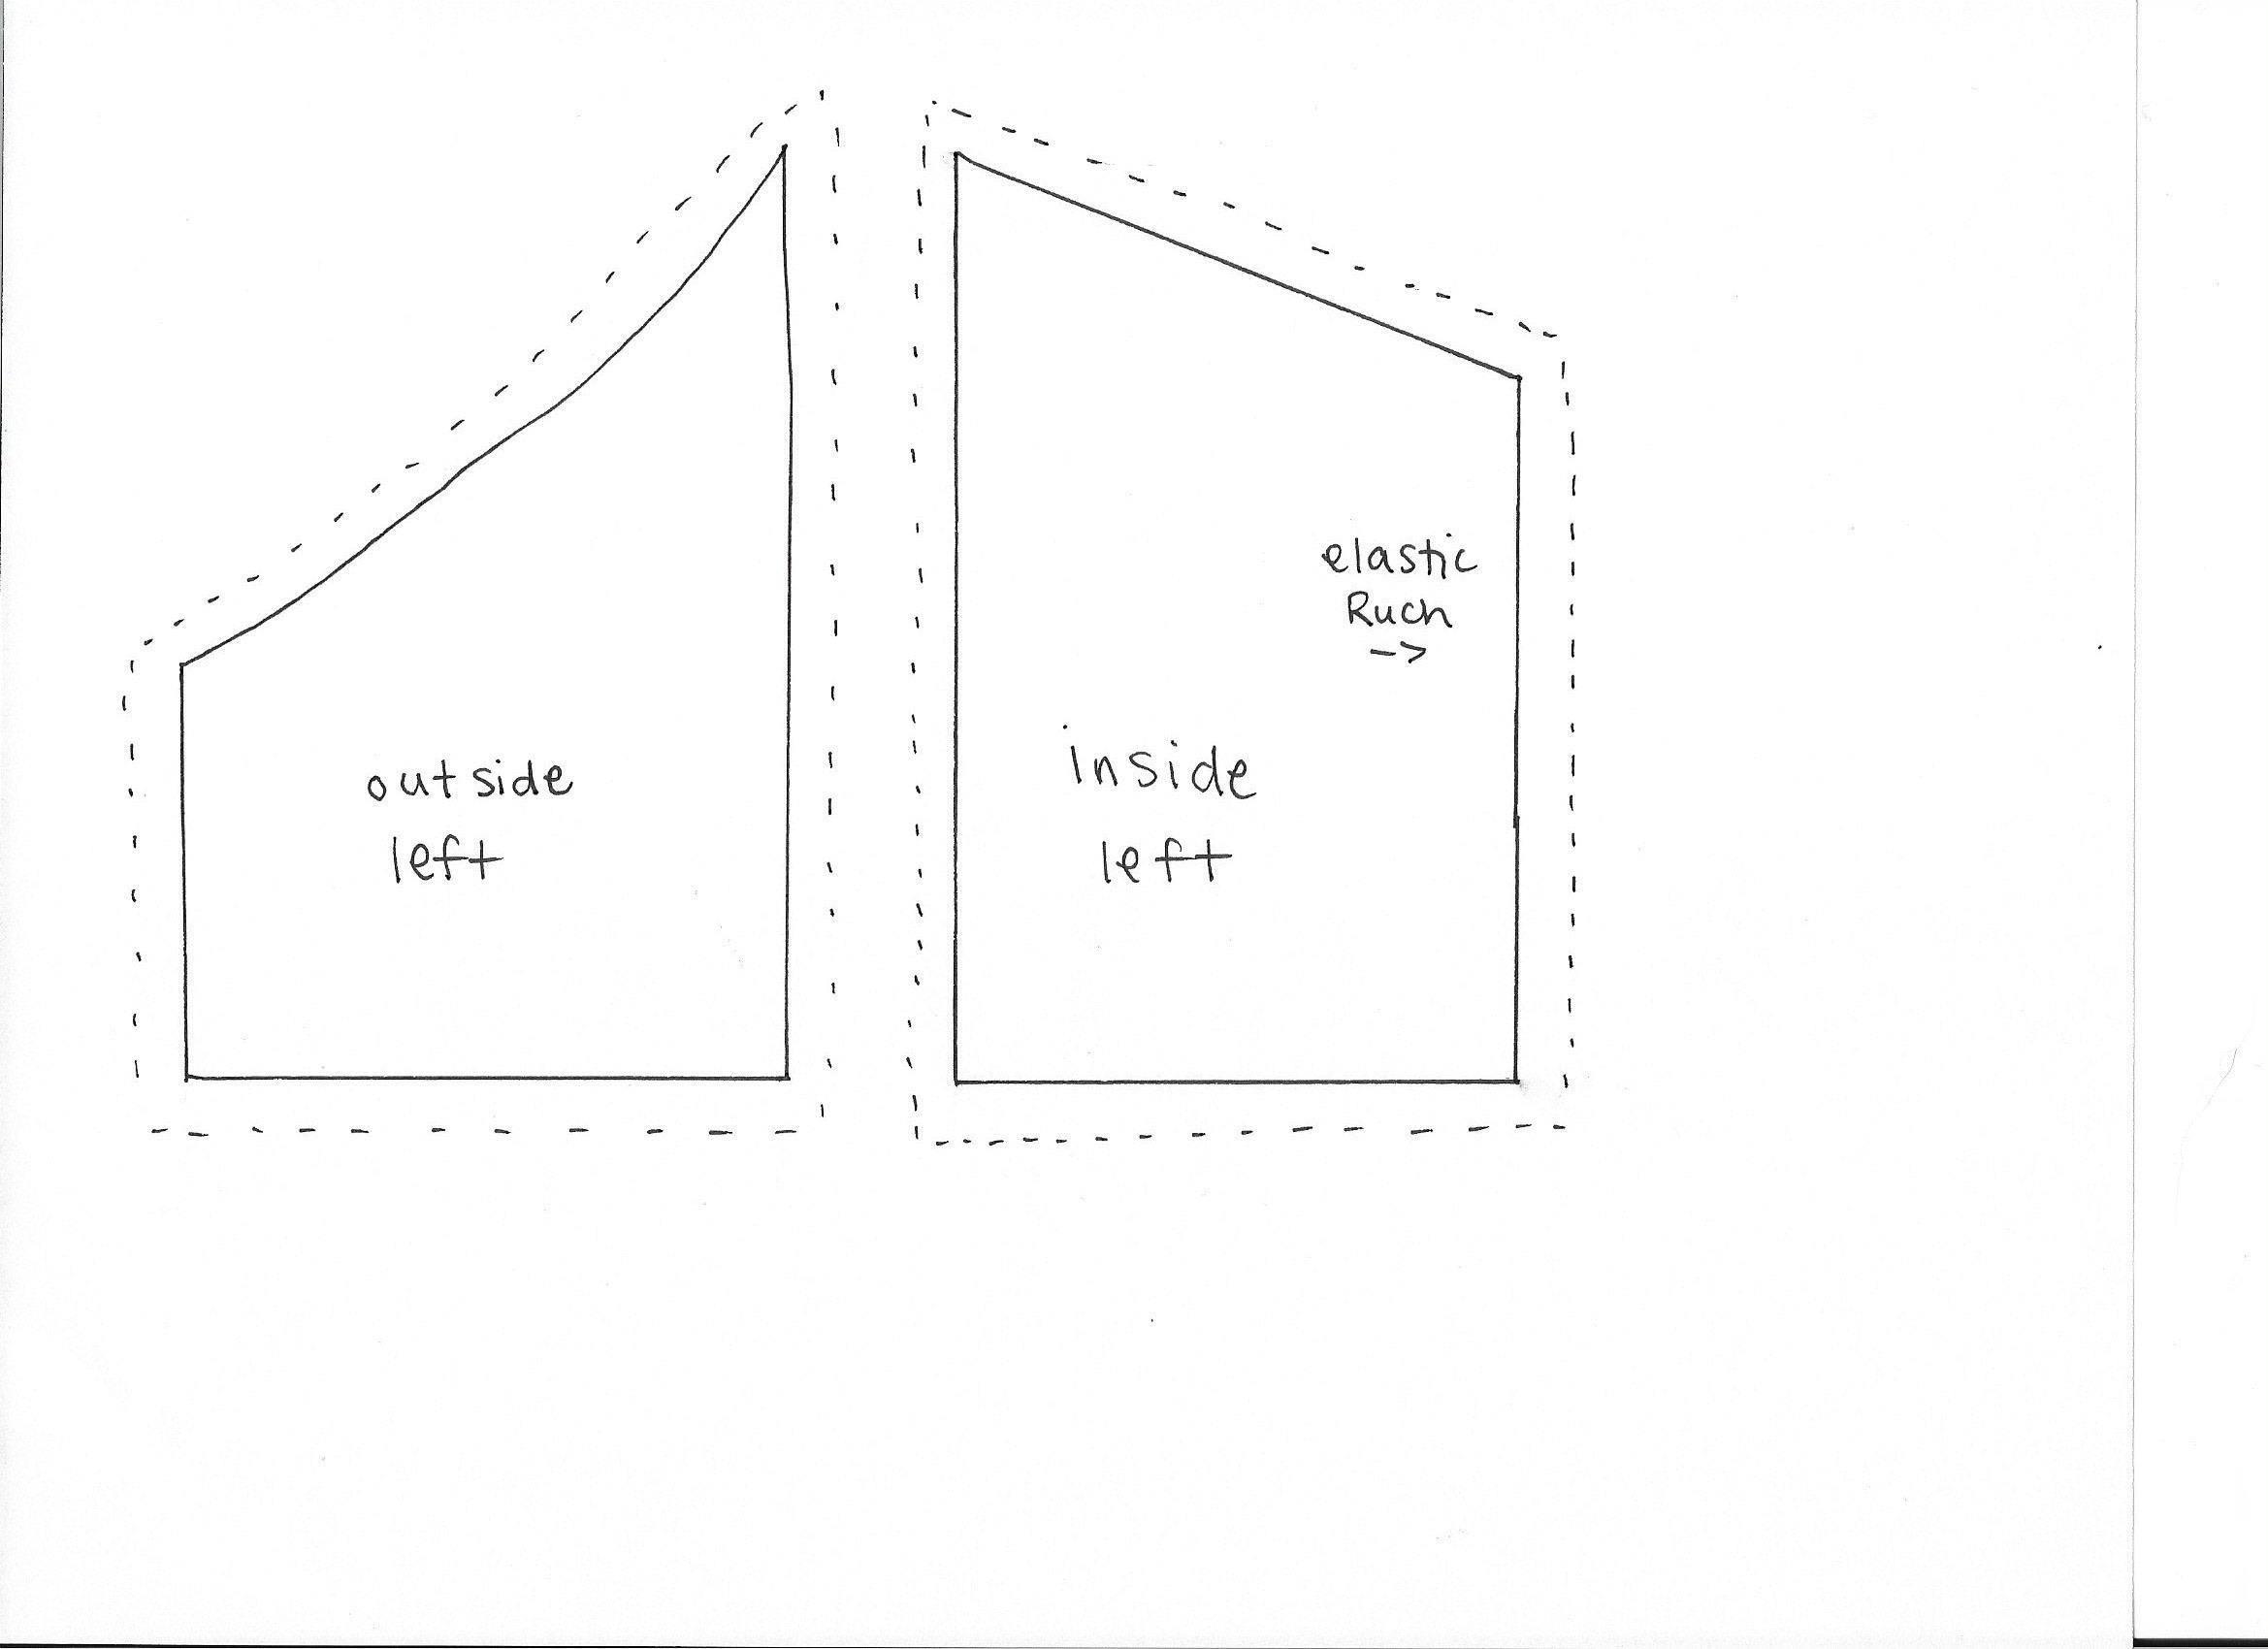
Gather your materials. In this step you will want to measure your bust and underbust. The pattern I have provided fits me, a 32 A, loosely. In order to sew a larger bra, print out the pattern and using your measurements, cut the paper with a wider edge as needed. Or you can cut out my pattern, hold it against a bra, and trace onto another sheet once you have decided what size you need. If you do this, remember to leave a seam allowance! Pictured in orange is the model bra(lette?). Remember to print patterns at 100%!
-
 Step 2
Once you have cut out the pattern pieces to your size, mark the fabric. I use chalk to mark. My fabric is left over jersey knit from a long sleeve shirt dress I made using this pattern: http://nap-timecreations.com/2015/03/womens-t-shirt-pattern-free.html. You could also buy any fabric that you like that is stretchy. Knits, jersey, even spandex would work great! You could upcycle t-shirts, maybe even fleece? The choices are endless! This is the cup of the bra! Time to cut!
-
 Step 3
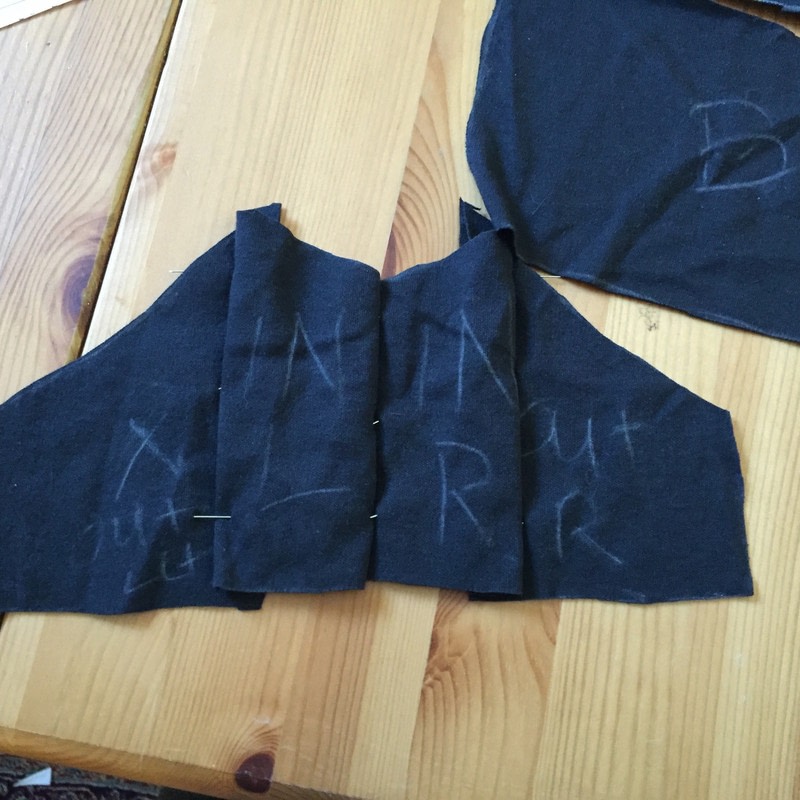
Once you have cut your cup pieces, lay them out to make sure they all generally line up. I found it useful to mark where they belong with my chalk, because I am very forgetful... If at this point the cups look a little big, don't worry! You haven't accounted for the seam allowance.
-
 Step 4
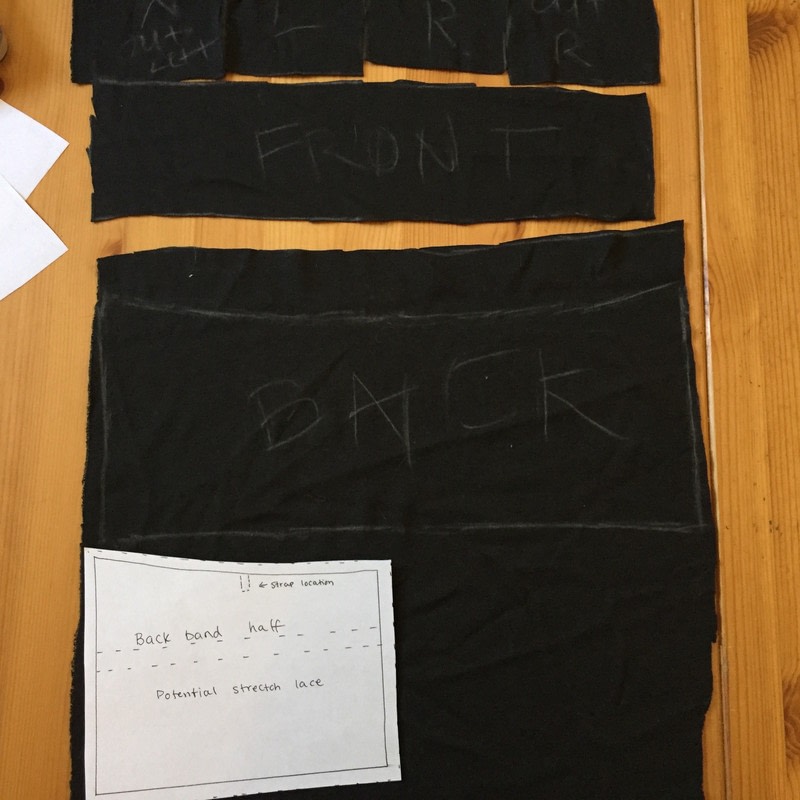
Next, it is time to do the front and back panels. In this photo I have already cut the front panel, which belongs under the cups. The back panel, not yet cut, is demonstrating that the front and back panels patterns are only half! so make sure that when you are making your piece you either print 2 or flip over the one piece to mirror the other side. The front and back panels do not need to be fabric! In fact if you look at the first picture the orange bra uses stretch lace.
-
 Step 5
Now you should have all of the fabric pieces of the bra! This would be a good time to pin the parts together carefully to try on the bra. Be careful not to get stabbed! If the bra is too loose, especially in the front and back panels, you will not get the support you need. So make sure to take your time to get the perfect fit!
-
 Step 6
Here is an example of the pinned cups. I didn't do it very carefully so it appears small. Remember that your seam allowance only need to be 1/4 inch at most.
-
 Step 7
Now that you have pinned your cups, take to the machine! You can sew your bra in two basic ways, either with a stretch fabric stitch or with an overcasting stitch. I chose an overcasting stitch because my fabric was fraying a little bit. Sew up the cups! You should sew the long ends of the inside and outside panels together, then the shorter ends of the inside cups together.
-
 Step 8
Your now existent cups should look like this.
-
 Step 9
Now you can pin on the front panel to the cups. Right sides together, pin the underneath of the cups to the front panel. Then sew in the same fashion you did the cups!
-
 Step 10
At this point I decided to top stitch the cup and front panel. This is optional. It gives the bra an appearance of underwire, and I thought generally looked better. I used a straight stitch and just sewed over the overcasting stitch connected the front panel and the cups.
-
Step 11
I don't have a picture for this step, but now it is time to attach the back panel. Line up the sides of the front and back of the bra (which are basically the under-armpit part) and sew in the same way you did before.
-
Step 12
Now that you have something that resembles a bra, try it on! It isn't too late to make changes. In fact at this point I decided to make the under-bust a bit shorter and trimmed around the bottom. If your bra is too loose, consider taking it in under the pits. At this time I decided because of my material to straight stitch my edges down. You can see it in the next step...
-
 Step 13
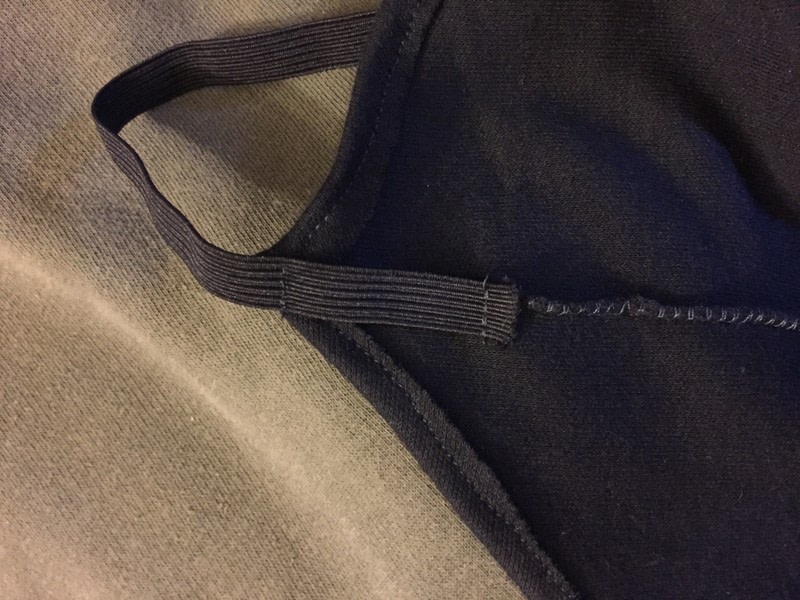
Now you can finally add the straps! I wanted to make a racer back bra, so I measured how long I needed my straps to be by using my old bra leaving a little extra just in case. Start with the front of the bra. The straps should be sewn down over the middle seam of the bra. For reliability I like to sew as shown. A bit more elastic with some straight stitching on the bottom and at the point of the bra.
-
 Step 14
Next sew the straps on the back. This step is fun because you can decide what kind of bra you want to make! Like I said, I wanted a racer back so I cut the elastic a bit long, but you could make a straight back bra if you wanted! You could also make adjustable straps, convertible bra, really whatever you want. This is how I sewed my strap, just a simple straight stitch (going back over, and then forward again for 3 times sewing coverage).
-
 Step 15
So, here is my racer back bra! If you look in the middle of the bra I added an optional embellishment...
-
 Step 16
I like the ruched look, so I took a small bit of elastic that was a bit shorter than the length of the seam there when completely stretched out. To make this look, sew one end of the elastic to the top of the bra over the seam. I used a straight stitch, and sewing slowly, stretch the elastic completely as much as you can and sew directly over the seam. It is a bit awkward so if you have never done this I recommend trying on a scrap fabric first. (I also like to do this on the booty of my underwear! Gives it a cute shape.)
-
 Step 17
So, tada! You have a cute comfy bra! Of course this bra doesn't lend much support but for us ladies who don't need it, may as well be comfy without shelling out $60 for a giant padded discomfort! I bet this pattern could even be used to create cute camis, or flowing tanks, or even a swimsuit top! Go crazy!