


About
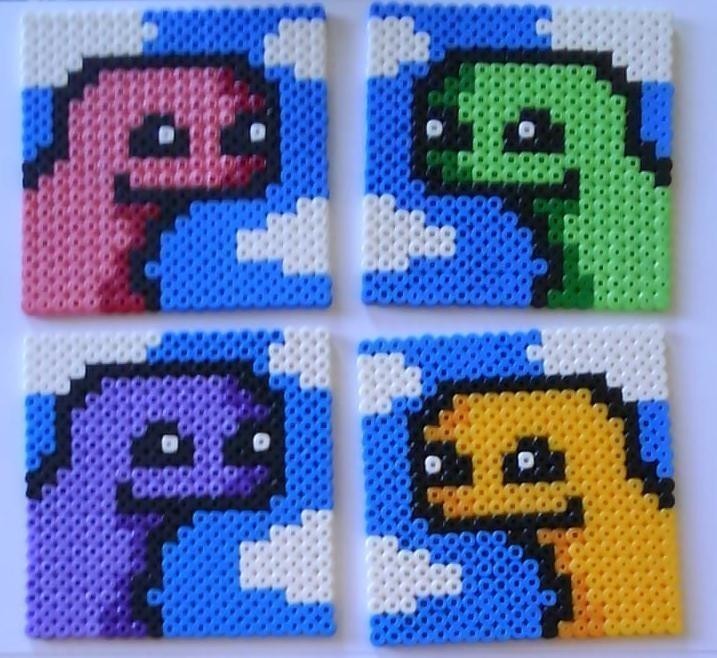
cute dino coasters!
I made theese for a friend of mine who loves dinosaurs.
You could use theese as coasters, decorations or table placement settings :)
-
 Leigh C. favorited Dinosaur Hama Bead Coaster! :D
11 Jan 22:15
Leigh C. favorited Dinosaur Hama Bead Coaster! :D
11 Jan 22:15
-
 Elizabeth s. favorited Dinosaur Hama Bead Coaster! :D
16 Dec 23:03
Elizabeth s. favorited Dinosaur Hama Bead Coaster! :D
16 Dec 23:03
-
 gina favorited Dinosaur Hama Bead Coaster! :D
17 Nov 14:56
gina favorited Dinosaur Hama Bead Coaster! :D
17 Nov 14:56
-
 kaynekitchens favorited Dinosaur Hama Bead Coaster! :D
06 Oct 17:03
kaynekitchens favorited Dinosaur Hama Bead Coaster! :D
06 Oct 17:03
-
jen s. favorited Dinosaur Hama Bead Coaster! :D
06 Oct 15:37
-
 dippydiscoball favorited Dinosaur Hama Bead Coaster! :D
08 Jul 18:47
dippydiscoball favorited Dinosaur Hama Bead Coaster! :D
08 Jul 18:47
You Will Need
-
 Step 1
You'll need;
Perler/hama beads
(or perhaps you refer to them as nabbi pearls, that works too ;) )Pegboard...a pair of tweezers if you want.
-
 Step 2
First I made the outlining.
Sometimes I start in a corner and work my way through it all, but this is easier for this craft. -
 Step 3
Then I made all of the clouds.
Now you're finished with the white pearls, besides from the two white ones that goes on the eyes. -
 Step 4
Then I make the black outlining of the dino!
-
 Step 5
Fill up the lines with the color of choise. I made a darker outlining on mine.
-
 Step 6
Then you just fill it up with the sky-blue and the dino's color :)
-
 Step 7
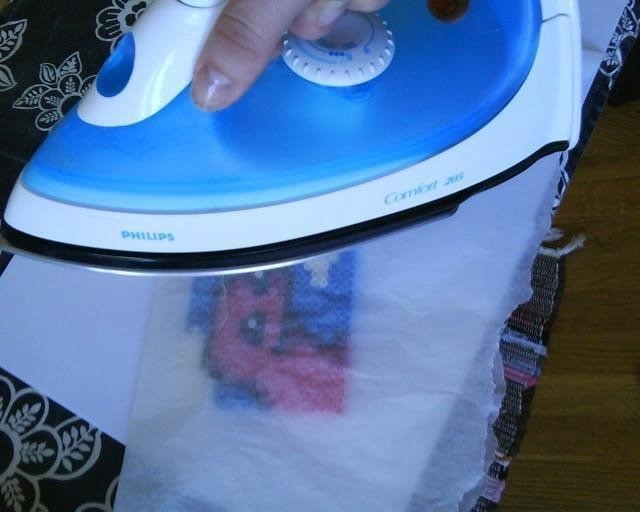
Bring out your iron and some ironing paper / baking sheet paper.
Iron goes on medium - high, but do try the medium heat first so that you wont melt it totally at first try!
-
 Step 8
Cover your dino!
-
 Step 9
Iron away!
-
 Step 10
Now it should be melted together.
You can choose for yourself just about how melted you'd like it to be.LET IT REST FOR A COUPLE OF SECONDS!
-
 Step 11
Then CAREFULLY pull it of the peg board and flip it so that the ironed side is facing downwards.
-
 Step 12
Then cover the un-ironed side with paper...
-
 Step 13
...and iron that side as well!
When you're finished, be QUICK and...
-
 Step 14
...put some weight on the perler creation!
If you don't do this quickly your creation will bend and get tilted.
Now, you don't want that, right?Let it rest for a couple of minutes.
-
 Step 15
Here we have some of the coasters I made!
The green one is my fav. but you can't really see it unless you click the image :D -
 Step 16
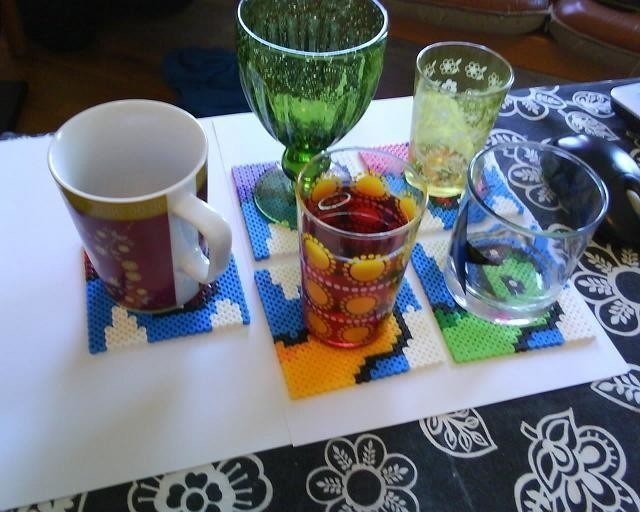
Ready to use as coasters! :D
-
 Step 17
:D
-
 Step 18
Here you can see them more clearly!
Go to my website at
http://pysselninja.blogspot.com
for more pics and other works :D(you can see enlarged pictures there where it's easier to count the number of pearls for the project.)


<3 <3 <3 <3 <3 <3