Deer Diary
Extract from Simple Sewing with Lola Nova • By Alexandra Smith • Published by Mitchell Beazley

About
Simple Sewing with Lola Nova
“Deer Diary, let me tell you a secret…” I love a brand-new diary or journal, with all the promise and possibility of a fresh start. This sweet covered notebook is made from cosy felt, appliquéd with a little woodland deer; perfect for writing down all your thoughts, stories, dreams and big ideas! Felt is such a wonderful craft material, easy to work with and it comes in a rainbow of colours to choose from. Use the templates to sew up your very own Deer Diary and you will find it comes together so quickly
that you will want to make up a few more for gifts. Instead of a deer, you might prefer a chicken or a few felt flowers for your cover.
Let your imagination run wild!
-
 Kinhime Dragon favorited Deer Diary
01 Aug 01:17
Kinhime Dragon favorited Deer Diary
01 Aug 01:17
-
 Rosalie T. favorited Deer Diary
21 Dec 05:32
Rosalie T. favorited Deer Diary
21 Dec 05:32
-
 Rachael H. added Deer Diary to Books/Journals
30 Nov 17:18
Rachael H. added Deer Diary to Books/Journals
30 Nov 17:18
-
Rachael H. favorited Deer Diary
30 Nov 17:18
-
 Suzi T. favorited Deer Diary
09 Nov 15:19
Suzi T. favorited Deer Diary
09 Nov 15:19
-
Joann O. added Deer Diary to To make
15 Oct 03:27
-
Joann O. favorited Deer Diary
15 Oct 03:26
-
 Chudames favorited Deer Diary
11 Oct 16:44
Chudames favorited Deer Diary
11 Oct 16:44
-
Robyn A. favorited Deer Diary
08 Oct 13:49
-
 erin f. favorited Deer Diary
05 Oct 08:04
erin f. favorited Deer Diary
05 Oct 08:04
-
 Step 1
Measuring and cutting the felt
The basic cover consists of 3 rectangle pieces of felt to
create the outer cover and the 2 inner flaps that your
notebook slips into. First, take some measurements to
determine the size of the rectangles you need.
Once you have chosen the notebook you want to cover,
use your tape measure to measure around the entire width
of your notebook (from the back to the front, including the
spine, if any). Add 1cm (3/8 in) to this measurement – this
will be the whole width of your cover. -
 Step 2
Now measure the height of your notebook, top to bottom.
Add 5mm (¼in) to this measurement – this will be the
height of your cover.
You now have the rectangular dimensions (width x height)
for the outer cover of your journal that you will cut out
from the sheet of felt.
For the inner flaps, subtract 8cm (3in) from the width of
the outer cover dimensions and cut out a corresponding
rectangle from the second sheet of felt. Cut this piece in
half along its height. You now have your two inner flaps
that will be sewn on the inside of the outer cover.
Using a template, trace or copy the
Deer scene. You can re-size them if you like using a
photocopier. Cut out the templates and either pin the
paper directly to the felt scraps, or trace onto the felt
with a fabric marker. -
Step 3
When cutting out the felt pieces to be appliquéd onto your
cover, I find that using small, sharp embroidery scissors with
a fine point at the ends is most beneficial. Cut slowly and
carefully around your templates to achieve the best results.
Once you have all of your pieces cut out, it is time to
arrange them on your cover. -
 Step 4
Appliqué the cover
To find the best placement of your appliqué pieces, take
your large rectangle cover piece and wrap it loosely
around your notebook, situating the overhang evenly. Now
arrange that sweet little deer and your scene pieces on
the cover until you feel they are just right. -
Step 5
You can pin them or use a tiny dab of glue stick to keep
them in place, wait a few minutes for the glue to dry
before you move on to the stitching. It’s now time to
appliqué our little buddy to the cover. Using a straight
stitch close to the edge of your appliqué piece, begin
stitching around your shape, back-stitching at the
beginning and end of your stitching to secure the thread.
Stitch slowly. With your needle in the down position, lift
your presser foot to pivot the cover when you come to
a corner or sharp turn in the appliqué piece, and lower
the presser foot before continuing to stitch. Repeat this
process for all your appliqué pieces. -
Step 6
Once you have finished the appliqué on the cover, you
can add a label or further embellishment to the inner flap
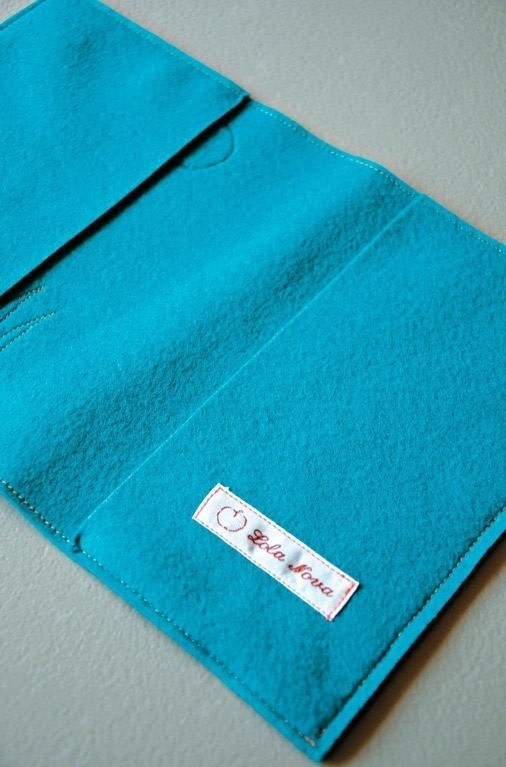
pieces, if you wish. -
 Step 7
Sew the cover together
Gather up your 3 finished cover pieces. Place each of
the inner-flap pieces on opposite ends of the large cover
rectangle, wrong sides together and matching raw edges.
Pin in place. -
Step 8
Firstly, stitch the cover and flaps together all along the
top long edge of your cover using a 3mm (1/8 in) seam
allowance and back-stitching neatly at the beginning and
end of your line of stitches. Repeat this process for the
long bottom edge. -
 Step 9
Now stitch the remaining two side seams with a scant
5mm (¼in) seam allowance, again back-stitching at the
start and end of your seam. -
 Step 10
Cover the notebook
To get your notebook all snuggled inside its brand new
cover, you will need to open up your notebook and fold
back the existing cover on itself. Fold your new felt cover
in the same fashion. Gently slide the notebook cover into
the inner flaps as shown. -
Step 11
If the cover is a little snug, don’t fret, as felt will stretch a
little after a short time and ease into the perfect fit.
There you have it, all ready to fill with your thoughts and
dreams. Happy writing!TIP
For a nice clean finish at the edges of your notebook
cover, use a clear ruler and a rotary cutter to trim a
straight line from your seam allowance around the outside
edges of your notebook, making sure you don’t cut into
your stitched seams.