
About
Brighten up a wooden pencil box
Pencils need love too! Decorate a pencil box to make pretty storage for your desk.
-
 Kin Dragon favorited Decorated Pencil Box
30 Jun 12:21
Kin Dragon favorited Decorated Pencil Box
30 Jun 12:21
-
 Nalani R. favorited Decorated Pencil Box
25 Jun 17:18
Nalani R. favorited Decorated Pencil Box
25 Jun 17:18
-
 Kimya J. favorited Decorated Pencil Box
26 May 00:24
Kimya J. favorited Decorated Pencil Box
26 May 00:24
-
 autumnrose.lee favorited Decorated Pencil Box
11 Nov 23:23
autumnrose.lee favorited Decorated Pencil Box
11 Nov 23:23
-
 rosa r. favorited Decorated Pencil Box
04 Aug 20:14
rosa r. favorited Decorated Pencil Box
04 Aug 20:14
-
 gettothepoint added Decorated Pencil Box to CRAFT ideas
06 Jun 16:22
gettothepoint added Decorated Pencil Box to CRAFT ideas
06 Jun 16:22
-
 nikimaki favorited Decorated Pencil Box
28 May 20:58
nikimaki favorited Decorated Pencil Box
28 May 20:58
-
 Darcy UK published her project Decorated Pencil Box
27 May 06:00
Darcy UK published her project Decorated Pencil Box
27 May 06:00
-
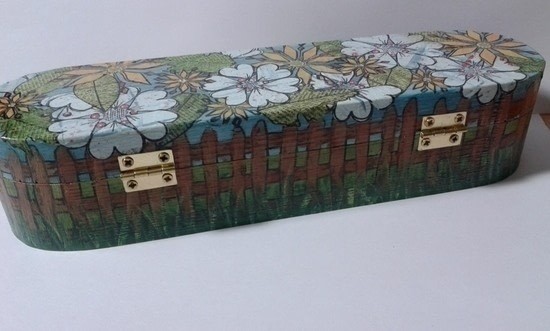
 Step 1
I began by taking apart the box, this one has 2 small hinges at the back which were easily removed. I then painted the bottom section of the box using 4 shades of green.
-
 Step 2
On the inside I added some off white paint and a crackle glaze to distress it.
-
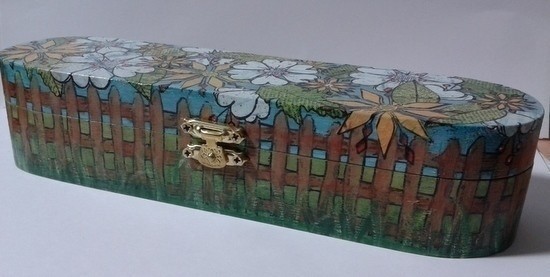
 Step 3
i did the same for the lid, but this time using 4 shades of blue.
Next i took some regular cheap white tissue paper and stamped designs onto it using black archival ink. I stamped birds on one piece and text on another piece. These were trimmed and glued inside the box.
-
 Step 4
i used a rubber stamp of a fence and stamped this all around the box using black archival ink.
-
 Step 5
The fence was painted with 3 browns and a dark yellow, using the different ones to add interest and depth to the fence.
-
 Step 6
I painted more tissue paper with blues and greens and yellows. Once this was dry I stamped leaves and flowers over the paint.
-
 Step 7
These were all cut out and carefully collaged onto the lid of the box.
Once the whole thing was dry I added a layer of satin glaze.