


About
Quick and no-sew shirt revamping
I got this from YouTube and wanted to try -and- share it. Just too awesome to keep to myself. ^^
The picture sucks, I look kinda sick. x)
-
 Key West Witch favorited Cute Top
26 Jun 03:18
Key West Witch favorited Cute Top
26 Jun 03:18
-
 Alma added Cute Top to Recycling T-shirts
08 Jul 09:48
Alma added Cute Top to Recycling T-shirts
08 Jul 09:48
-
 AnA W. added Cute Top to Shirts
18 May 10:20
AnA W. added Cute Top to Shirts
18 May 10:20
-
upsgal favorited Cute Top
01 Apr 23:55
-
Naomi D. favorited Cute Top
03 Jan 06:59
-
 Emma H. favorited Cute Top
31 Oct 23:51
Emma H. favorited Cute Top
31 Oct 23:51
-
 shelly.anderson.547 added Cute Top to Tee Shirt
11 Jun 21:08
shelly.anderson.547 added Cute Top to Tee Shirt
11 Jun 21:08
-
 Maggers favorited Cute Top
03 Mar 00:37
Maggers favorited Cute Top
03 Mar 00:37
-
 Stephanie N. favorited Cute Top
30 Jan 04:11
Stephanie N. favorited Cute Top
30 Jan 04:11
-
 Shelly S. added Cute Top to refashion
05 Aug 03:03
Shelly S. added Cute Top to refashion
05 Aug 03:03
You Will Need
-
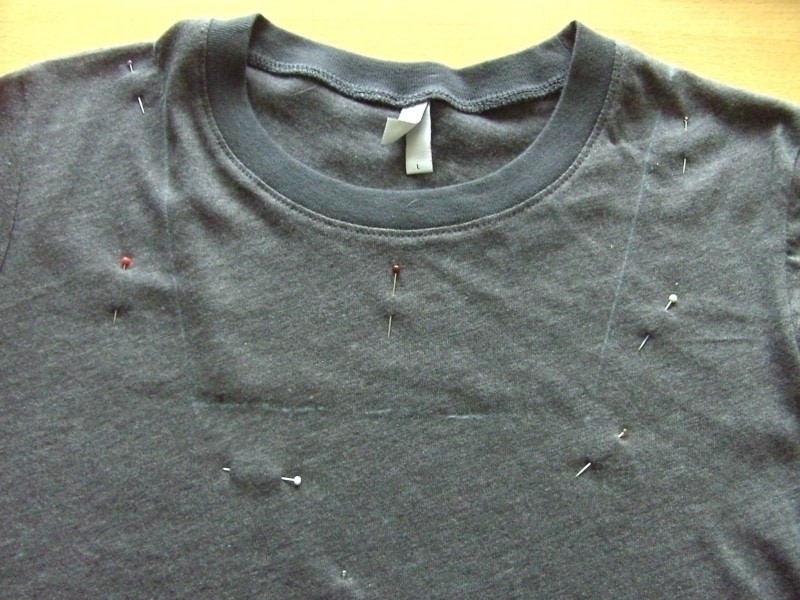
 Step 1
Grab your shirt, flatten it out on an even surface. Decide on a neckline and draw it on with chalk. You can make a template for that or just draw free-handed.
-
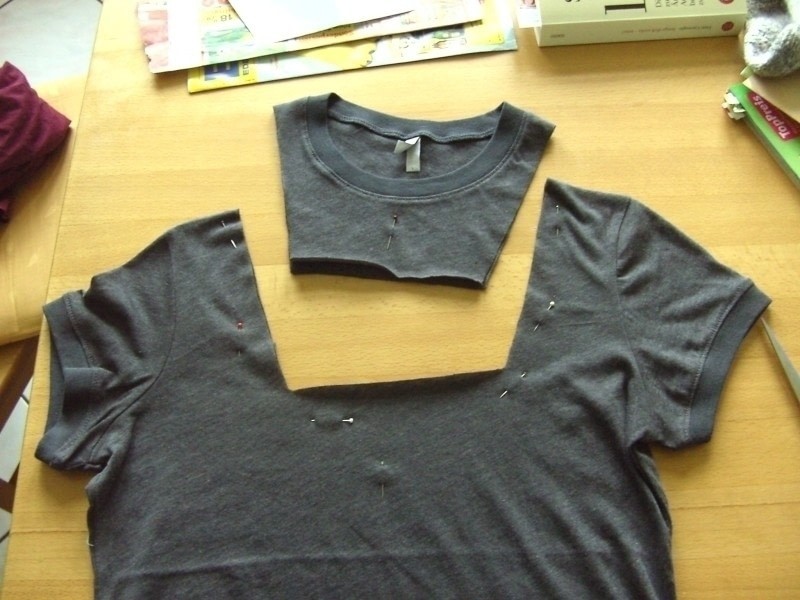
 Step 2
Cut out the neckline ( and the sleeve seams, if desired ).
Measure the middle of the shirt and mark it with 2 needles through the front layer, one on the neckline and one on the lower seam.
-
 Step 3
Grab the front by the needles and flatten the sirt so you have a fold that is exactly the middle of your shirt.
Grab a pair of really sharp scissors and make little cuts along the middle line! You'll want to make an uneven amout of cuts, that's important. Make them a little less than half an inch wide, the space in between them is up to you.
-
 Step 4
Take your second material. This can either be a strip of contrasting shirt fabric, pulled into a nice string. Or you could use satin ribbon to get a more chic look. I'll do that another time...
Wave it through the loops, I think that's pretty self-explanatory if it goes along with the picture. Tie off in a bow. Snip the ends if desired.
-
 Step 5
You may do the same thing to the upside of your sleeves, which is what I did. But this time, I thought it would look better to weave it so that the knot would be not on the shoulders but on the ( non-existing ) seam, plus, I did not tie a bow on the sleeves... it was kinda too much. ^^
There you have it, a quick and really, really cute shirt. :)
You could paint stuff on it afterwards... The girl that did the original tutorial splattered paint all over and it looked awesome...


Versions


Posted by
Dragonfly

Posted by
NanaxR

Posted by
Angel in the Night


@ Angel: Thanks. ^^ I'm fed up with it though, gonna go back to being a redhead later this day. ^^
@ Sokje: It's my parent's bathroom. I'm gonna move out soon, so goodbye newly found photo location. xD