About
Let the faeries eat your dream with this simple and effective pillow case!
I wanted to cover a travel pillow that I had because its case cannot be removed and washed easily. So I decided to make my own easy pillow case. No buttons, no zips, just a needle and thread.
Tags
-
 Key West Witch favorited Cute And Simple Pillow Case
07 May 18:23
Key West Witch favorited Cute And Simple Pillow Case
07 May 18:23
-
 Billie F. added Cute And Simple Pillow Case to will try
19 Feb 23:49
Billie F. added Cute And Simple Pillow Case to will try
19 Feb 23:49
-
 Macci Suzie Alis Rios favorited Cute And Simple Pillow Case
19 Aug 00:25
Macci Suzie Alis Rios favorited Cute And Simple Pillow Case
19 Aug 00:25
-
 Step 1
Gather your materials and the pillow or cushion that you want to make a cover for.
-
 Step 2
I chose camouflage fabric because I love camo stuff. I used fleece because it is nice and soft.
-
 Step 3
Measure around your pillow, mark it out and leave a seam allowance. Then cut it out.
-
 Step 4
Put the fabric right-sides together and then pin the two ends. I am doing it so that there is a slit in the middle of the back of it where I can get the pillow in and out.
-
 Step 5
Here you can see I have pinned one side, you can also see the opening in the middle.
-
 Step 6
Sew the two sides together, taking care to ensure that the areas that will go through the most stress are firmly sewn.
This is what my pillow case looks like inside out and sewn. I used a basic stitch by hand. -
 Step 7
Turn it the right way and put your pillow in. Mine is a bit big, but that allows it flexibility and to fit more pillows.
-
 Step 8
Peek-a-boo! You can see the Tatty Teddy (aka Blue-nosed Bear) peeking out through the slit. If you want you can stop there, but I wanted to add some decoration to the slit.
-
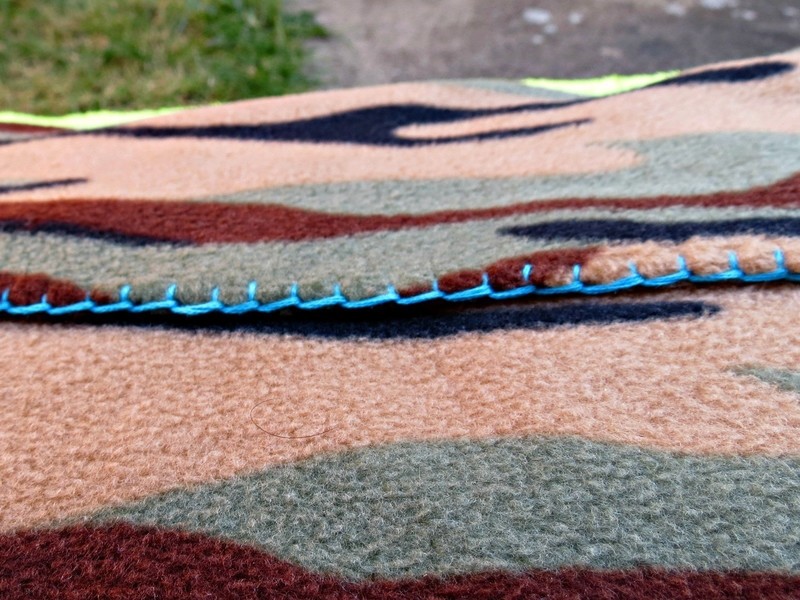
 Step 9
I used a standard 6 strands of embroidery floss in a blanket stitch along the overlying slit.
-
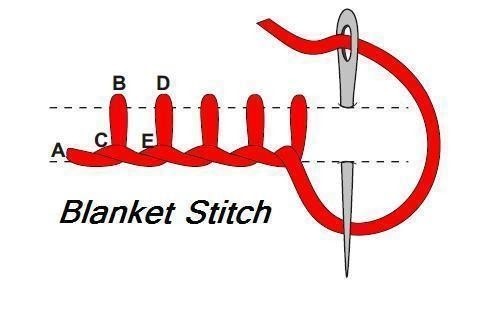
 Step 10
Here's a little picture on how to do the blanket stitch
-
 Step 11
And here is the back of the pillow case when it is finished! I didn't want to put anything on the front of it as it would probably irritate me whilst sleeping or trying to get to sleep.