About
How to Make a Custom Photo Album
If you find a T-shirt with graphics or text that match the subject of the album, you don't even need to worry about embellishment!
Being a life-long photographer, I have a special love for photos and the bookshelves full of albums to prove it! I think a photo album (or scrapbook) filled with memories is a fantastic gift, but you can't just put them into a boring store-bought album, oh no! If the album itself is a beautiful, handmade, personalized part of the gift, the whole book will be so much more special. So, in continuing with my recycled-crafting theme I just can't seem to break away from, I'm here to show you how to use old or thrifted T-shirts to make a custom album cover.
You Will Need
-
 Step 1
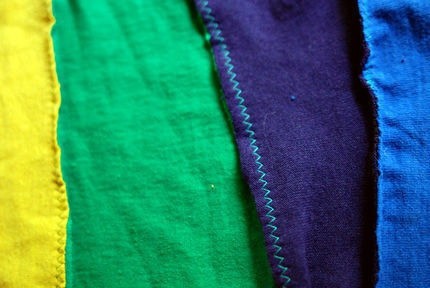
Open up the album, and cut T-shirt pieces so that when placed together the fabric height is about an inch more than the album and the width is a little less than twice the album. Imagine that this strip of T-shirt pieces is divided into four equal segments. The two end segments will be on the inside covers of the album, while the third segment over from the left will be the cover. So, if you are using a T-shirt with a graphic that you want on the cover, the graphic should be positioned in that third segment over. This will all make more sense as you scroll down to the next steps . . .
I like to use hemmed edges of T-shirts for the two sides for a clean look on the inside covers.
-
 Step 2
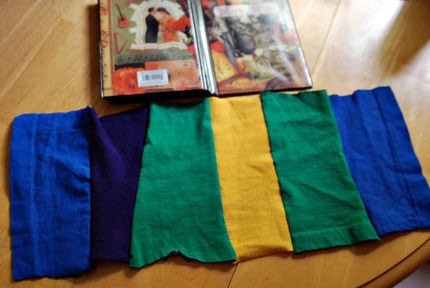
Now sew all those pieces together to make your strip whole, with right sides facing. If you want to make a more interesting design, such as with diagonal lines or triangle shapes, you can make the strip too tall, leaving the top and bottom messy and uneven, and later cutting it straight across after the strip is sewn.
Use a zigzag stitch so the fabric can stretch; if sewing by hand, use a stitch that will allow for stretch.
-
 Step 3
If you want to do appliqué on your cover, this is the time to do it! Hand embroidery is pretty easy to add after the cover is finished, but any kind of embellishing that's best done with the fabric flattened out like this should be done now. Other ideas ideas you can try are decorative machine topstitching, freezer paper printing, linocut printing, and reverse appliqué.
Remember which segments of the strip will be visible when doing your embellishments—you wouldn't want all your work to end up on the inside flap!
-
 Step 4
When you're ready to finish sewing the cover together, try it on the album to see where the flaps should go. For a good-looking cover, the fabric should be stretched. Try to judge the positioning with the album opened so that when the cover is on and the album closes, the cover will stretch.
My example ended up fitting perfectly with the flaps all the way to the center.
-
 Step 5
Take note of where the flaps should be sewn down either with pins or chalk if needed, and sew across the top of each flap with right sides facing.
Be sure to lock those stitches well, especially on the insides, by sewing backwards and forwards a couple times.
-
 Step 6
Try the cover on the album to see where you should sew the bottom seams. Again, the cover will look best if the fabric is slightly stretched, so you'll want to sew the bottom accordingly.
In my case, I could sew along the bottom like a normal seam for a well-fitting cover, but you may need to sew up farther and trim the excess for a good fit.
-
 Step 7
If you sew your seam and it fits too loosely, you can resew it tighter. Just be sure not to sew it too tight because that mistake would be much harder to correct!
Trim along the outsides of the seams for neat edges that won't be bulky inside the album.
-
 Step 8
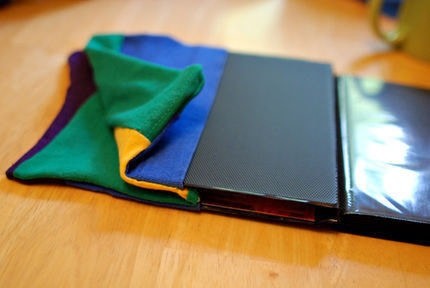
If your flaps don't go all the way to the center and the edges where the flap seams end are messy, you can hem them down to make a neat top and bottom edge. When everything looks good, turn your finished cover right side out and put it on your album.
If the flaps go all the way to the center, you'll need to open the album so the front and back covers are facing in order to put it on.
-
 Step 9
If you waited until this point to do embroidery, like I did, here's your blank canvas!
I left the cover on the album while embroidering; since the fabric is stretched, it acted like an embroidery hoop—perfect!
-
 Step 10
Have fun with the embellishment: Make it an original, unique, personal, one-of-a-kind gift!
A plain 4x6 photo album becomes something really special with some simple sewing and creative embellishment.
-
 Step 11
Now that the album is finished, it's time for the second part of the gift: the photos! There are lots of ways you can fill the album; here are some examples.
The simplest is to use just photos—let the pictures do the talking.
-
Step 12
-
 Step 13
For an album filled with photos from multiple trips, events, groups, etc., I like to make a 4x6 title card for each section, with the name of the trip/event, the date, and any other key info. Stick in each card at the beginning of that section, like chapters in a book.
Keep with the recycled theme by using cardboard from cereal boxes to make your title cards.
-
 Step 14
Find an album with space for captions to write photo details, people's names, places, quotes, memories . . .
Even though "a picture is worth a thousand words," adding some actual words can make a photo album gift much more special!
-
 Step 15
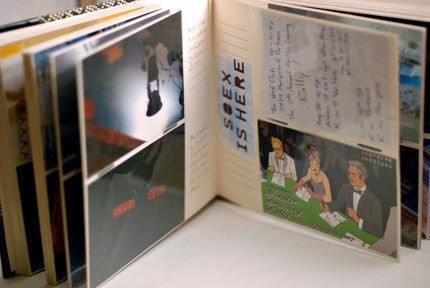
Mix some scrapbook-esque elements into the album by putting postcards, brochures, ticket stubs, stickers, etc., into some of the photo spaces. This is great for a vacation album, especially if you're like me and save every little museum pass and cool store receipt.
An album with extra room for captions means extra room to stick other little souvenirs.
-
 Step 16
Or skip the photos altogether! This option is a little crazy, since this project is all about photos, but here it is anyway . . . When I spent a summer in Europe, I collected so many of those little paper mementos (trash, really, but I couldn't throw away anything from Europe!), so in addition to my photo album from the summer, I also put together this book of all nonphoto stuff. If you're a total pack rat like me, you may have enough stuff from your summer trip with your best friend to put together a stuff-book to give her/him for a totally unique gift filled with memories!
Of course, you can take this concept and add photos in there, too!
Whatever you decide to fill your album with, as long as it's personal, orginal, and heartfelt, it will make a fantastic gift for your loved one!