About
Dive into resin casting with these statement rings.
This project is perfect for beginner or pro resin casters. Inspired by the show, Steven Universe, you can now flaunt your inner fangirl without going over the top.
Tags
-
 Maria P. favorited Crystal Gem Resin Rings
27 Jul 19:43
Maria P. favorited Crystal Gem Resin Rings
27 Jul 19:43
-
 Tracy G. favorited Crystal Gem Resin Rings
10 Aug 14:58
Tracy G. favorited Crystal Gem Resin Rings
10 Aug 14:58
-
 SamanthaJ added Crystal Gem Resin Rings to Wearables
09 Aug 19:28
SamanthaJ added Crystal Gem Resin Rings to Wearables
09 Aug 19:28
-
 lleeahs favorited Crystal Gem Resin Rings
09 Aug 00:09
lleeahs favorited Crystal Gem Resin Rings
09 Aug 00:09
-
 KozmicBlues added Crystal Gem Resin Rings to Anti-avorriment
08 Aug 09:50
KozmicBlues added Crystal Gem Resin Rings to Anti-avorriment
08 Aug 09:50
-
 Bryanna A. published her project Crystal Gem Resin Rings
08 Aug 06:00
Bryanna A. published her project Crystal Gem Resin Rings
08 Aug 06:00
You Will Need
-
 Step 1
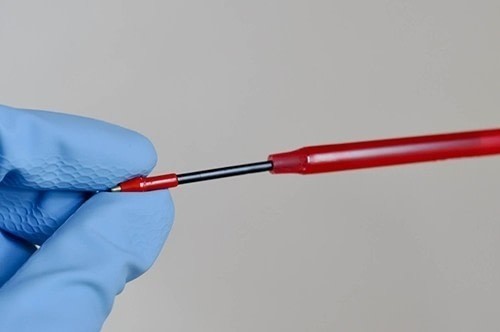
This takes a few minutes so I started with draining a red ballpoint pen. Remove the ink tube from the pen.
-
 Step 2
Place it in a spare measuring cup to drain. You’ll be mixing resin with it later. Set aside.
-
 Step 3
Now it is time to mix your resin. Read the directions for your specific resin but mine said to mix equal parts of Part A and Part B.
-
 Step 4
The directions said to then mix for two minutes very slowly to prevent bubbles. Be sure to scrape the bottoms and the sides and keep mixing until the resin is clear. Let it sit for 5 minutes (according to my resin).
-
 Step 5
While the resin sets, fill your molds. There are a bunch of different options but I will show you what I used. I filled my Amethyst gem with crushed amethyst and scraped some purple eyeshadow in there. I filled a second one without just the stone and no eyeshadow to see if I liked it more. You can also try chunky purple glitter or sprinkles.
-
 Step 6
For the Rose Quartz gem I used crushed rose quartz but pink and cream sprinkles or glitter would do the job just fine.
-
 Step 7
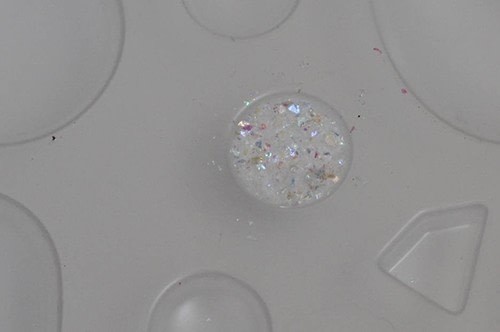
Pearl’s gem was filled with large white glitter but pearlescent eyeshadow or just a big pearl bead would work too.
-
 Step 8
I wasn't sure which garnet I would like better so I filled one with red sprinkles and one with red ink-dyed resin (you'll see that later). Glitter also would work well.
-
 Step 9
After my resin sat, I still had some bubbles in it as you can see. I read online that you can hit it for a few seconds with hot air from a hair dryer and it should help release the bubbles. It worked for me but I don’t know how it affects other resins.
-
 Step 10
The next step is to start pouring resin into the molds. Slowly fill because it is easy to overflow. You can use toothpicks to make sure you get all of the bubbles out of the resin.
-
 Step 11
With Amethyst’s gem I used a toothpick to mix in the eyeshadow. Stir slowly and it is okay if it gets a bit messy. You can trim the excess resin once it dries.
-
 Step 12
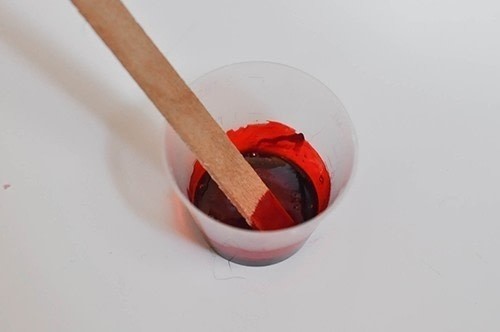
When all the molds are filled, use a stir stick and mix a few drops of the pen ink into the remaining resin. A little ink goes a long way. Then pour that mixture into a second Garnet gem mold.
-
 Step 13
The hardest part is done. Cover the molds with a large tupperware or cover and let them sit for twelve hours (or however long your resin says to let sit).
-
 Step 14
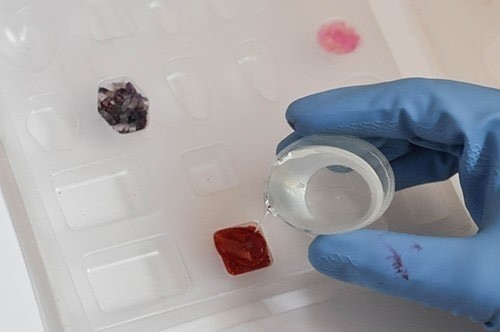
After you wait twelve hours, pop your gems out!
-
 Step 15
You may have excess resin on the edges of your gems. Before the resin fully sets, take some scissors and trim as close to the edge as you can.
-
 Step 16
You now can use the extra fine sanding block to smooth out those edges.
-
 Step 17
This step is optional. They sell a clear coat the apply to your resin that makes it more glossy and shiny. But a cheaper (but less durable) option is to apply a coat or two of clear nail polish. Whichever works best for you.
-
 Step 18
Time to assemble the rings! Grab your ring bases, adhesive, and gems.
-
 Step 19
This step is also optional, but I always scuff up the surface I am going to be gluing with a sanding block to add extra grip.
-
 Step 20
Add some glue, and center the ring base on the back of the gem. Let it dry completely.