


About
Made for the tiny swap :)
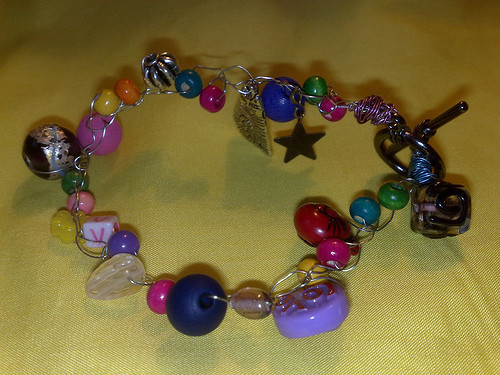
I made the first one for Violetta for the tiny swap. Its made by crocheting a length of jewelery wire and crocheting in beads, charms and other odds and ends that I could find that fitted with her interests e.g. cats, purple, letter 'v' etc. I attached the clasp with coloured craft wire. I liked how it came out so much that I made one for myself too :) I hope this how to is clear enough. Ask if you have any questions.
-
 Cacbaz favorited Crochetted Wire Bracelet
09 Dec 20:38
Cacbaz favorited Crochetted Wire Bracelet
09 Dec 20:38
-
 sweetsundae0 favorited Crochetted Wire Bracelet
25 Aug 17:34
sweetsundae0 favorited Crochetted Wire Bracelet
25 Aug 17:34
-
 Arty Kitkat entered their project Crochetted Wire Bracelet to cutey
03 Apr 14:28
Arty Kitkat entered their project Crochetted Wire Bracelet to cutey
03 Apr 14:28
-
Arty Kitkat entered their project Crochetted Wire Bracelet to Beads Unlimited Contest
25 Nov 21:05
-
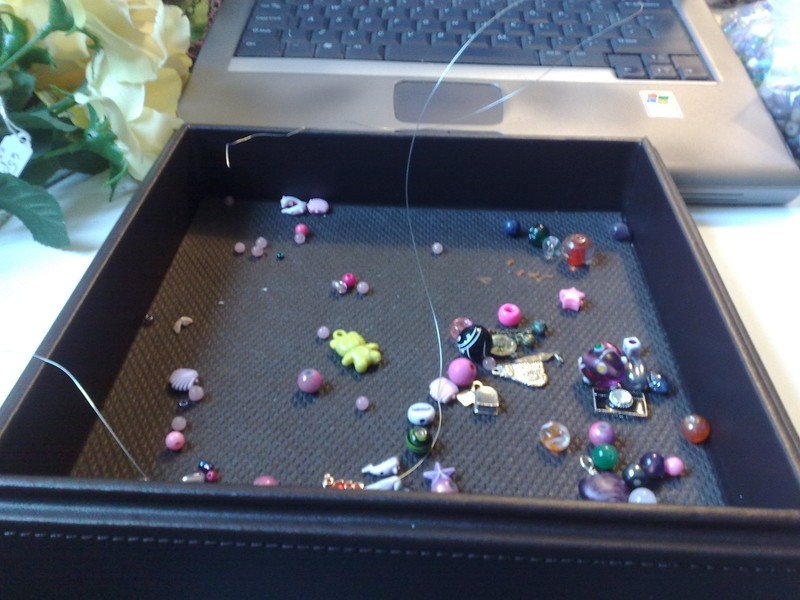
 Step 1
Start off by gathering all your bits and bobs. I made up my bracelet using bits and bobs which symbolized the things I like and my interest. I did the same when I made Violettas'. Measure out your jewelery wire by wrapping the wire around your wrist 5 times.
-
 Step 2
Make a loop with your wire like you would if you were crocheting with wool. Crochet a couple of stitches with your wire.
-
 Step 3
Thread on your first charm/bead. Crochet your next stitch so that your wire goes over your bead/charm and incorporates it into the stitch.
-
 Step 4
Continue crocheting in charms & beads every stitch or two. Every so often just check your bracelet against your wrist to check how its looking.
-
 Step 5
When you have reached the end and crocheted nearly all your wire fold the end through the last loop to secure your stitches. Do this a few times and tidy up the ends so that there are no sharp bits sticking out. I used small pliers to do this. Do the same to the start so thats nice and neat too.
-
 Step 6
Position your toggle clasp/ lobster clasp and weave your wire through the hole in the clasp and wind in through the end of your bracelet. I wound mine through the stitches and then wrapped the remainder of my wire round the join. I used coloured wire as I thought it looked cool :)
-
 Step 7
Now stand back and admire your handiwork :)