


About
Somehow retro...
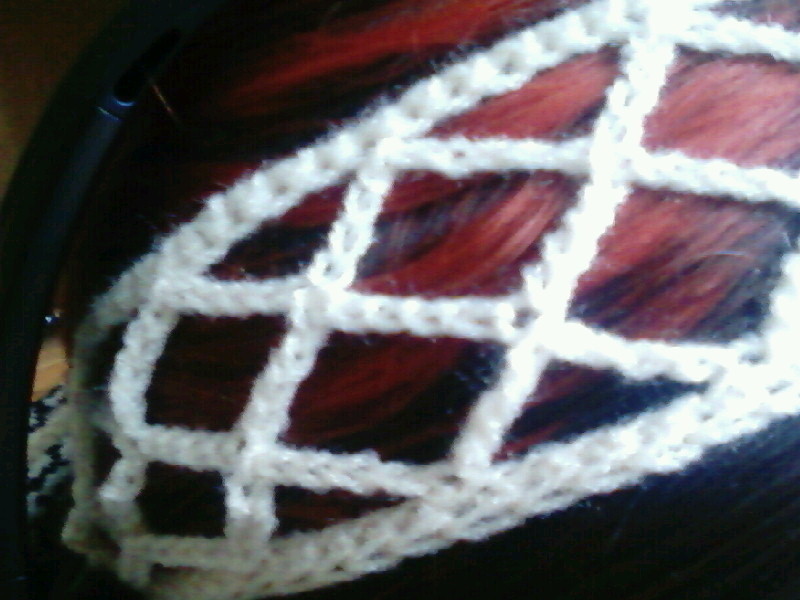
Only crappy photos avaiable. xD
No pics for the single steps, didn't take any.
Did this on the train to university, super quick...
This is my very first crochet tutorial, I really, really hope you won't get totally lost... xD
-
 Loviiletter favorited Crocheted Headband
31 May 19:34
Loviiletter favorited Crocheted Headband
31 May 19:34
-
 _.+'** Eden+ *+..._ favorited Crocheted Headband
14 Dec 09:36
_.+'** Eden+ *+..._ favorited Crocheted Headband
14 Dec 09:36
-
 Kimberlie K. favorited Crocheted Headband
25 Jun 22:48
Kimberlie K. favorited Crocheted Headband
25 Jun 22:48
-
 Breanna H. added Crocheted Headband to To-make list
19 Feb 00:15
Breanna H. added Crocheted Headband to To-make list
19 Feb 00:15
-
Breanna H. favorited Crocheted Headband
19 Feb 00:15
-
 Michelle M. added Crocheted Headband to crochet
30 Dec 13:55
Michelle M. added Crocheted Headband to crochet
30 Dec 13:55
-
 hannah g. favorited Crocheted Headband
11 Jul 05:21
hannah g. favorited Crocheted Headband
11 Jul 05:21
-
 Ravenskull favorited Crocheted Headband
01 May 16:53
Ravenskull favorited Crocheted Headband
01 May 16:53
-
 srslyjc favorited Crocheted Headband
19 Jul 21:20
srslyjc favorited Crocheted Headband
19 Jul 21:20
-
 ebretherick favorited Crocheted Headband
07 Feb 01:30
ebretherick favorited Crocheted Headband
07 Feb 01:30
You Will Need
-
Step 1
Frist, ch for desired length ( which would be, from behind one ear to the next ), ch one extra, turn and sc all the way back.
-
Step 2
The 'fishnet' part goes like this: ch for a while, depending on your yarn size. My yarn was about 3, and i did 9 ch each ( number has to be uneven ). Dig back into your base at about half the stitches length. I counted 5 from the first ch and made a slip stitch in the 6th stitch.
-
Step 3
Do that till the end of the row. If the measurements at the end aren't that exact due to the length of your first ch row, well, try to cheat a bit.
At the end of the row, ch about 4 that go 'up' plus half the stitches of your 'bows'. slip stitch into the middle stitch of the last rows bow... last rows bow.... sounds funny if you say it fast for a few times...
-
Step 4
Continue bowing and rowing till you're satisfied... On the end of every second row, you'll have to crochet 'down' to the last row so you have a strong border. I used to cut the thread and start with a new one at the end of the last bow. Sounds really complicated, but you'll see it when you do it. xD
-
Step 5
the last row contains of - in my measurements - 5 ch and a slip stitch into the middle stitch, 5 ch, ss, 5 ch, ss and so on... Turn, sc in every ch, finish off.
Then, I took the piece and looped three long strands of the same yarn around the small sides ( i had a little triangle exactly at the middle ), braiding them down and ending with a knot. These braids enable you to tie the band at the back of your head...
Comments


