


About
Prettify your favourite cards
I can't claim I came up with this idea myself, I saw these postcards on the wonderful silly old suitcase blog: http://sillyoldsuitcase.blogspot.nl/2013/01/diy-tutorial-kleurig-muur-hang.html
However, although she has a great photo tutorial she doesn't show/explain how to do the actual crochet scallops. So I thought I'd try it myself and share with everyone : )
For the varigated edge, I used embroidery floss and added a new colour when the old one ran out.
The black card has a shell edge, single crochet round the whole card first as a base and then shell stitch all the way round.
Tags
-
 Rachel B. favorited Crochet Edged Postcards
09 May 23:27
Rachel B. favorited Crochet Edged Postcards
09 May 23:27
-
 pandanomz favorited Crochet Edged Postcards
09 Sep 19:57
pandanomz favorited Crochet Edged Postcards
09 Sep 19:57
-
 tyler t. favorited Crochet Edged Postcards
10 Apr 10:30
tyler t. favorited Crochet Edged Postcards
10 Apr 10:30
-
 Amy D. favorited Crochet Edged Postcards
14 Jan 00:28
Amy D. favorited Crochet Edged Postcards
14 Jan 00:28
-
 Kinhime Dragon added Crochet Edged Postcards to Art Journal ideas
07 Dec 20:27
Kinhime Dragon added Crochet Edged Postcards to Art Journal ideas
07 Dec 20:27
-
Leslie D. added Crochet Edged Postcards to CROCHET CUTIES
14 Sep 17:02
-
 vstearnes favorited Crochet Edged Postcards
26 Jul 16:51
vstearnes favorited Crochet Edged Postcards
26 Jul 16:51
-
 xxstinaxx favorited Crochet Edged Postcards
18 May 03:02
xxstinaxx favorited Crochet Edged Postcards
18 May 03:02
-
 Libby W. entered her project Crochet Edged Postcards to Ecojot
19 Apr 12:44
Libby W. entered her project Crochet Edged Postcards to Ecojot
19 Apr 12:44
-
 meagan.halbardier added Crochet Edged Postcards to To Do List
13 Mar 19:55
meagan.halbardier added Crochet Edged Postcards to To Do List
13 Mar 19:55
You Will Need
-
 Step 1
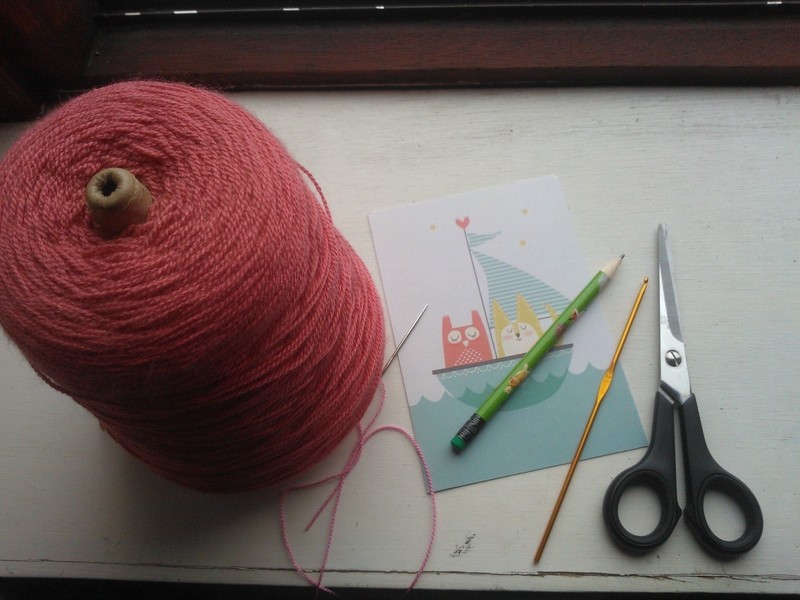
Gather your materials: crochet thread, postcard, pencil, yarn needle, scissors & a crochet hook.
-
 Step 2
Clip the corners on your postcard so that they are curved.
-
 Step 3
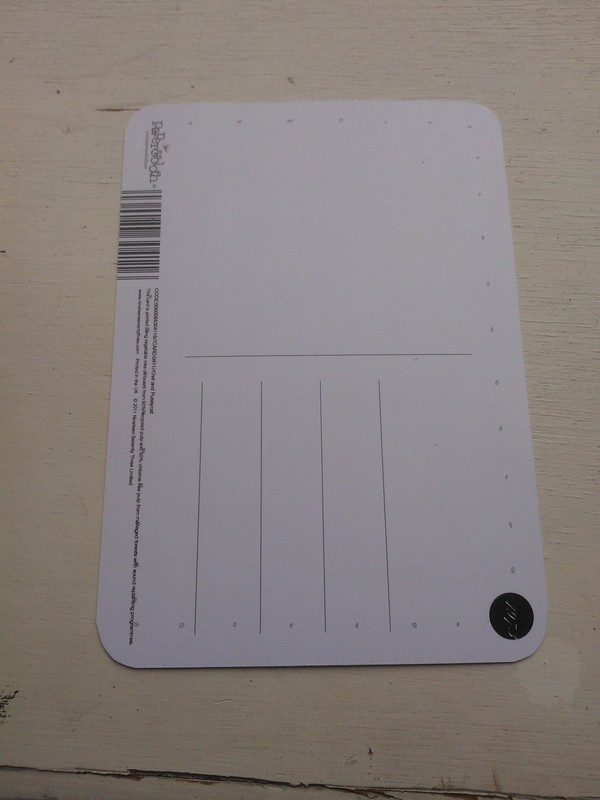
Use the pencil to mark on the underside where you want to punch the holes through.
-
 Step 4
Use the yarn needle to punch holes in the card from the front to the back.
-
 Step 5
When you're finished it should look like this.
-
 Step 6
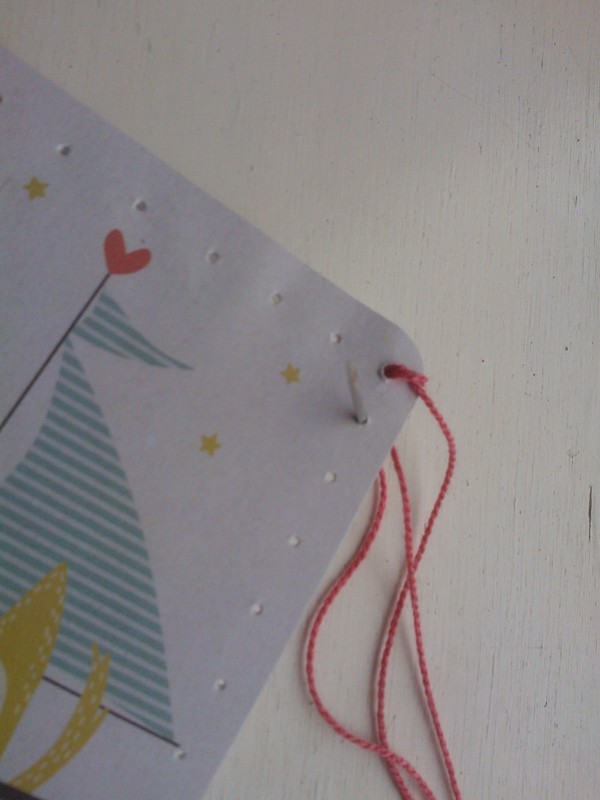
Cut a length of crochet cotton. Knot the end and pull through a hole in the card so the knot sits underneith.
-
 Step 7
Bring the needle round the back of the card and back into the same hole, so that the thread loops around the edge of the card.
-
 Step 8
Pass the needle under the loop you have just made on the front of the card.
-
 Step 9
Move the needle to the next hole along and pull the thread through the card from front to back.
-
 Step 10
Tuck the thread under loop thats running accross the back of the card.
-
 Step 11
It should look like this.
-
 Step 12
Repeat steps 9 & 10, until the whole card is covered. Go into the same whole twice to get round the corners. Sew in the end,when you reach where you started.
-
 Step 13
It should look like this.
-
 Step 14
Using the cotton on the reel, pull up a loop on cotton with your crochet hook, so that it is tucked under the thread around the outside of the card.
-
 Step 15
Chain one.
-
 Step 16
To crochet the scallop shape, crochet a single crochet (sc), followed by as many double crochets that you need so that the scallop folds round the corner.Finish the scallop with a single crochet.
-
 Step 17
Repeat the scallop shape in the next little pocket of thread. The small scallops are made up of 5 double crochets with a single crochet at each end.
-
 Step 18
Repeat until the whole edge of the card is covered. When you get back the beginning, sew in the end, so that the crochet is secure.
-
 Step 19
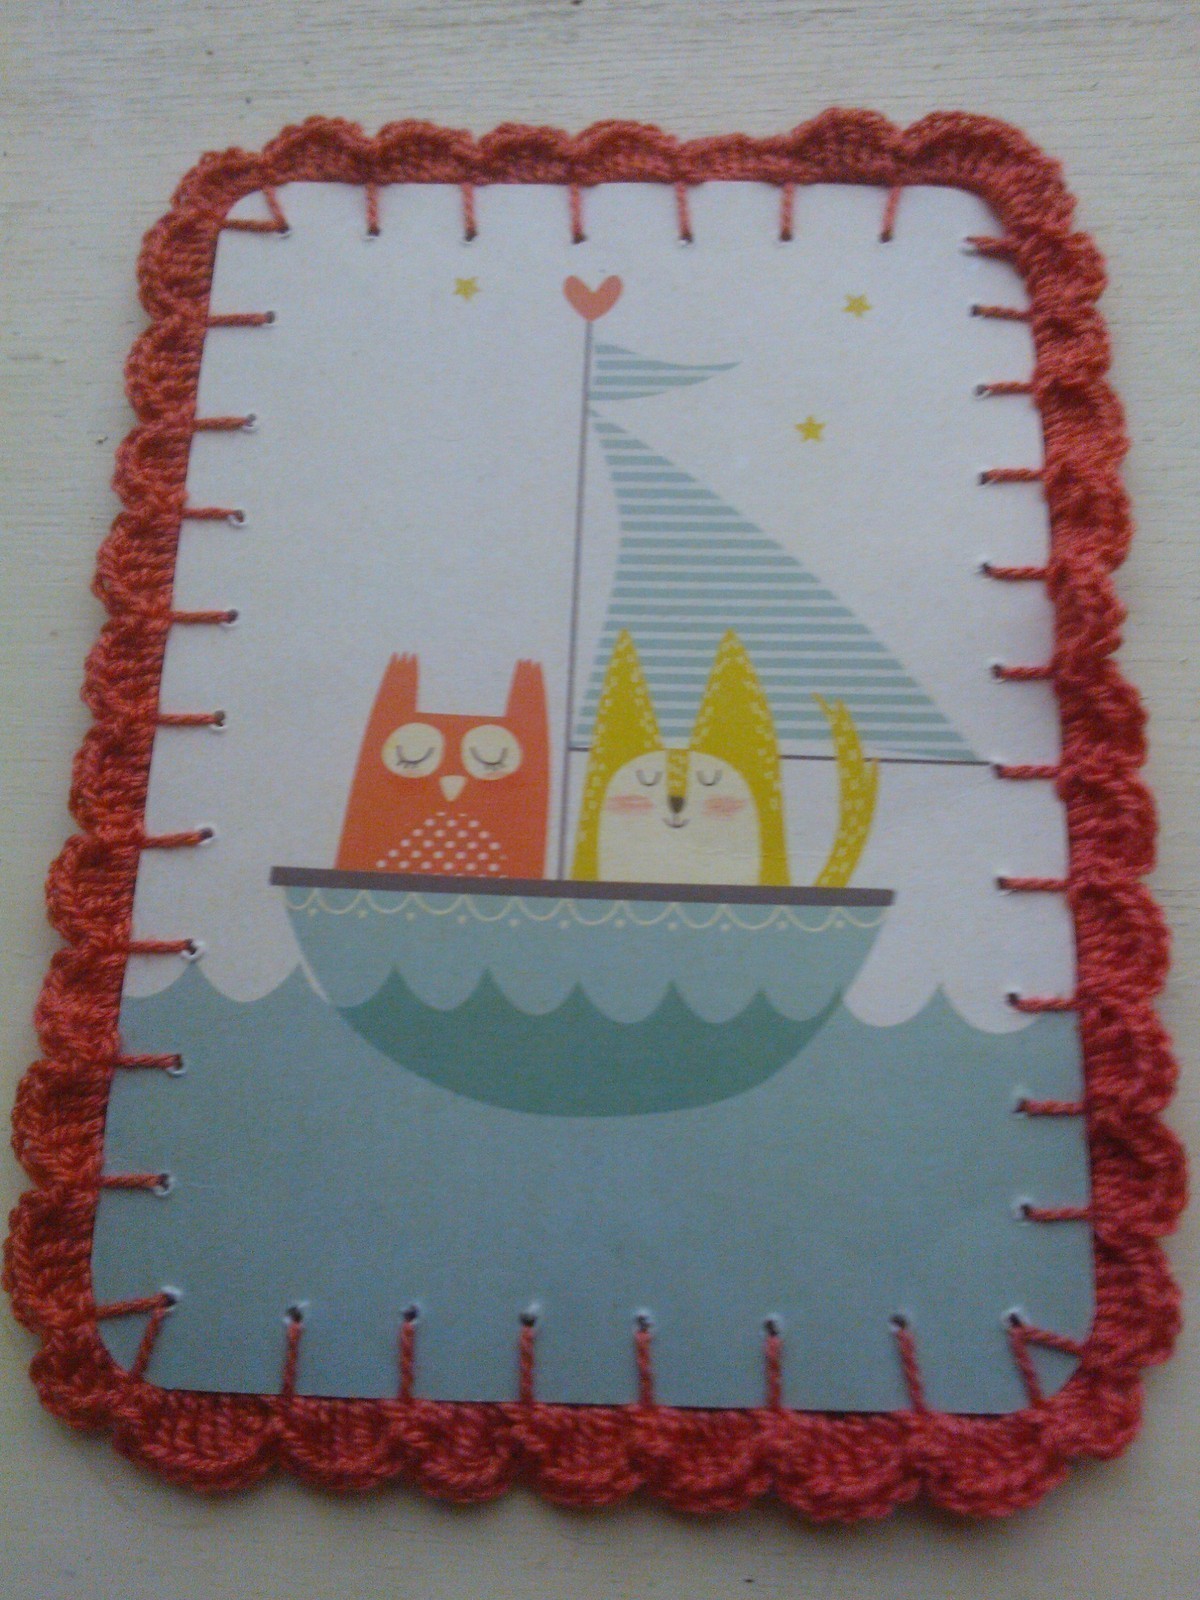
Finished! Give away to a friend in a homecard envelope, or keep for yourself.