


About
A cosy patchwork quilt.
My Mum use to make patchwork quilts and won lots of awards for her designs, so I decided to see if I had it in my genes and made my very own.
I'm not the most patient crafter, as I like to jump on to new projects quickly, so even though I had the majority of this quilt finished within two days, I left it for a few months before the cold weather finally forced me to finish it.
-
 Kristen W. added Cosy Patchwork Quilt to quilts
16 Apr 11:43
Kristen W. added Cosy Patchwork Quilt to quilts
16 Apr 11:43
-
Kim M. favorited Cosy Patchwork Quilt
10 Oct 20:23
-
Ilana M. favorited Cosy Patchwork Quilt
21 Jan 00:42
-
 Trish H. added Cosy Patchwork Quilt to KID PROJECTS
18 Jun 23:43
Trish H. added Cosy Patchwork Quilt to KID PROJECTS
18 Jun 23:43
-
 Eva C. favorited Cosy Patchwork Quilt
17 Aug 08:24
Eva C. favorited Cosy Patchwork Quilt
17 Aug 08:24
-
 K2 favorited Cosy Patchwork Quilt
03 Jul 19:40
K2 favorited Cosy Patchwork Quilt
03 Jul 19:40
-
 RareJewel favorited Cosy Patchwork Quilt
24 May 08:02
RareJewel favorited Cosy Patchwork Quilt
24 May 08:02
-
sarah g. favorited Cosy Patchwork Quilt
13 Apr 05:07
-
Pamela H. favorited Cosy Patchwork Quilt
16 Sep 20:23
-
 Roughwaters44 favorited Cosy Patchwork Quilt
08 Jul 04:19
Roughwaters44 favorited Cosy Patchwork Quilt
08 Jul 04:19
-
 Step 1
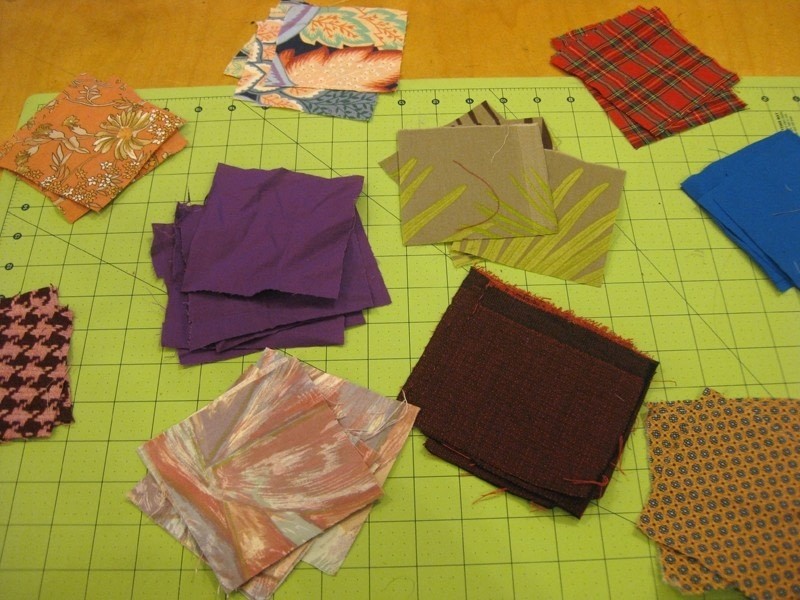
First I cut my squares, these were 3" x 3". I used around 30 different types of fabric for my quilt and cut 256 squares.
Put them in to neat little piles to make your project easier.
-
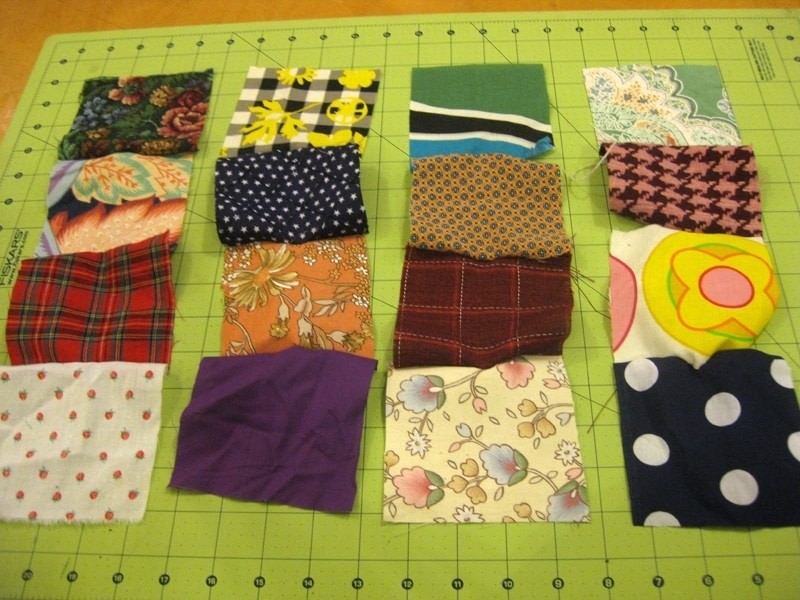
 Step 2
Arrange the squares in a nice way. I did blocks of 16, and I made two different types of blocks. So in total, you should end up with 16 blocks, made up of 16 squares.
-
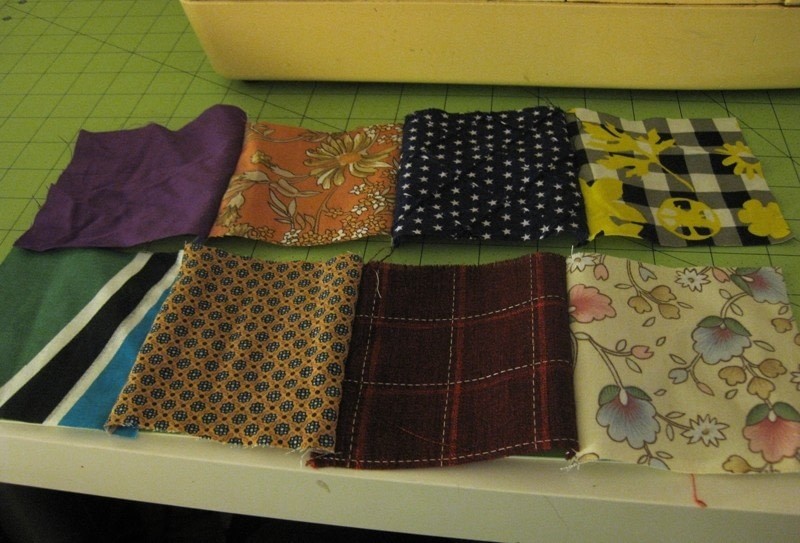
 Step 3
Spread out the vertical rows to give you a bit of space in between each.
-
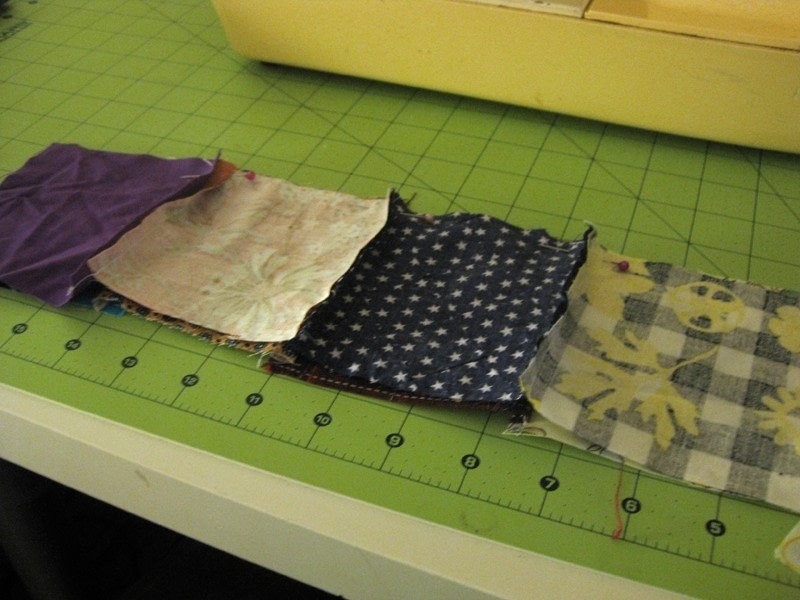
 Step 4
Fold the top square down, so that the wrong side is facing up and place a pin along the top edge, so that you're pinning it to the square behind.
-
 Step 5
Continue folding down until each square is pinned to the one above. Fold it back up and it should look like this.
-
 Step 6
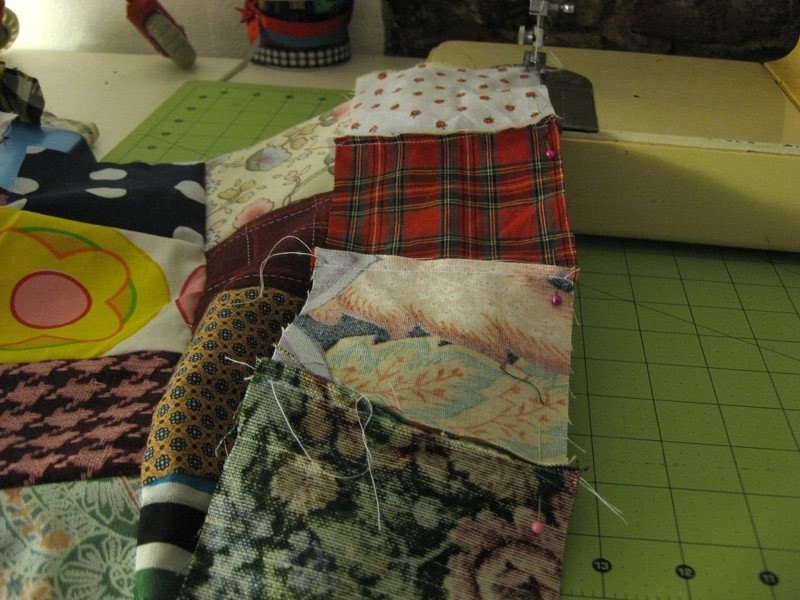
Do the same process for the rest of the vertical strips.
-
 Step 7
Sew along these edges, removing the pins as you go.
-
 Step 8
When they're all sewn together they should look like this.
Place two of the vertical rows side by side.
-
 Step 9
Place one row on top of the other (wrong side facing up) and pin along the top edge. Repeat this for the other rows in the block.
-
 Step 10
Now sew the rows together, removing the pins as you go.
-
 Step 11
Your finished block should look like this.
-
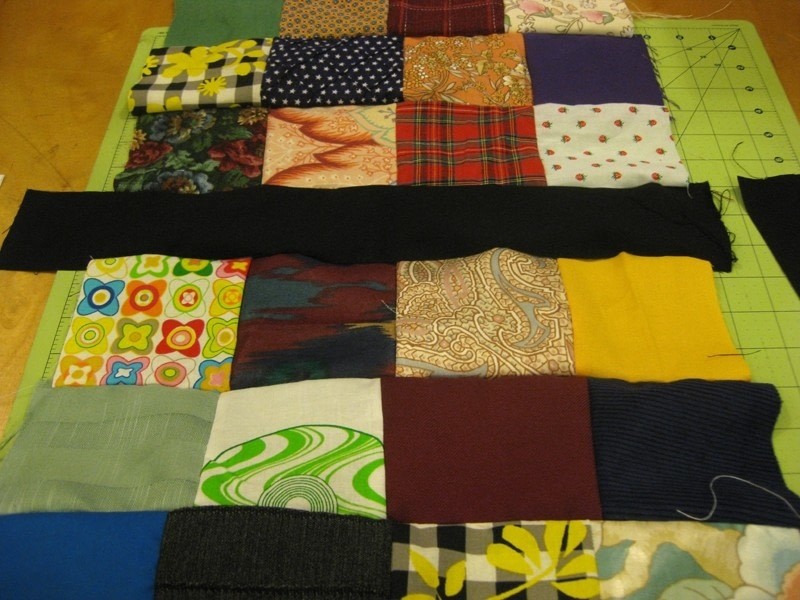
 Step 12
Here are my two types of blocks. Continue sewing together the remaining squares in to matching blocks.
-
 Step 13
We're going to join the blocks together with black strips of fabric. Cut these out measuring 15" x 3". You will need 24 of these.
-
 Step 14
Pin the strip along the top edge of one of the blocks. Sew this in place.
-
 Step 15
Take one of the contrasting blocks and sew it to the black strip. Repeat this until you have a row of 4.
Do this for all of the blocks.
-
 Step 16
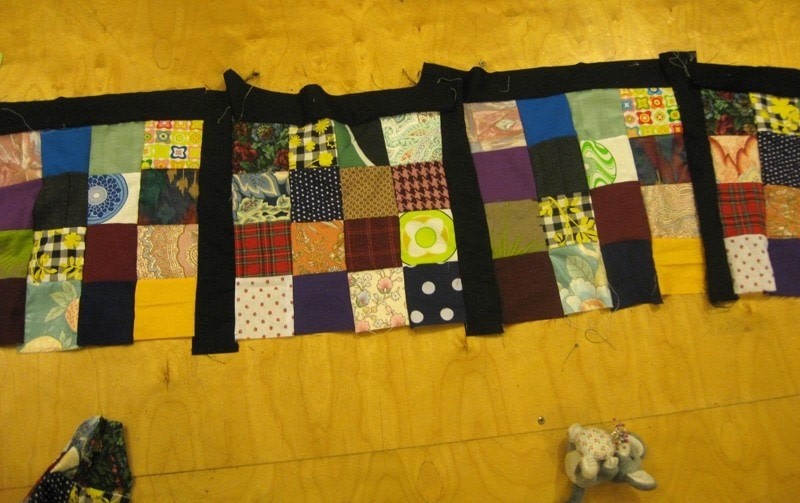
I found it easiest to sew four of the black strips together and then pin it to the top edge of the row of four blocks, before sewing in place.
-
 Step 17
Sew another row of blocks on top of the black strip. I put the blocks in an alternative order, so that you would have a different block to the top, left and right of each other.
-
 Step 18
Your patchwork is starting to take shape now.
-
 Step 19
Sew on the other rows and that's the time consuming part of your patchwork finished.
-
 Step 20
Now, it's time to add the batting. The thicker the batting you use, the cosier your quilt will be. I gave my quilt a 15" overlap of batting at the top edge to make it a bit longer.
-
 Step 21
I also gave my quilt a 3" overlap at the bottom. Stitch the batting in place. To get the edges all nice, fold the quilt inside out (so that the wrong sides are facing up) and then stitch along the edge, leaving a small area unstitched, so that you can fold it right side out and then sew the opening closed.
-
 Step 22
To give your quilt a nice finish, sew along all the sides of the black strips.
All done, now snuggle under and enjoy!


Thank god for this tutorial.
Thank *YOU* for this tutorial. I was almost at the stage of giving up.
Now i just wish i had scrap fabric for squares. >.<
Thanks for sharing this with us!