

About
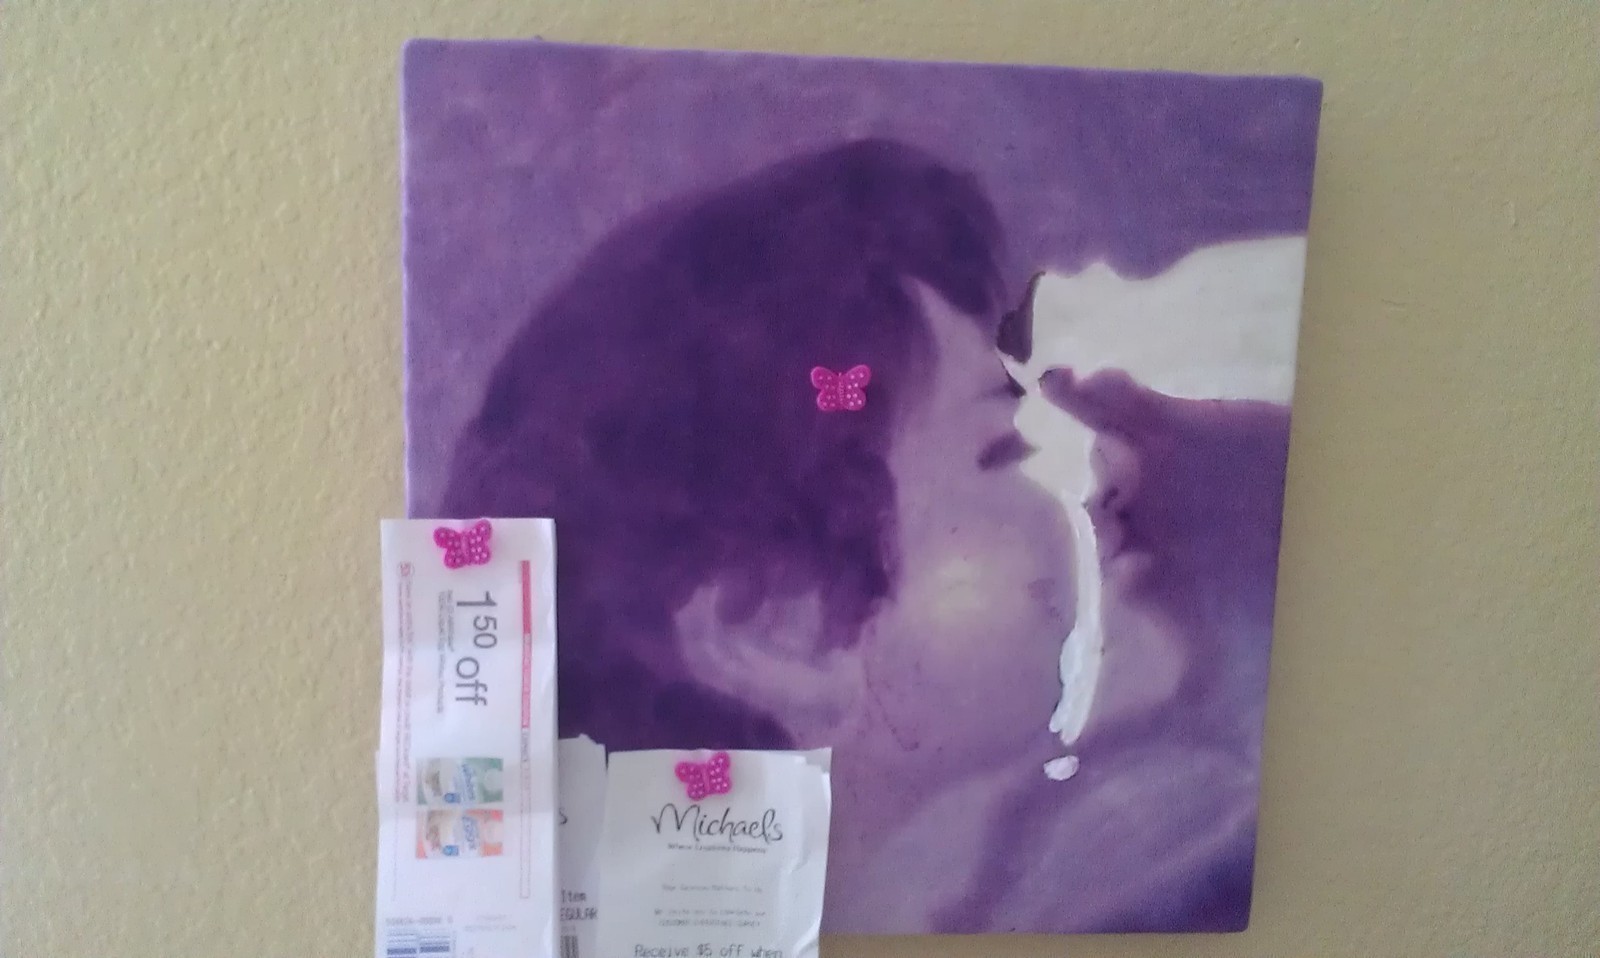
Because my wall just made too much sense without it.
The wall in my new room was looking bare so I bought a four pack of cork boards. However, they ended up a little to thin and crumbly for me, so i "fixed" them.
The picture is Misha Collins being weird (purple-ified) because apparently I get inspired by strange things.
Tags
-
 Rhine favorited Cork Board Wall Art
10 Jan 07:53
Rhine favorited Cork Board Wall Art
10 Jan 07:53
-
 lilcalcb@gmail.com added Cork Board Wall Art to art
25 Aug 21:11
lilcalcb@gmail.com added Cork Board Wall Art to art
25 Aug 21:11
-
 Valerie R. replied to a comment on Cork Board Wall Art
14 Jun 20:45
Valerie R. replied to a comment on Cork Board Wall Art
14 Jun 20:45
-
 Smercurial replied to a comment on her project Cork Board Wall Art
07 Jun 10:37
Smercurial replied to a comment on her project Cork Board Wall Art
07 Jun 10:37
-
Valerie R. commented on Cork Board Wall Art
07 Jun 02:27
-
 Vanessa B. added Cork Board Wall Art to Home DIY
19 Apr 06:45
Vanessa B. added Cork Board Wall Art to Home DIY
19 Apr 06:45
-
 Ada B. favorited Cork Board Wall Art
09 Apr 11:52
Ada B. favorited Cork Board Wall Art
09 Apr 11:52
-
 Advitha K. favorited Cork Board Wall Art
03 Apr 12:23
Advitha K. favorited Cork Board Wall Art
03 Apr 12:23
-
Smercurial entered her project Cork Board Wall Art to Dremel Multi-Tool Contest
03 Apr 01:20
-
 Step 1
Materials:
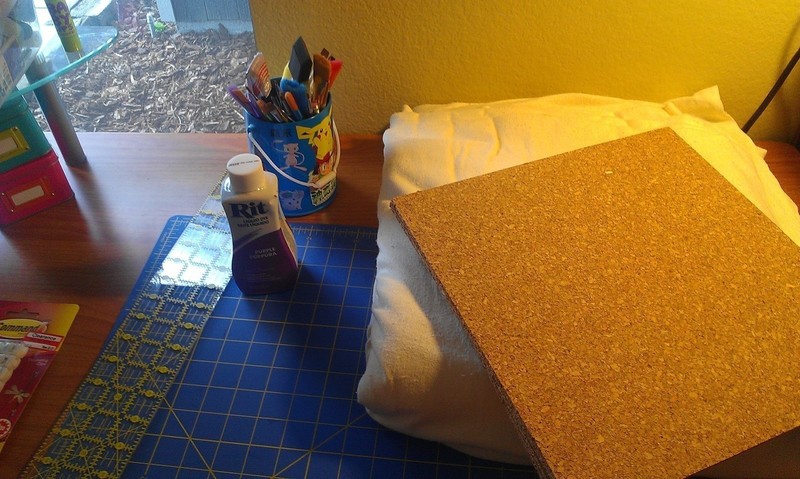
4pack cork tiles from Target
enough cloth to cover both sides
fabric dye (Rit)
needle and thread
eyelets and eyelet punch (optional)
hanging hardware -
 Step 2
I plan to use two cork tiles together since they're a little thin for me.
Take your fabric and trace the outline of the cork board on it. Cut around the outline, leaving enough room for the fabric to wrap around the sides of the board and about an inch or two more.
If you're planning to copy an image, print it out to fit your board.
-
 Step 3
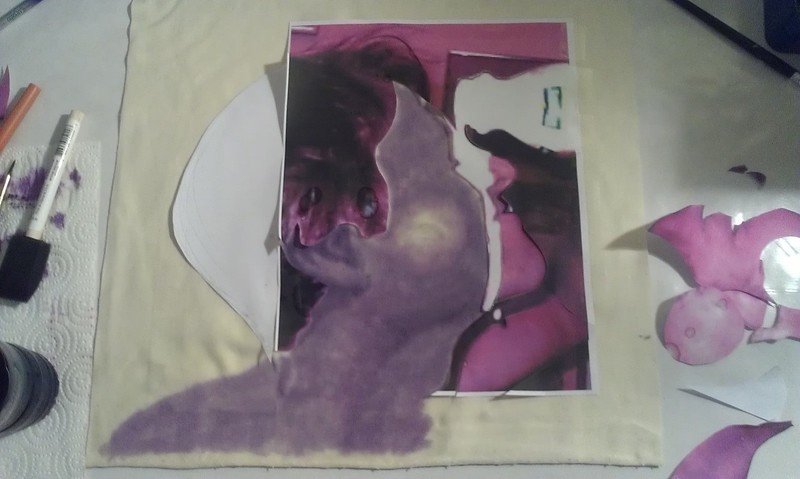
If you're working from an image instead of freeform, I found it was easier to cut it apart by colours and lightly tape it down as a guideline while i paint.
-
 Step 4
Prepare your dye. I chose to work all in one colour because my wall is yellow and i figured a purple "art" piece would look nice against it. I mixed different ratios of liquid dye with hot water to create lighter purples and darker purples.
-
 Step 5
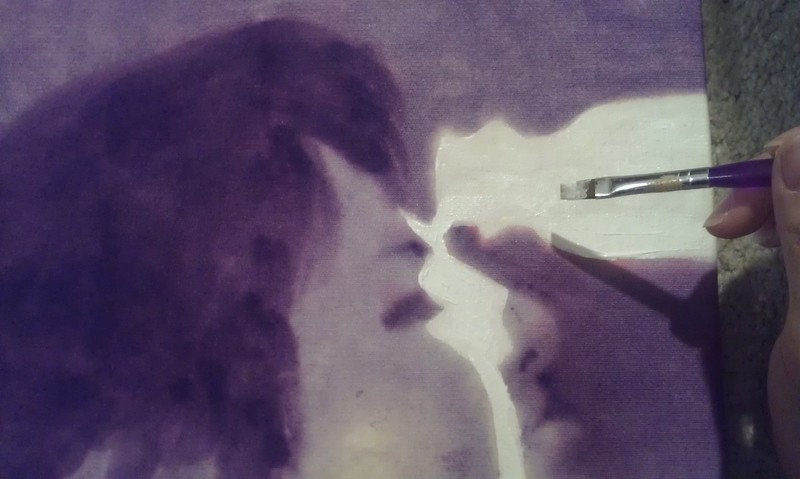
Remove a paper guide piece and start painting in. Try to match the gradations and blend different shades when needed. Paint past your outline to the edge of the cloth to add colour along the sides of the finished piece.
(Note: the dye dries lighter than it currently looks, so keep that in mind while painting)
-
 Step 6
Once you're done painting you need to set the dye. I heat set mine by sandwiching it between two pieces of plastic wrap while it was still wet, then folded it to fit in a microwave. Place it on top of a layer of paper towels and microwave for two minutes. I then washed it in the sink with cold water until it ran clear and stuck it in the dryer because i'm paranoid about it running, lol.
-
 Step 7
Position and attach to the board. I don't know how well a staple gun would work, but since my cork was already crumbly, i didn't want to chance it. I held it in place with a bit of tape for the moment.
-
 Step 8
(Optional)
Cut out another piece of cloth slightly larger than the board and press the sides down so that it's the size of the board for a cleaner edge. This will be the back piece.I also put in two eyelets in the back for ease of hanging. Flip the piece over and align with the board.
-
 Step 9
Sew the two pieces together.
-
 Step 10
(optional)
I felt it needed a bit more *umph* and that the dye had bled a bit onto the white area, so i used a bit of white acrylic over the area. Using tacks on dried acrylic isn't attractive, so if you're planning to use it as a corkboard as well, limit the acrylic to small areas.I decided that since i wouldn't be poking holes in that area anyway that i would accentuate it a bit more and used some Mod Podge Dimensional Magic on it for a bit of interest. It... leaked out of the white areas and dried darker, so i don't recommend...
-
 Step 11
If you used eyelets as well, use them as a guideline to attach your mounting hardware. I used command hooks since i have a tone of them from living in rented spaces. Hang your picture, and you're done! A piece of art that doubles as a cork board.


Comments


