


About
Proclaim your love of all things shiny with a collar of great sparkle!
I've been thinking about making a collar for a while and today I finally got around to it. A couple of years ago I bought a gem-setter tool which came with lots of diamante studs and I decided this would be the perfect project to use them on.
Tags
-
 Key West Witch added Collar Of Bling to Flowers - Real and not so...
30 Jun 02:55
Key West Witch added Collar Of Bling to Flowers - Real and not so...
30 Jun 02:55
-
 Helen W. entered her project Collar Of Bling to Harmonees Creations
05 Jan 18:41
Helen W. entered her project Collar Of Bling to Harmonees Creations
05 Jan 18:41
-
 Emma H. favorited Collar Of Bling
04 Jul 11:50
Emma H. favorited Collar Of Bling
04 Jul 11:50
-
 Bencaz favorited Collar Of Bling
21 Jul 19:47
Bencaz favorited Collar Of Bling
21 Jul 19:47
-
Helen W. entered her project Collar Of Bling to Allstarco Contest
24 Feb 14:56
-
 rawley c. favorited Collar Of Bling
02 Nov 03:36
rawley c. favorited Collar Of Bling
02 Nov 03:36
-
Helen W. entered her project Collar Of Bling to Hats On Heads
08 Jun 17:11
-
 comradebunny favorited Collar Of Bling
15 Mar 21:32
comradebunny favorited Collar Of Bling
15 Mar 21:32
-
 HantuPenanggal favorited Collar Of Bling
21 Feb 06:43
HantuPenanggal favorited Collar Of Bling
21 Feb 06:43
-
 viridianag0 added Collar Of Bling to Jewelry
16 Feb 17:41
viridianag0 added Collar Of Bling to Jewelry
16 Feb 17:41
-
 Step 1
First off you need a pattern, a half collar pattern. I made mine with a flexi ruler; I curved it round my neck for the inside line and then drew a collar shape. Play about until your happy with your pattern.
-
 Step 2
Use your pattern piece to cut out 4 pieces of felt.
-
 Step 3
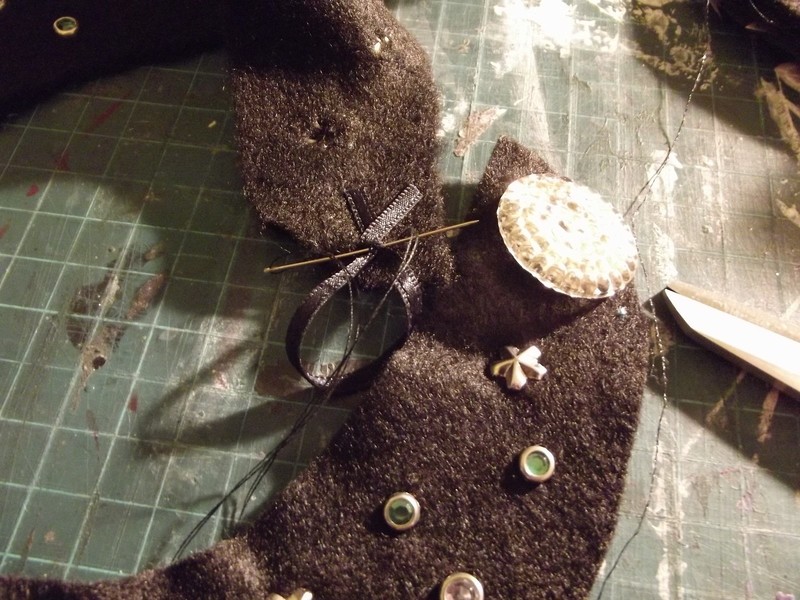
Take two of the collar pieces and arrange your bling. It's worth taking a bit of time to get this right. I decided to make each side a little different but you could do a symmetrical one if you prefer.
-
 Step 4
Attach your bling. I have a tool for setting studs but you can just push them through the fabric and bend the points down with your fingers or scissor blade.
You can get iron on gems but in my experience they just fall off which is annoying but you could always glue gems on if you didn't want to use stud type shiny things.
-
 Step 5
The back of your collar pieces should look a little like this now.
-
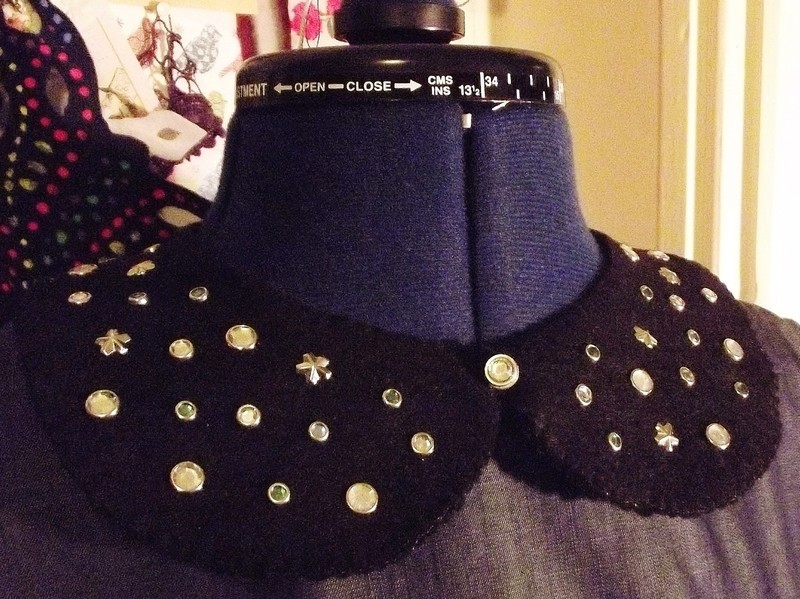
 Step 6
Slightly overlap the two collar pieces at the front and hold them together with a decorative button, or another gem if you prefer.
-
 Step 7
Attach a button to the RIGHT side of one of the collar pieces at the back points and a ribbon loop (big enough to fit the button) to the WRONG side of the other back point. This is your fastening.
-
 Step 8
Phew, nearly done. Remember those other 2 collar pieces? Now you're going to sew them to the first two pieces so the spiky points of the studs don't scratch you and the collar is a bit stronger.
I used blanket stitch but you could just use a running stitch all the way round if you prefer. Remember to overlap slightly at the front, using the decorated sides as a guide.
-
 Step 9
Enjoy wearing the shiniest collar in town!


Comments


