


About
A cute miniature art gift
I made these tins to sell in my Etsy shop awhile back and I thought it would be fun to tell you how I made them.
-
 Misty B. favorited Collage Tins
08 Mar 18:40
Misty B. favorited Collage Tins
08 Mar 18:40
-
 maggie b. added Collage Tins to class
06 Feb 21:48
maggie b. added Collage Tins to class
06 Feb 21:48
-
 Sarah Sylvia S. favorited Collage Tins
18 Jul 05:05
Sarah Sylvia S. favorited Collage Tins
18 Jul 05:05
-
 Judy T. favorited Collage Tins
22 Apr 14:40
Judy T. favorited Collage Tins
22 Apr 14:40
-
 cathy s. favorited Collage Tins
26 Aug 14:02
cathy s. favorited Collage Tins
26 Aug 14:02
-
Dan F. favorited Collage Tins
03 Aug 04:45
-
Tessa F. favorited Collage Tins
18 May 07:59
-
Len favorited Collage Tins
19 Apr 22:39
-
 basiajo favorited Collage Tins
12 Feb 18:10
basiajo favorited Collage Tins
12 Feb 18:10
-
 Taarna added Collage Tins to crafty
11 Feb 11:43
Taarna added Collage Tins to crafty
11 Feb 11:43
You Will Need
-
 Step 1
Supplies!
1. Metal Tins (you can find these on Amazon). I used the 20oz kind or any kind that has over a 2.5 inch lid surface.
2. Scissors
3. Mod Podge
4. Craft Casting Epoxy Resin
5. Sandpaper
6. Collage Material (I printed mine).
Some great websites for free collage material are:
www.thegraphicsfairy.com
and
http://etc.usf.edu/clipart/7. A sponge brush
For the backgrounds I used scrap booking paper.
-
Step 2
The first thing you want to do is cut out your collage material. Try to fit images into interesting ways on top of the tin. Size it up and see if you like it.
-
 Step 3
The next step is to size your background.
How I do this is by taking my scrapbook paper background and place it over the lid. I then keep it in place and push down so I can indent the circle on the paper.
(This method is so much easier if you are like me and don't have a fancy puncher or anything.)
Then if you turn the paper over, you will have an exact indent of your tin's surface and will be able to cut it down to the EXACT MEASUREMENTS without even measuring.
-
Step 4
Use a sponge brush and mod podge to first place your background onto the the tin's lid.
Then, you can begin gluing down your collage pieces.
Give this lid a few coats of mod podge because this helps seal your images so that the resin doesn't go underneath them.
-
 Step 5
After your glue has dried, remove the lid from the tin. If you leave the lid on and add resin, any resin that seeps over will seal your lid to the tin. It is almost impossible to get off and ends up looking crummy.
So take the lid off, then place them on top of wax paper or a huge stack of papers you don't want to ruin. This is just in case any resin seeps over the edge.
Follow directions on your package (which is typically equal parts of the two solutions, and mixing). Mix to the full time your package says, this will help get rid of many problems (such as bubbles) that people tend to have.
During the first thirty minutes, you can watch your poured resin and if any bubbles arise, use the warmth of your breath (make a haaaaaaa sound) and it will pop those bubbles.
Then, wait for the appropriate time on the package to cure the resin.
-
 Step 6
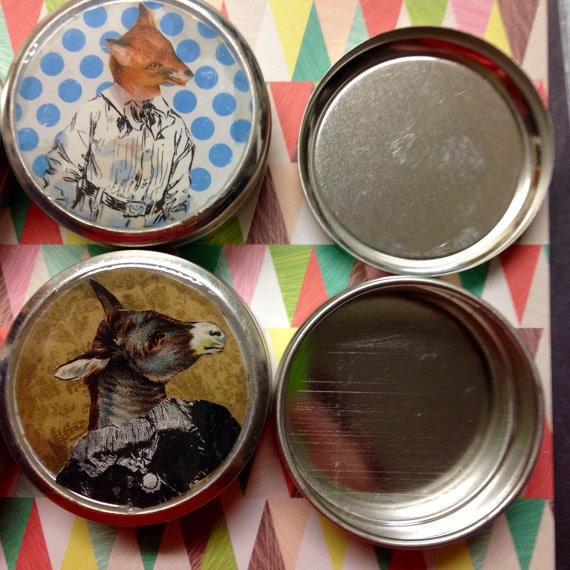
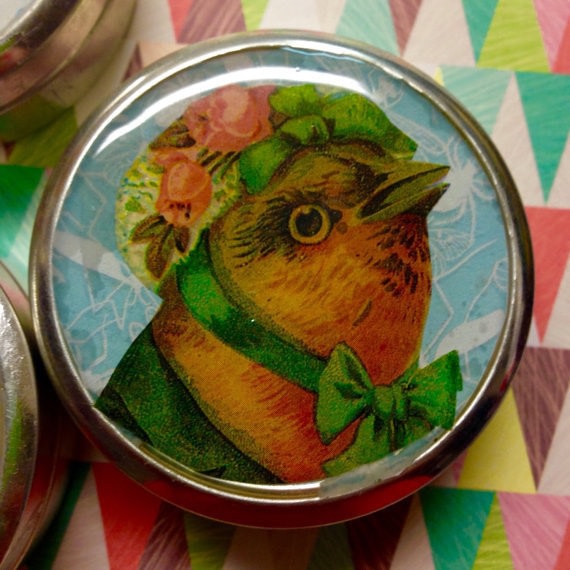
Once your resin has cured you will have a factory quality, one-of-a-kind art tin.
If you have sand paper, which has to be of the highest grit (1000 or more) you can sand off any seeped over resin. Anything lower than 1000 will probably dent the metal. With 1000 it only makes these teeny scratches but when you buff over the tin with the sandpaper it just makes it shinier!
Now you can sell them or give them as gifts, or keep them for yourself! They are fun to put jewelry inside and give as a present :)


Comments

