About
Soft, custom, and almost 100% recycled
It’s (almost) 100% recycled playtime! (And it’s fun for the kid, too.)
This cloth children’s book is made from thrift store men’s shirts, snagged on a free day. (My favorite thrift store has days where everything left on the shelves is free. Pretty cool. Check it out if you are ever in Lincoln, NE.) Usually when a man’s shirt ends up in the thrift store, the collars are yellowed, the cuffs are torn, and/or there are food stains on the front. The back, however, is a big swatch of nice cotton fabric.
My supplies list just has estimates. I didn't buy anything for this project, as I am not buying fabric until my stash diminishes!
There are multiple ways to make one of these. Please follow as much or as little of the directions as you feel are helpful.
BIG HINT: The more precise your measurements, the easier this will be. Mine weren’t precise at all, but I don’t mind adapting on the fly.
This was my first one, and I enjoyed it, even though it took much longer than I thought it would.
Tags
-
 Pimke added Cloth Baby Book to Nähmuster
03 Mar 14:41
Pimke added Cloth Baby Book to Nähmuster
03 Mar 14:41
-
 J. Pario entered her project Cloth Baby Book to SINGER Dress Form Contest
06 Apr 22:32
J. Pario entered her project Cloth Baby Book to SINGER Dress Form Contest
06 Apr 22:32
-
 Jasmine C. favorited Cloth Baby Book
23 May 16:23
Jasmine C. favorited Cloth Baby Book
23 May 16:23
-
 Vanessa B. added Cloth Baby Book to Home DIY
19 Apr 06:58
Vanessa B. added Cloth Baby Book to Home DIY
19 Apr 06:58
-
 Sarai B. added Cloth Baby Book to quiet time toy ideas
08 Apr 12:07
Sarai B. added Cloth Baby Book to quiet time toy ideas
08 Apr 12:07
-
 koalala o. added Cloth Baby Book to Emery Crafts
07 Apr 05:09
koalala o. added Cloth Baby Book to Emery Crafts
07 Apr 05:09
-
 Step 1
Stare at a big pile of fabric wondering how you are ever going to turn it into a book. (And then look at the picture and wonder why you always seem to be in your OK-to-get-paint-on-it clothes when someone is taking your picture.)
Think about bright, contrasting colors. Supposedly infants can’t distinguish between pastels, and bright colors are more fun anyway.
-
 Step 2
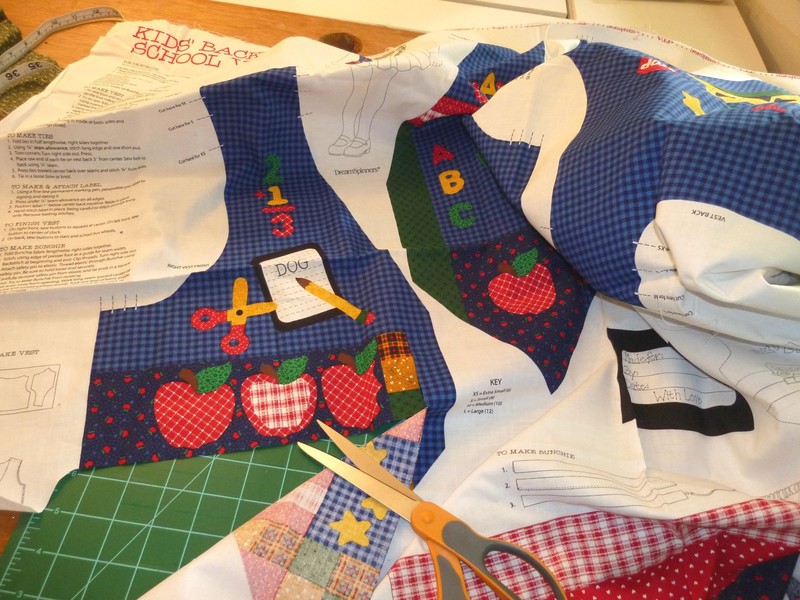
Find images to applique on the pages.
I had fabric with a pattern for an embarrassing “back to school” vest that some poor kid would have to wear to school because Grandma made it. (I hadn’t purchased it on purpose—it was from an auction where I bought a pile at a time.) So I cut out images from that.
-
 Step 3
Each 24x12 rectangle will be sewn to another 24x12 rectangle, making a total of four pages, two on each rectangle. I left the inside front and back cover blank, so I had one empty rectangle. I had six rectangles, giving me spots for 12 appliqué images.
Before sorting out imagines, fold each rectangle in half and iron it. This will give you a center line that will prove useful throughout the project.
If you don’t have a sequence for your pictures, this project will be much easier!
If you do want the images in a particular order, I’d make a paper mock-up of what you are planning so you get the right image on the right page.
-
 Step 4
Pin your appliqués to the fabric. Try to keep the fabric smoother than I did.
-
 Step 5
Test your appliqué stitch on scrap fabric. The default setting for the machine wasn’t what I wanted. The stitches weren’t close enough together and I needed WIDE stitches to compensate for my general lack of precision sewing skills. I wanted this book sturdy! I ended up setting the length to .5 and the width to 4.5. Length = the distance between the tops of the mountains in the zig-zag stitch and width = how far back and forth the needle goes. I wrote these measurements down and kept them by my sewing machine.
I am very proud of this little cat!
-
 Step 6
Sew on your appliqués.
-
 Step 7
Cut your batting. I used fleece, not quilting batting, as I had some left over from another project.
I wanted it to be easy to stitch the three layers together so I did a square for each page, leaving the middle without batting. There's a step not pictured where I cut the batting in half. I also made it slightly smaller than the page.
-
 Step 8
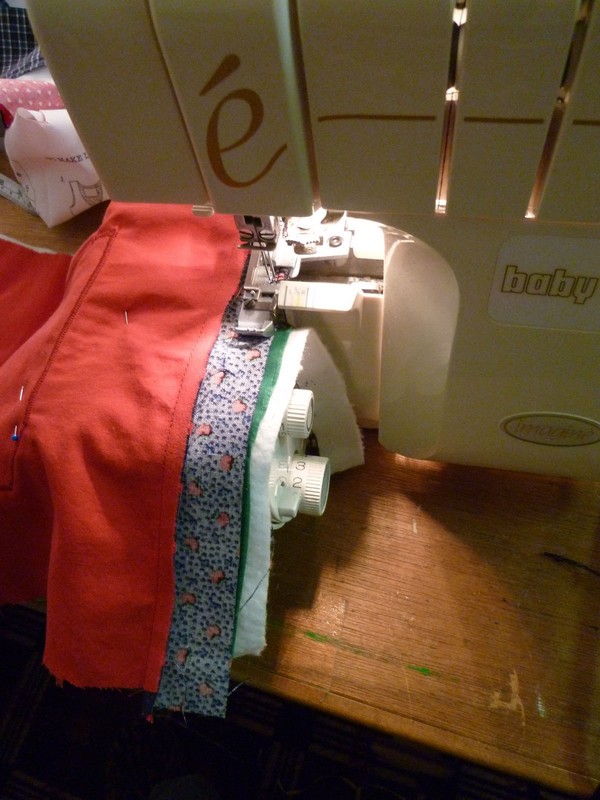
I tried this both by sewing the batting to each page (and creating a kind of border) and by serging the two pages and the batting together at the same time. I preferred the second method.
For the “one seam catches all three” put two pages together with their images facing each other. (Also known as “right sides together.”) Put the batting on one side or the other of this sandwich. Pin.
If you don't have a serger you'll need to use the first method. Use a wide seam allowance.
-
 Step 9
Sew all three together, leaving an opening to turn it right side out.
-
 Step 10
Here's the opening.
-
Step 11
Repeat the above process for all the pages.
-
 Step 12
Stack all the pages together and sew them together down the middle, backstitching at the top and bottom for extra reinforcement.
-
Step 13
You are now ready to give your gift! (There are some pictures of this on my blog if you want to see cute little newborn Madeline.)
Thanks for reading my tutorial! Please feel free to ask questions and be sure to improvise if you make your own.