


About
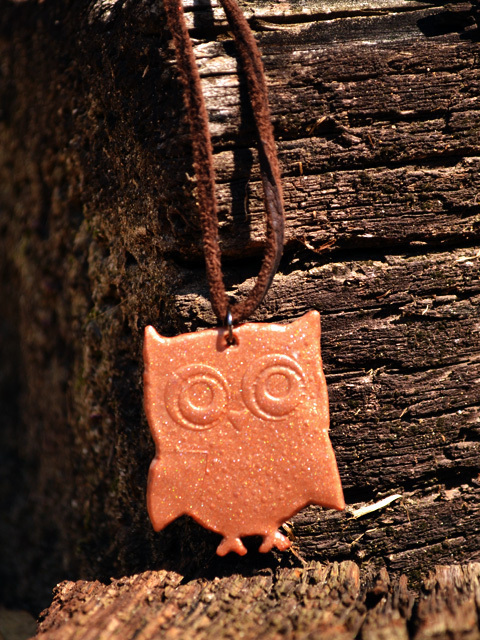
Stamped Polymer Clay Pendants for Awesome Necklaces!
I used Sculpey Premo! Accents in Copper for the owl. I used a pasta machine tissue blade from Sculpey as well.
You can use any kind of clay you want, but I highly suggest something with mica particles in it. It makes the finished pendant really stand out!
It's a pretty easy project if you're familiar with polymer clay, but you have to be really careful cutting out the stamp part. Don't try to make a mica shift from only my directions. Read some tutorials before hand. My directions are just intended to refresh your memory... I'm not sure if it's detailed enough to teach someone that has no idea what it is.
But yeah, it's a great project and super fun. With all the things you can do with clay and stamping, the possibilities really are endless! Have fun!
Tags
-
 Lotusburger favorited Clay Cut Out Owl Pendant
20 Dec 08:28
Lotusburger favorited Clay Cut Out Owl Pendant
20 Dec 08:28
-
 amyandJodie favorited Clay Cut Out Owl Pendant
26 Apr 22:29
amyandJodie favorited Clay Cut Out Owl Pendant
26 Apr 22:29
-
 Bliss Art Company added Clay Cut Out Owl Pendant to Polymer Clay
02 Feb 04:41
Bliss Art Company added Clay Cut Out Owl Pendant to Polymer Clay
02 Feb 04:41
-
Bliss Art Company favorited Clay Cut Out Owl Pendant
02 Feb 04:41
-
 Alyssa favorited Clay Cut Out Owl Pendant
26 Nov 00:20
Alyssa favorited Clay Cut Out Owl Pendant
26 Nov 00:20
-
 aviiry G. favorited Clay Cut Out Owl Pendant
14 Oct 20:05
aviiry G. favorited Clay Cut Out Owl Pendant
14 Oct 20:05
-
 quinn.harper.56 favorited Clay Cut Out Owl Pendant
09 Oct 08:26
quinn.harper.56 favorited Clay Cut Out Owl Pendant
09 Oct 08:26
-
 jodie.james.904108 favorited Clay Cut Out Owl Pendant
08 Sep 21:21
jodie.james.904108 favorited Clay Cut Out Owl Pendant
08 Sep 21:21
-
 Tiffany G. favorited Clay Cut Out Owl Pendant
11 Aug 01:23
Tiffany G. favorited Clay Cut Out Owl Pendant
11 Aug 01:23
-
 SAdragonfly favorited Clay Cut Out Owl Pendant
29 Jul 04:49
SAdragonfly favorited Clay Cut Out Owl Pendant
29 Jul 04:49
-
Step 1
Make sure you get enough clay to work with. You have to decide how thick you want it and how much extra clay you need around the sides to cut it out easily. I think I used half of one of the fourth of blocks that come in the pack.
-
Step 2
Make sure you condition the clay REALLY well. Especially if it has anything mixed in with it (powders, glitters, another clay(s),etc. Bust out your pasta machine or clay roller and make sure you get all of the air bubbles out. You'll know when it's ready when it's pliable enough to mold with your fingers with ease.
-
Step 3
Now it the time to flatten it out. Use whatever conditioning (warming up and kneading the clay until it's workable) method and flatten out a square of clay (mine was about 1/4" thick) and let it sit for a while. This takes time. Be patient or you'll have to start all over. If you want to speed the process up a bit, put the flattened square of clay on a piece of wax paper and lay it in the freezer for a few minutes. This is a crucial part to the stamping process. If the clay don't have a chance to set in the square that you have made, it'll just squish under your stamp. If you're using any line of Sculpey, this is super crucial as Sculpey tends to be very pliable to begin with.
-
Step 4
After your clay square is ready (again, you'll know), spritz it with a mold release agent. Not too much; just enough so the top is moistened. Spray the stamp you have chosen. Get some fabric, a paper towel or a coffee filter (not tissues or toilet paper as they tend to leave fibers and residue behind) and get the release agent (or water) into all the tiny cracks and crevices of the stamp.
Put the clay on a piece of wax paper (if you've already done so to let the square dry, take it off and place it back on before you stamp). Slowly and evenly, push the stamp into the clay. I usually use a small book or box or sometimes the back of my phone to push the stamp in the clay. Pressing evenly in the middle and all the sides- top, top right, top left, left, bottom left, bottom, bottom right, right, top right and then in the middle again- almost ensures a great stamping. Just don't push too hard or you'll get the stamp stuck. If you're new to polymer clay or stamping, you'll probably want to do some test runs first.
-
Step 5
After you've pressed, pick up the stamp and slowly and carefully peal off the clay. You've got your imprint!
-
Step 6
If you want to do a mica shift print, you can take your tissue blade and again, VERY carefully, slice off the top layer of the imprint. The pendent will be smooth and the stamp will still show because it's shifted the mica particles in the clay (only if you used a clay with mica particles or added some to the clay during conditioning- otherwise you'l lose your imprint totally). If you're going to do a mica shift print, let it sit again to harden up before you begin. Slice in small areas and just take off the very top layer. To smooth it out when you're finished, just run it through your pasta machine again (only to make the top smooth again! Don't make it any thinner!) or use your clay roller to neaten it up.
-
Step 7
Ok, now you have to cut out the stamp and make a hole for the jump ring. You don't really have to, but I think it makes the pendant so much more unique! So go ahead and grab your tooth pick, make a hole where you want it and place your tissue blade over wherever you choose to begin. Press the blade down and through the clay. Do this all the way around.
-
Step 8
Once you've cut out your stamp from the clay, neaten it up a little around the sides if you want a more polished finish. Put it on the small sheet of aluminum foil and bake according to the manufacturer's instructions (as well as taking into consideration whether your oven runs hot or cool- adjust as necessary).
-
Step 9
When you're finished you can sand, buff and polish it if you did a mica shift. If you didn't you can still do the sides. Just make sure you have really tiny dremel bits! Then, paint a coat or two of glaze on it and put on your jump ring!
-
Step 10
Take your cord or leather, string it through the jump ring on the pendant you just made and attach the clasp! I was lazy and just tied knots, but there are several ways to attach clasps to leather, string and cord without tying it and they look much neater.
Comments


