


About
Includes five variations.
A traditional origami box with a new take for Christmas.
-
 Kerry A. favorited Christmas Origami Box
06 Sep 08:30
Kerry A. favorited Christmas Origami Box
06 Sep 08:30
-
 Alannah B. favorited Christmas Origami Box
08 Dec 19:57
Alannah B. favorited Christmas Origami Box
08 Dec 19:57
-
 Marie B. favorited Christmas Origami Box
05 Jun 21:11
Marie B. favorited Christmas Origami Box
05 Jun 21:11
-
 Henary C. favorited Christmas Origami Box
26 Sep 04:42
Henary C. favorited Christmas Origami Box
26 Sep 04:42
-
 Justin C. favorited Christmas Origami Box
25 Sep 12:38
Justin C. favorited Christmas Origami Box
25 Sep 12:38
-
 Rob J. favorited Christmas Origami Box
23 Sep 10:55
Rob J. favorited Christmas Origami Box
23 Sep 10:55
-
 Fred James favorited Christmas Origami Box
20 Mar 08:34
Fred James favorited Christmas Origami Box
20 Mar 08:34
-
Júlia S. added Christmas Origami Box to paper
17 Dec 19:33
-
 harleygirl6815 added Christmas Origami Box to Paper Crafts
29 Nov 04:42
harleygirl6815 added Christmas Origami Box to Paper Crafts
29 Nov 04:42
-
harleygirl6815 favorited Christmas Origami Box
29 Nov 04:42
You Will Need
-
 Step 1
You will need 8 sheets of square paper. For the top, I used Christmas-themed scrapbook paper and for the bottom I used white cardstock for sturdiness. Of course you can use any paper if you want to make a gift box for another occassion.
-
 Step 2
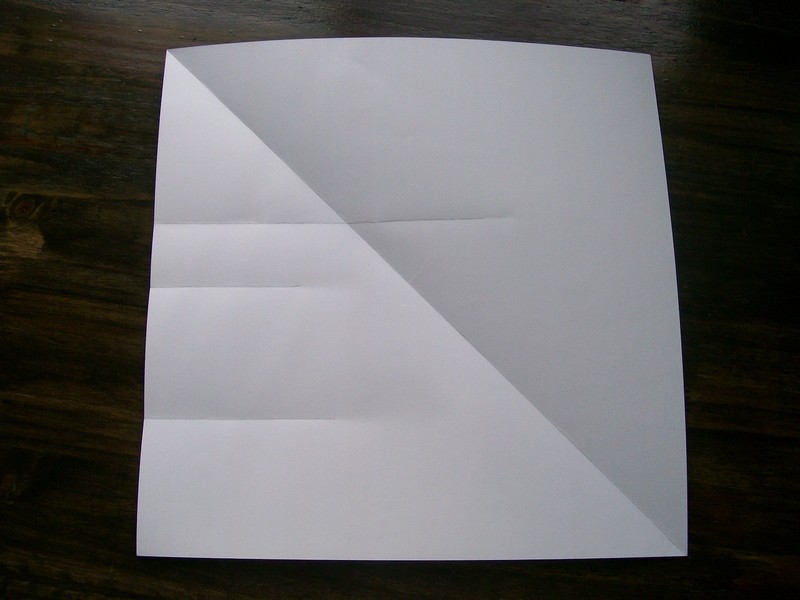
FOR THE TOP: Crease sheet in half. Then the bottom half to the middle and crease. Then fold the top down edge down to the lowest fold and crease. Your paper will look like this. Keep unfolded.
-
 Step 3
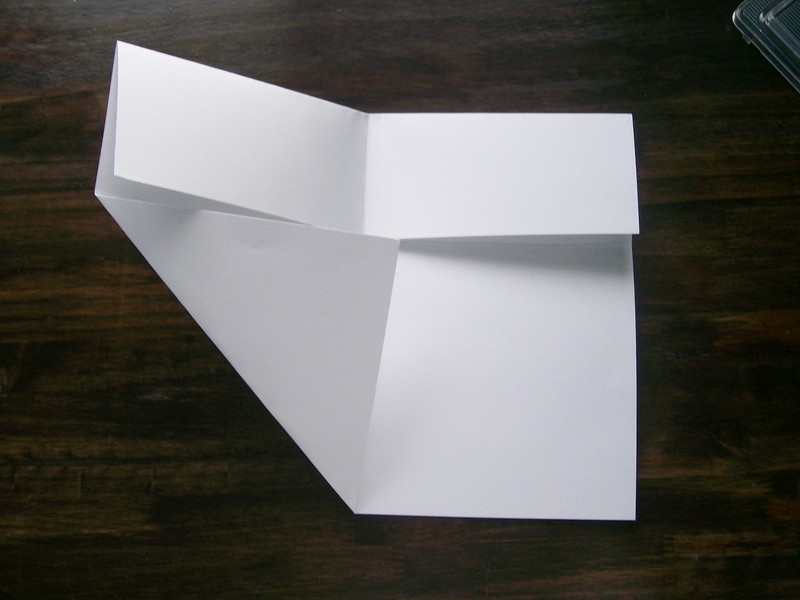
Fold diagonally, then unfold.
-
 Step 4
Fold down corner to the edge of uppermost crease.
-
 Step 5
Fold side along the same line.
-
 Step 6
Fold bottom corner up along edge.
-
 Step 7
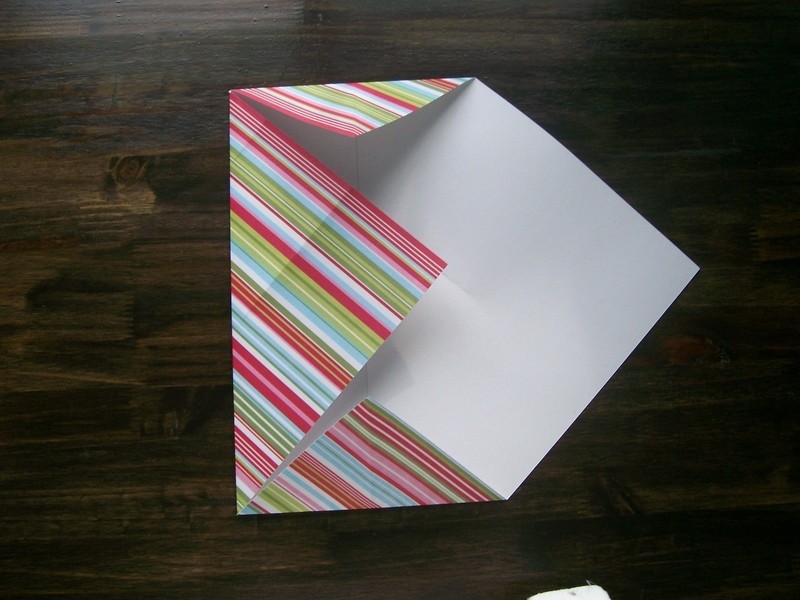
Fold last corner along the edges, you will get an envelope-looking sheet.
-
 Step 8
Fold the bottom point up to meet the top point. The top portion will be an "X".
-
 Step 9
Fold in half where the two points meet in the "X". Unfold.
-
 Step 10
Fold diagonally to the right along the edge of the "X". Unfold.
-
 Step 11
Fold diagonally to the left along the edge of the "X". Unfold.
-
 Step 12
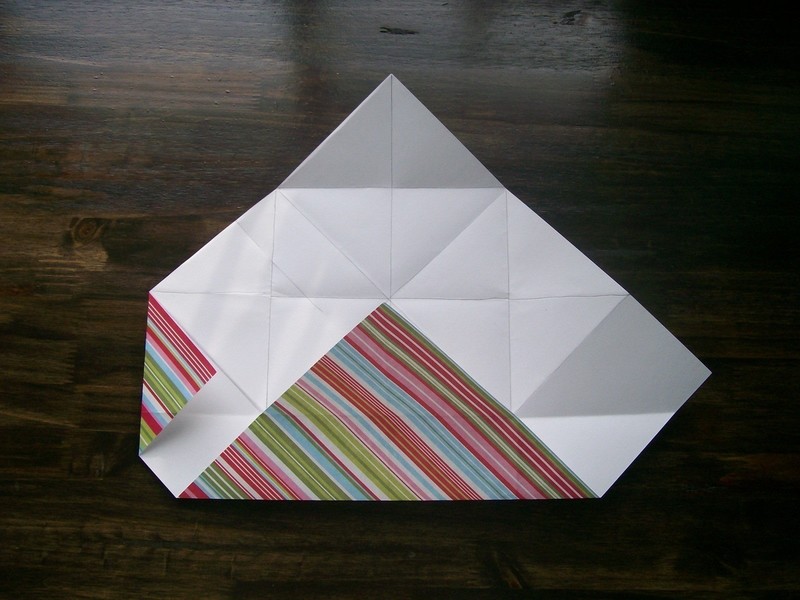
Unfold the whole sheet. Turn to make a diamond shape. Take note of all the creases.
-
 Step 13
Fold the bottom corner up along its pre-existing creases. Then fold again along the preexisting crease. Make this shape. This is important because this will be the side of your box.
-
 Step 14
Unfold the last fold, leaving the bottom corner up.
-
 Step 15
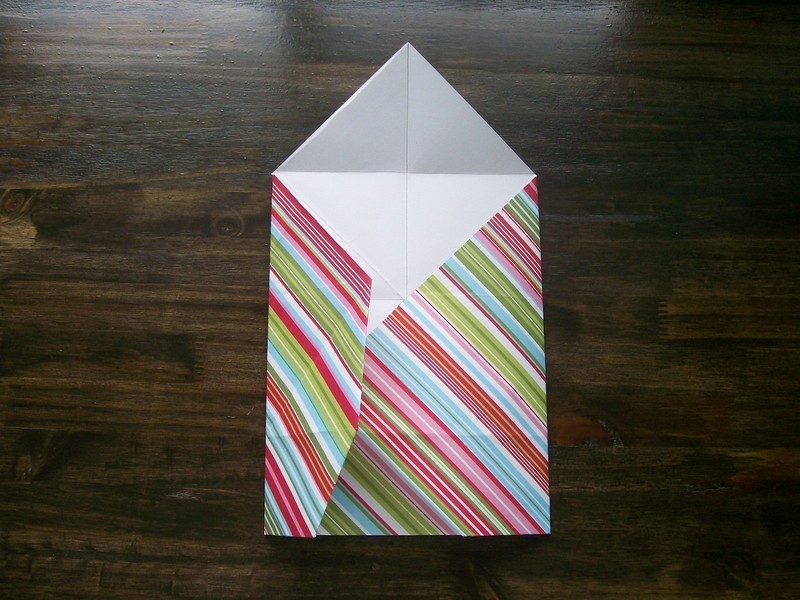
Fold the left corner along the line.
-
 Step 16
Fold the corner below along from the fold to the point.
-
 Step 17
Fold in right side.
-
 Step 18
Fold in left side.
-
 Step 19
Turn over.
-
 Step 20
Fold to the left, diagonally along the "X". There will be a diamond at top of the reverse side.
-
 Step 21
Fold down (diamond in half)and under (the fold should be a valley between both sides).
-
 Step 22
Fold top to the right.
-
 Step 23
Fold upwards, meeting the bottom edge of the traingle to the center fold.
-
 Step 24
Fold the top to the left.
-
 Step 25
Fold to the right along triangle edge.
-
 Step 26
Fold down and right.
-
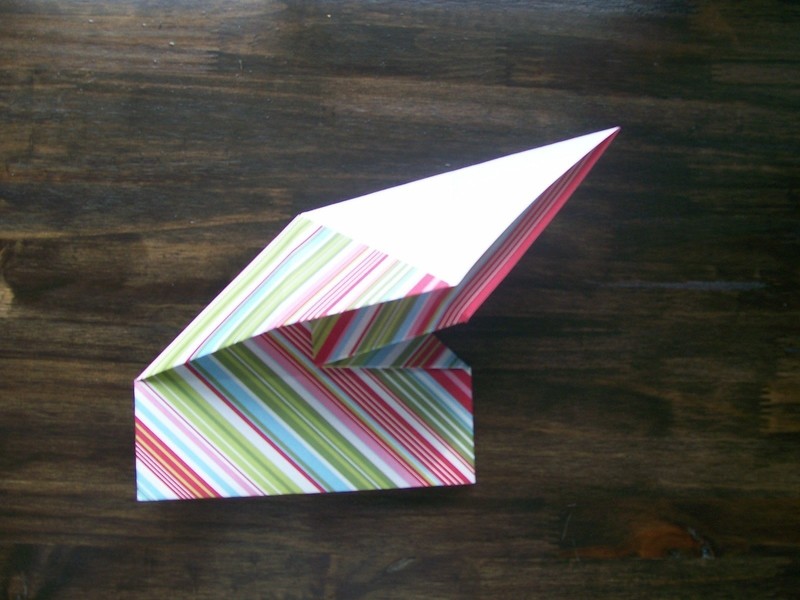
 Step 27
Fold the top corner down and to the right.
-
 Step 28
Unfold the top portion. Take note of all the creases.
-
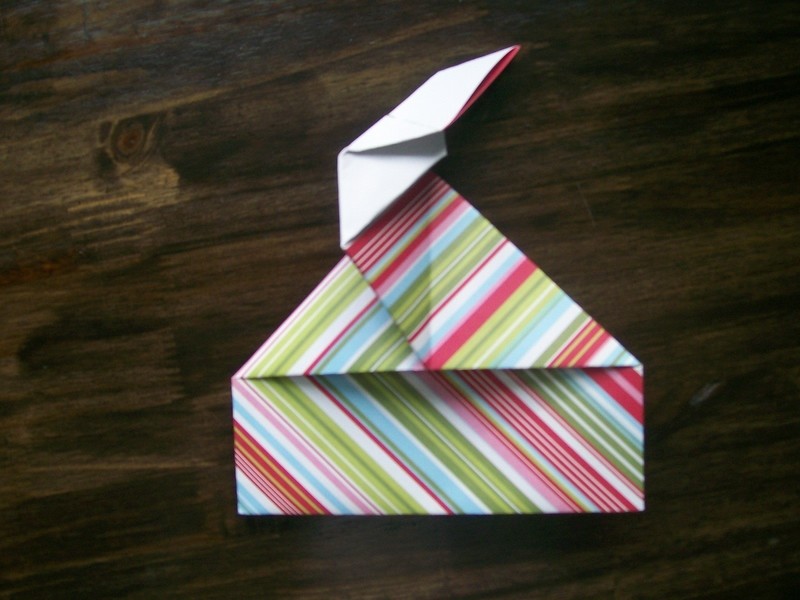
 Step 29
Repeat steps 2-28, until you have four.
-
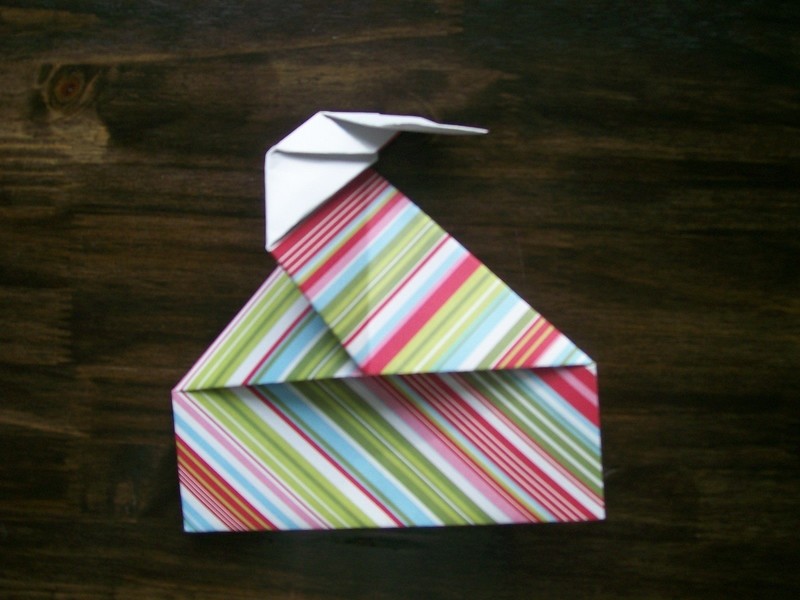
 Step 30
Open the bottom edges of all four. They will look like this.
-
 Step 31
Connect the four pieces by sliding the pointed edge of one under the triangle of another.
-
 Step 32
Two connected will look like this underneath.
-
 Step 33
When connected the bottom will look like this.
NOTE: This part is the most difficult and will definately drive you crazy. I've been making these for years and I still go bonkers during this step.
-
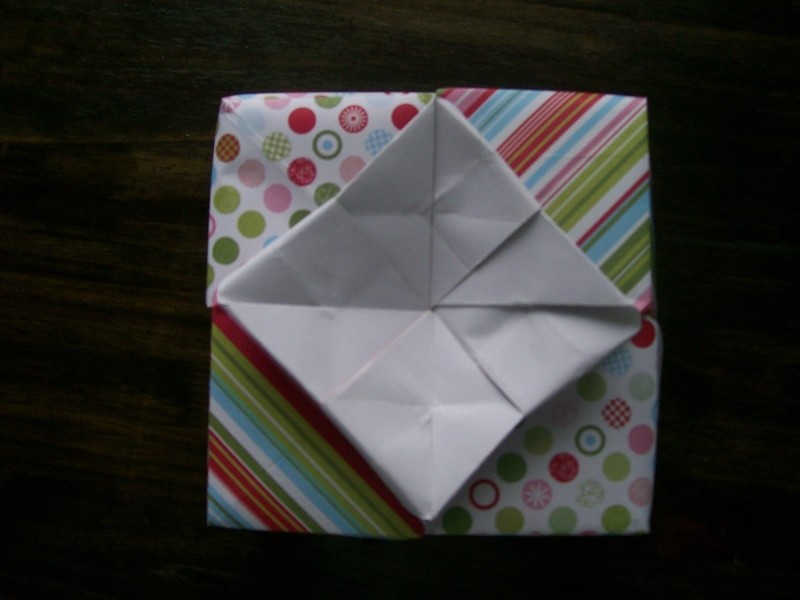
 Step 34
Top #1. You can leave it just like this if you choose, but place a little piece of tape on the underneath side so the box stays together.
-
 Step 35
Top #2. By folding the corners under you will get this top. Again, for this top place a little tape under so the box doesn't come apart.
-
 Step 36
Top #3. Tuck in the corners again. This top will hold so no need for tape.
-
 Step 37
Top #4. Fold the corners again, then tuck. No tape needed for this top either.
-
 Step 38
Top #5. Fold the corners one more time the tuck. No tape needed, very secure.
-
 Step 39
FOR THE BOTTOM: Fold in half and open.
-
 Step 40
Fold top part in half. Then fold in half creating a vertical crease. Unfold, until you get this.
-
 Step 41
Fold bottom corner up to top and center edges.
-
 Step 42
Fold the corner up to the opposing top edge.
-
 Step 43
This will naturally fold out.
-
 Step 44
Repeat steps 39-43 until you get four pieces.
-
 Step 45
Connected by sliding one edge under another, staggering with each piece.
NOTE: Again a very frustrating step.
-
 Step 46
This inside will look like this when you've connected them properly.
-
 Step 47
The outside of the bottom will look like this.
-
 Step 48
To complete the bottom, tuck the corners under the edges, staggering.
NOTE: There will be a small hole in the bottom. So if you are going to place small objects inside the box like christmas candy or cookies, I recommend making a liner, so nothing falls out.
-
 Step 49
Put your top on your bottom and you are done!


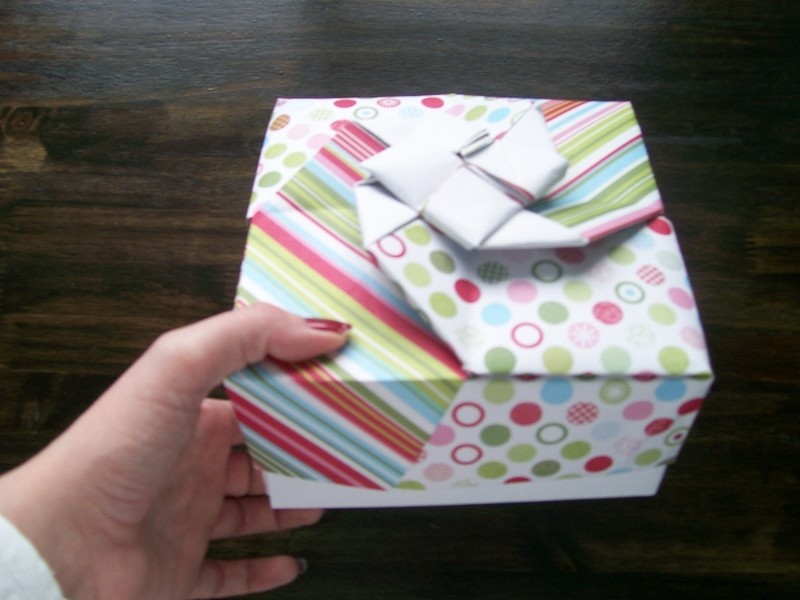


This is the perfect substitute