

About
Christmas Stocking Tutorial
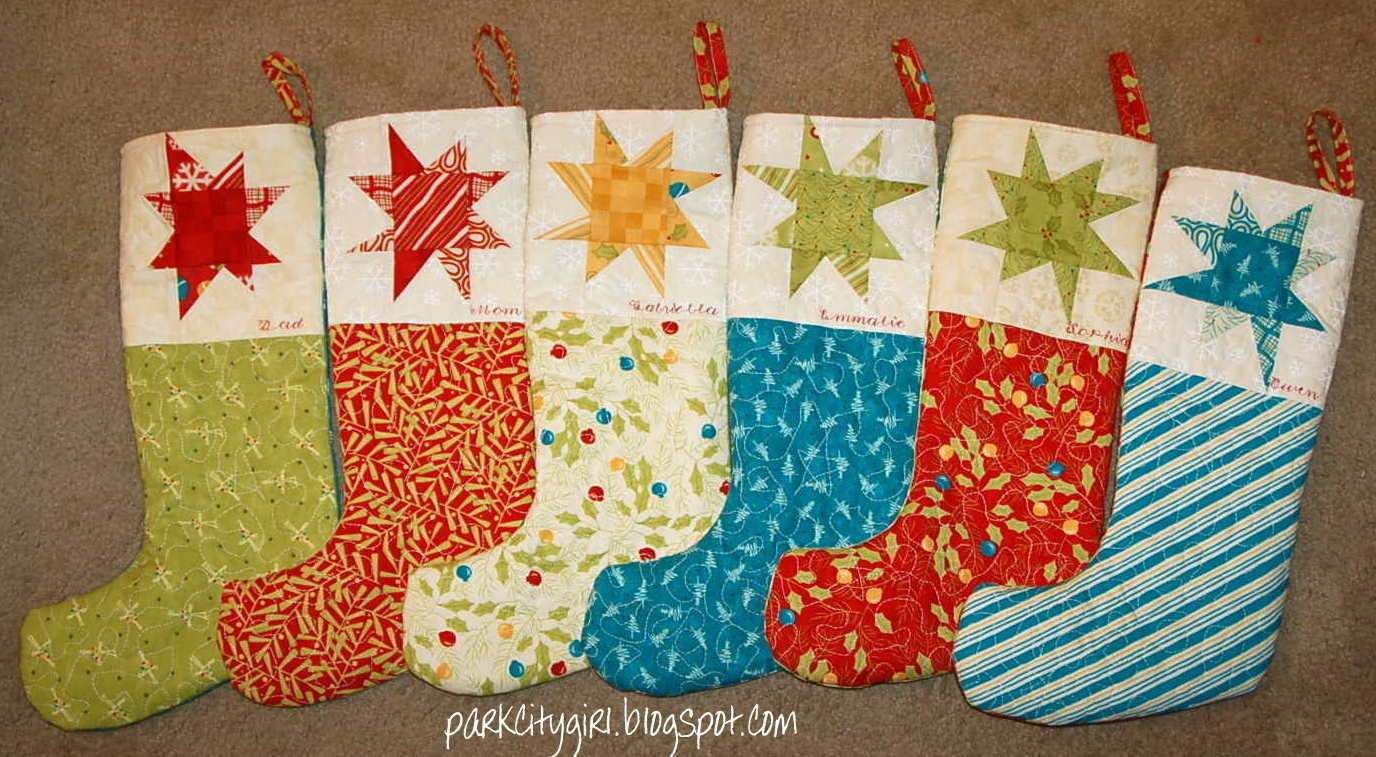
I'm so excited to share my Stocking Tutorial with you! Thanks for all your sweet compliments the other day - my family is excited to have special stockings made by mom!
There are a lot of little steps, but they are so fun to put together! I hope that you have a go at it. I used a total of 12 fat quarters (2 per stocking) and a scraps for the stars. I used 1/4" seams for the star construction, and 3/8" for the general construction of the stocking.
I'm a wife and mom (of 4) needing to create to maintain sanity, my blog chronicles our full life and my crafty endeavors - join me!
Tags
-
 madd::sunshine favorited Christmas Stocking
05 Nov 14:46
madd::sunshine favorited Christmas Stocking
05 Nov 14:46
-
 Staci Fowler favorited Christmas Stocking
14 Dec 18:47
Staci Fowler favorited Christmas Stocking
14 Dec 18:47
-
 Miranda W. commented on Christmas Stocking
11 Dec 01:45
Miranda W. commented on Christmas Stocking
11 Dec 01:45
-
 lisa123 favorited Christmas Stocking
27 Aug 15:23
lisa123 favorited Christmas Stocking
27 Aug 15:23
You Will Need
-
 Step 1
Trace a stocking or find a pattern. (Google stocking pattern if you need a pattern) I used this little one as a starting point, I didn't want them too big, as we usually just put candy in our stockings. Mine measures 6 1/2" across the top, and 16 1/2" long - at the longest point.
-
Step 2
Cut out a front and back (exterior) panel. The easiest way is to fold it in half and cut 2.
-
 Step 3
Cut out lining in the same way. You need a total of 4 panels for each stocking.
-
 Step 4
Fold your pattern down 5 1/2 inches. Don't cut the pattern! With the front of your stockings, cut it with your pattern folded. We are making room for the stars!
-
 Step 5
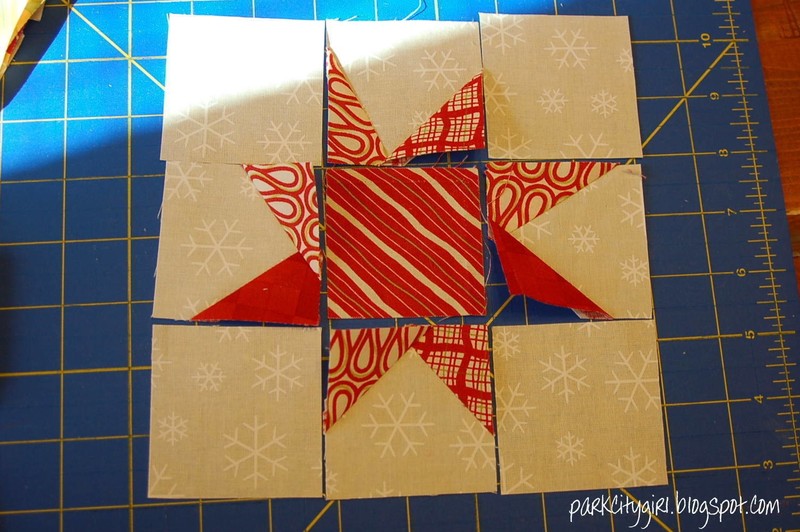
To make the stars, you need 8 - 2 1/2" squares in a light color, and 5 - 2 1/2" squares in a contrasting color.
-
 Step 6
Construct your stars, like this. Then sew to the front of stocking panel.
-
 Step 7
Take the tops that you cut off in step 4, and cut 1 1/2" x 6 1/2" strips - one per stocking. Take them to the ironing board - iron in half on the length, then fold each edge into the center again, and press flat.
-
 Step 8
Top stitch close to the edge to close. Set aside for later.
-
 Step 9
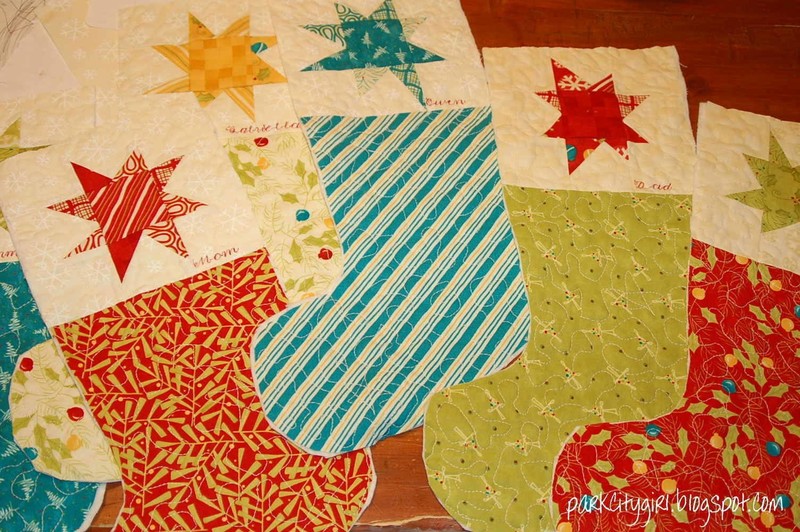
Baste your stocking front to a piece of batting, and quilt. I quilted in cream thread and opted to add names in red. My machine has a pretty alphabet, but you could also hand embroider the names if you like. I'm not sure you can see it, but I didn't quilt over the star, just around it. If you haven't done any free-motion quilting yet - this is a great size project for getting started!
-
 Step 10
After quilting, get your pattern and pin in place. Trim batting /stocking to the pattern. I cut a touch off the top - they go together much easier if the pieces are all the same size :)
-
 Step 11
All your fronts are ready to become stockings!
-
 Step 12
Pin back panel to front - right sides together and sew!
-
 Step 13
Clip curves
-
 Step 14
and trim seam allowance.
-
 Step 15
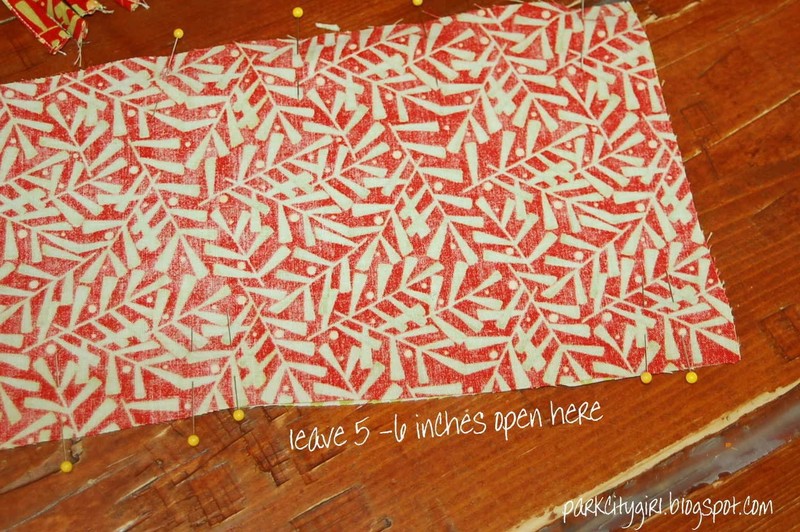
Pin lining pieces together - leaving a 6" gap in the back, as indicated below and sew. Be sure to backstitch your openings. Clip your curves like you did in step 12.
-
 Step 16
Insert exterior into the lining, right sides together. Match seams, then add loop. Fold it in half and tuck between exterior and lining, the side with no batting.
-
 Step 17
Pin it in place, right next to the seam.
-
 Step 18
Sew around the top of the stocking. I backstitched over the loop for extra security.
-
Step 19
Pull stocking through the opening in the lining.
-
 Step 20
Pin opening shut.
-
 Step 21
Sew close the edge to close opening. Then tuck lining inside of stocking.
-
 Step 22
Top stitch around opening! And enjoy :)
I hope that everything makes sense! Let me know if you have any questions, and I want to see if you make them!
Blessings ~
Amy


Comments


