


About
Cherry Print Newsboy Cap with tutorial *img. heavy*
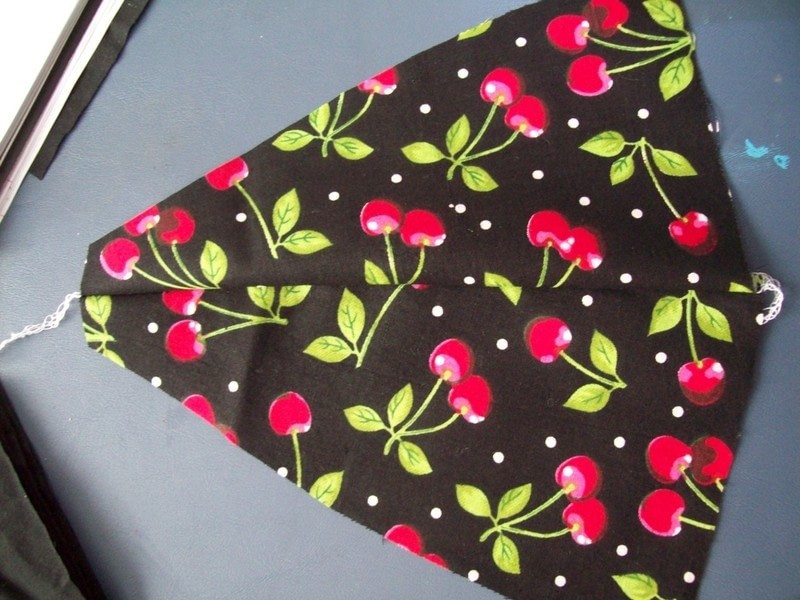
Ok, so here is the long awaited tutorial. I had plans on making one for myself, so I thought why not make a tutorial as I go. Here is mine, as a retro chick I love cherries:
-
 Alma added Cherry Print Newsboy Cap to Hats & Headwear
12 Jun 16:58
Alma added Cherry Print Newsboy Cap to Hats & Headwear
12 Jun 16:58
-
 Bevvii D. added Cherry Print Newsboy Cap to 3Y3 <3
22 Nov 04:11
Bevvii D. added Cherry Print Newsboy Cap to 3Y3 <3
22 Nov 04:11
-
Bevvii D. favorited Cherry Print Newsboy Cap
22 Nov 04:11
-
Samantha F. favorited Cherry Print Newsboy Cap
17 Nov 04:32
-
 dalekordancer favorited Cherry Print Newsboy Cap
09 Jul 08:00
dalekordancer favorited Cherry Print Newsboy Cap
09 Jul 08:00
-
 kerushi t. favorited Cherry Print Newsboy Cap
20 May 21:21
kerushi t. favorited Cherry Print Newsboy Cap
20 May 21:21
-
 SarahOliveira92 added Cherry Print Newsboy Cap to Inspirações
25 Jan 23:28
SarahOliveira92 added Cherry Print Newsboy Cap to Inspirações
25 Jan 23:28
-
SarahOliveira92 favorited Cherry Print Newsboy Cap
25 Jan 23:27
-
Abbey B. favorited Cherry Print Newsboy Cap
21 Dec 08:08
-
 Annie favorited Cherry Print Newsboy Cap
26 Nov 06:59
Annie favorited Cherry Print Newsboy Cap
26 Nov 06:59
-
 Step 1
Supplies: 3 pattern pcs, interfacing, fabric ¼ yd for the print and ½ - 1 yd of contrast, and a button with a stem (not flat, but domed)
* any thing else you want to use on hat--I am experimenting with lace, ribbons, ruffles, changing the shape of the brim, etc. Be creative, have fun!!If you need clearer images, I will try to make them clickable.
-
 Step 2
Cut out all the pieces---- 8 of the cap body pieces (16 total- 8 from the print and 8 from the lining/contrast), Brim cut 2 out of which ever one you choose and one out of interfacing *depending on weight of interfacing you may need more than one layer, I used an extra two layers of the black fabric for my interfacing*, Band- cut 2 out of contrast
-
 Step 3
Cap Body
Start sewing the Outer cap body pieces together, starting on the longer of the two sides. Sew with right sides together matching the long side to the long side, short side to short side. Sew all pieces together like this…. -
 Step 4
So, now you will have a complete hat body, repeat for the lining.
-
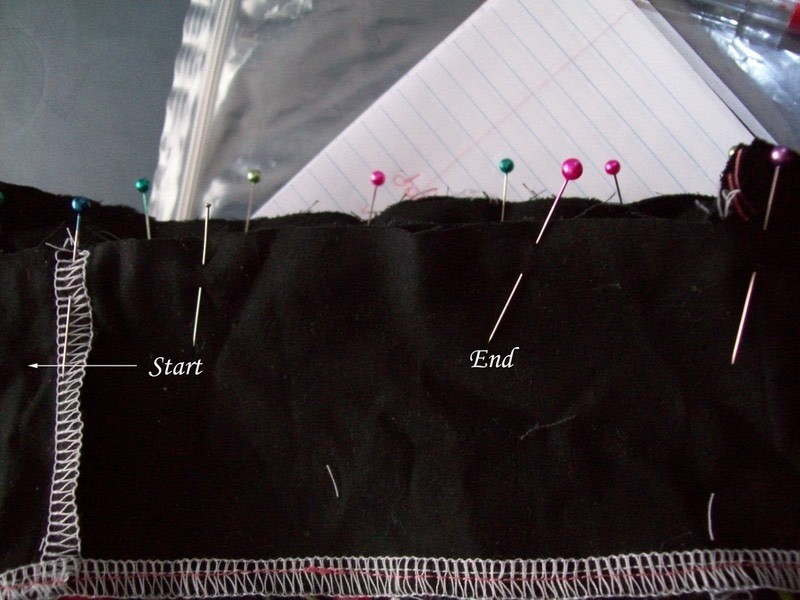
 Step 5
Now it is time to finish off the top. This is a little hard to explain so I will do my best….. Bring up all the side seams at the top, so it is sort of a line. You will stitch across, catching all of the top seams. See picture below to get an idea…. This closes the top.
-
Step 6
Brim
With right sides together. The interfacing will be on the wrong side. Sew the interfacing and brim pieces together. You are sewing around the edge that will be facing out. -
 Step 7
Turn right sides out and press. (the interfacing is sandwiched between the two) Topstitch as many times as you would like along the outer edge. I did two rows.
-
Step 8
Band
Sew the bands at C.B. (with right sides facing) to form a complete circle. You will have 2 when you are done. -
 Step 9
Divide evenly into eight sections and place a pin at each.
-
 Step 10
Sewing Band and Cap Body
Take one of the bands and the outer cap body, and place it right sides together. Match each seam with the pin from step 7. *Ignore the gap at the moment, see next step* -
 Step 11
Make a tiny pleat in each section, just enough to take in the excess fabric. Pin. *Make sure you have them all facing the same way. Sew all the way around. Repeat for the lining.
-
 Step 12
Topstitch on the right side where the band and cap body meets. Repeat for lining.
-
Step 13
Sewing the Brim, Lining and Outer Pieces Together
Place the lining inside the outer part with right sides facing. You should see the seams on the outside and inside (kind of looks like an inside out bag) Matching C.B. seams and pin. -
 Step 14
Now you are going to sandwich the brim in between the two layers. Match C.F. and pin. Go along each side of the brim pining in between the layers, when you reach the brim ends, you are going to match the end where you topstitched along the raw edges of the bands.
-
 Step 15
Start sewing 1” from the C.B. seam and sew all the way around to the other side and sew 1” past the brim edge. You should now have a opening approx. 2”.
-
 Step 16
Turn inside out through the hole, push the lining to the inside and press along the lower edge. You are going to fold the opening inward and you will edge stitch along the edge.
-
Step 17
This is completely optional but add the button at the center top, going through both layers. Try to match the lining as best as you can with the thread.
Also, you can tack down at the back so the hat stays in shape.
16. Now you have yourself a wonderful newsboy cap. Warning: They are addictive!!!If you have any questions feel free to post here or PM me.


awesome
I tend to find verrryy expensive Newsboy caps and I have one that... ahem... Is actually worth alot. So ever since I bought it I've been debating on sewing this awesome belt buckle to it, you have just saved me SO MUCH MONEY! thanks so much for the tut!!
xx